8-14 Chapter 8 Clutch and driveline
3’
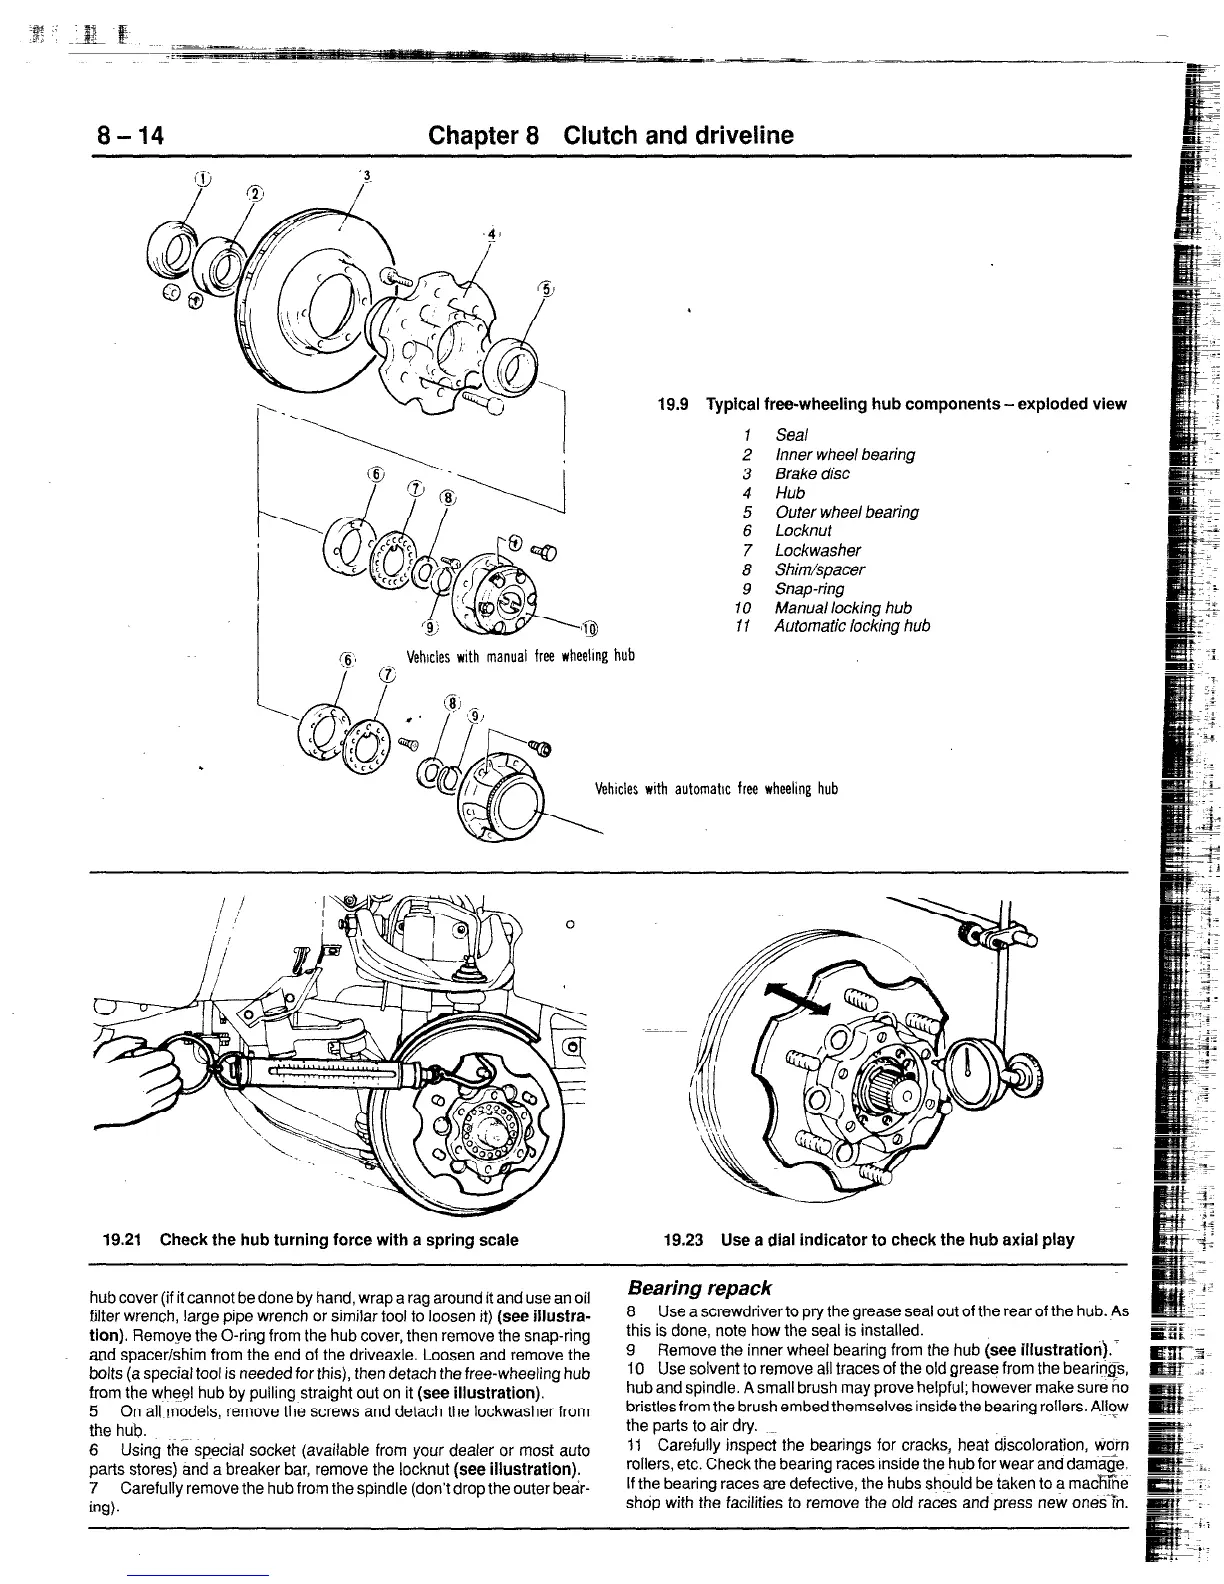
_ Vehicles with manual free wheelmg hub
I
‘f:
19.9 Typical free-wheeling hub components-exploded view
1 Seal
2 Inner wheel bearing
3
Brake disc
4 Hub
5 Outer wheel bearing
6 Locknut
7 Lockwasher
8 Shim/spacer
9 Snap-ring
10 Manual locking hub
II Automafic locking hub
Vehicles with automatrc free wheeling hub
19.21 Check the hub turning force with a spring scale
19.23 Use a dial indicator to check the hub axial play
hub cover (if it cannot be done by hand, wrap a rag around it and use an oil
filter wrench, large pipe wrench or similar tool to loosen it) (see illustra-
tion). Remove the O-ring from the hub cover, then remove the snap-ring
and spacer/shim from the end of the driveaxle. Loosen and remove the
bolts (a special tool is needed for this), then detach the free-wheeling hub
from the wheel hub by pulling straight out on it (see illustration).
5 On all
models,
remove the screws and detach the lockwasher from
the hub. ~.
6 Using the special socket (available from your dealer or most auto
parts stores) and a breaker bar, remove the locknut (see illustration).
7 Carefully remove the hub from the spindle (don’t drop the outer bear-
ha.
Bearing repack
8 Use a screwdriver to pry the grease seal out of the rear of the hub. As
this is done, note how the seal is installed.
9 Remove the inner wheel bearing from the hub (see illustratiori).7
10 Use solvent to remove all traces of the old grease from the bearin@,
hub
and spindle. A small brush may prove helpful; however make sure no
bristles from the brush embed themselves inside the bearing rollers. Altow
the parts to air dry.
11 Carefully inspect the bearings for cracks, heat discoloration, Won
rollers, etc. Check the bearing races inside the hub for wear and damage.
If the bearing races are defective, the hubs should be taken to a macf%e
shop with the facilities to remove the old races and
press
new ones%
 Loading...


