Chapter 3 Cooling, heating and air conditioning systems
3-15
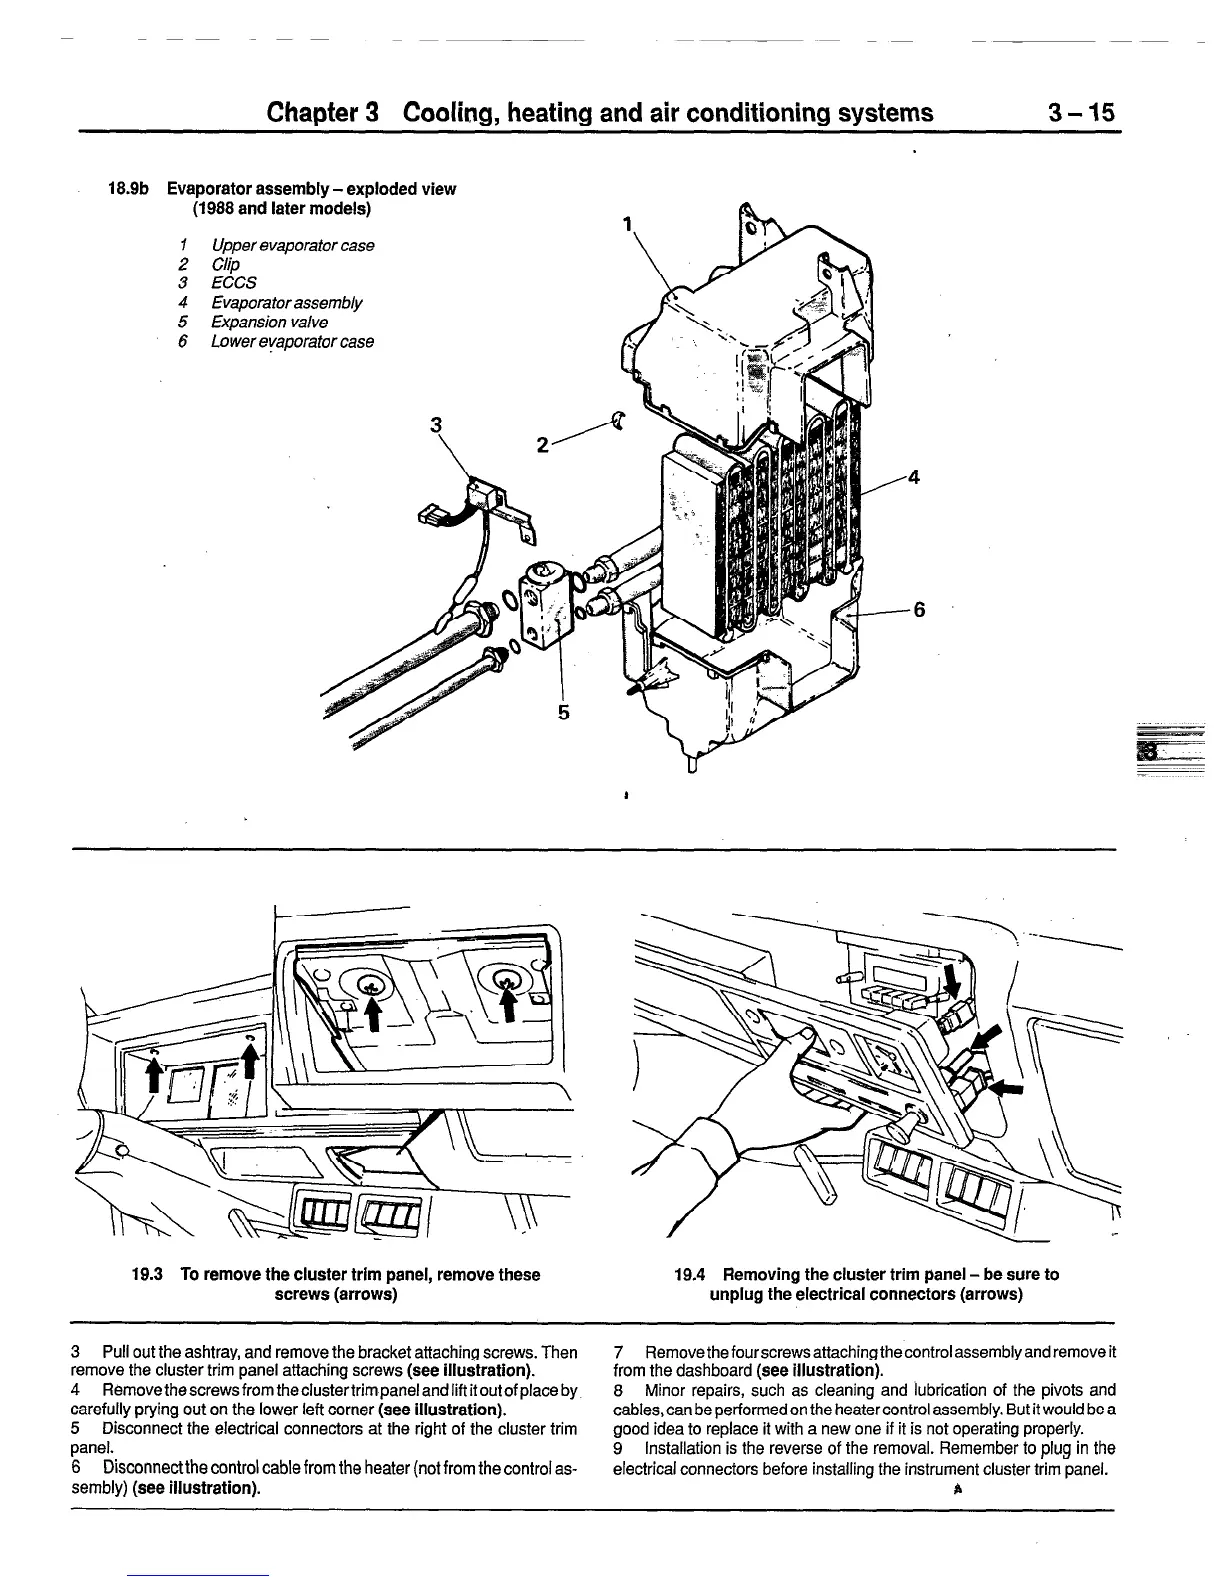
18.9b Evaporator assembly-exploded view
(1988 and later models)
I Upper evaporator case
2 Clip
3 ECCS
4 Evaporator assembly
5 Expansion valve
6 Lower eyaporator case
19.3 To remove the cluster trim panel, remove these
screws (arrows)
-
19.4 Removing the cluster trim panel -be sure to
unplug the electrical connectors (arrows)
3 Pull out the ashtray, and remove the bracket attaching screws. Then
remove the cluster trim panel attaching screws (see illustration).
4 Remove the screws from the clustertrim panel and lift it out of place by
carefully prying out on the lower left corner (see illustration).
5 Disconnect the electrical connectors at the right of the cluster trim
panel.
6 Disconnectthe control cable from the heater (not from the control as-
sembly) (see illustration).
7 Removethefourscrewsattachingthecontrolassemblyandremoveit
from the dashboard (see illustration).
8 Minor repairs, such as cleaning and lubrication of the pivots and
cables, can be performed on the heatercontrol assembly. But it would be a
good idea to replace it with a new one if it is not operating properly.
9 Installation is the reverse of the removal. Remember to plug in the
electrical connectors before installing the instrument cluster trim panel.
b
 Loading...


