1-26 Chapter 1 Tune-up and routine maintenance
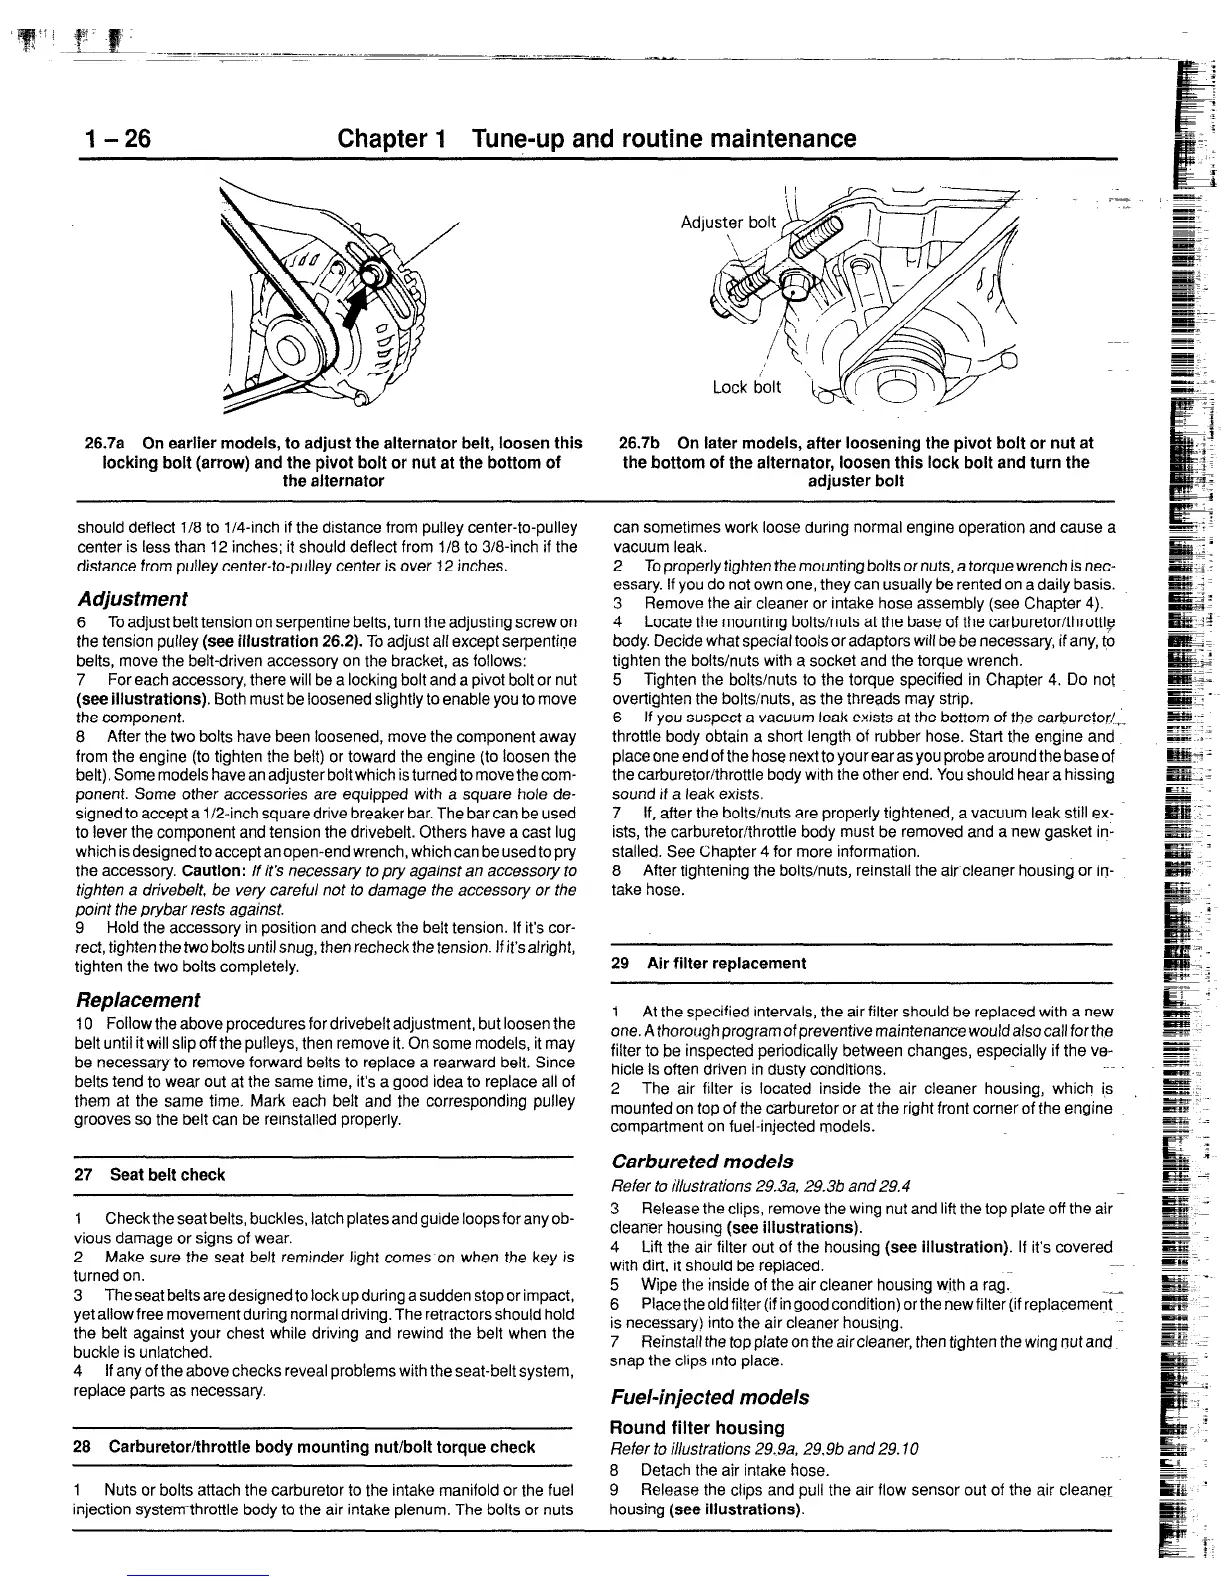
26.7a On earlier models, to adjust the alternator belt, loosen this
locking bolt (arrow) and the pivot bolt or nut at the bottom of
the alternator
26.7b On later models, after loosening the pivot bolt or nut at
the bottom of the alternator, loosen this lock bolt and turn the
adjuster bolt
should deflect l/8 to l/4-inch if the distance from pulley center-to-pulley
center is less than 12 inches; it should deflect from i/8 to 3/8-inch if the
distance from pulley center-to-pulley center is over 12 inches.
Adjustment
6
To
adjust belt
tension on serpentine belts, turn the adjusting screw on
the tension pulley
(see illustration 26.2).
To
adjust all
except serpentine
belts, move the belt-driven accessory on the bracket, as follows:
7 For each accessory, there will be a locking bolt and a pivot bolt or nut
(see illustrations).
Both must be loosened slightly to enable you to move
the component.
8 After the two bolts have been loosened, move the component away
from the engine (to tighten the belt) or toward the engine (to loosen the
belt). Some models have an adjuster bolt which is turned to move the com-
ponent. Some other accessories are equipped with a square hole de-
signed to accept a 1 /Zinch square drive breaker bar. The bar can be used
to lever the component and tension the drivebelt. Others have a cast lug
which is designed to accept an open-end wrench, which can be used to pry
the
accessory. Caution:
If it’s necessary to pry against an accessory to
tighten a drivebelt, be very careful not to damage the accessory or the
point the prybar rests against.
9 Hold the accessory in position and check the belt tension. If its cor-
rect, tighten the two bolts until snug, then recheck the tension. If it’salright,
tighten the two bolts completely.
Replacement
IO Follow the above procedures for drivebelt adjustment, but loosen the
belt until it will slip off the pulleys, then remove it. On some models, it may
be necessary to remove forward belts to replace a rearward belt. Since
belts tend to wear out at the same time, its a good idea to replace all of
them at the same time. Mark each belt and the corresponding pulley
grooves so the belt can be reinstalled properly.
27 Seat belt check
1 Check the seat belts, buckles, latch plates and guide loops for any ob-
vious damage or signs of wear.
2 Make sure the seat belt reminder light comes on when the key is
turned on.
3
The
seat belts
are designed to lock up during a sudden stop or impact,
yet allow free movement during normal driving. The retractors should hold
the belt against your chest while driving and rewind the belt when the
buckle is unlatched.
4 If any of the above checks reveal problems with the seat-belt system,
replace parts as necessary.
28 Carburetor/throttle body mounting nut/bolt torque check
1
Nuts or bolts attach the carburetor to the intake manifold or the fuel
injection systemthrottle body to the air intake plenum. The bolts or nuts
can sometimes work loose during normal engine operation and cause a
vacuum leak.
2 To properly tighten the mounting bolts or nuts, a torque wrench is nec-
essary. If you do not own one, they can usually be rented on a daily basis.
3 Remove the air cleaner or intake hose assembly (see Chapter 4).
4 Locate the mounting bolts/nuts at the base of the carburetor/throttle
body. Decide what special tools or adaptors will be be necessary, if any, to
tighten the bolts/nuts with a socket and the torque wrench.
5 Tighten the bolts/nuts to the torque specified in Chapter 4. Do not
overtighten the bolts/nuts, as the threads may strip.
6 If you suspect a vacuum leak exists at the bottom of the carburetor/+:
throttle body obtain a short length of rubber hose. Start the engine and
place one end of the hose next to your ear as you probe around the base of
the carburetor/throttle body with the other end. You should hear a hissing
sound if a leak exists.
7 If, after the bolts/nuts are properly tightened,
a vacuum
leak still ex-
ists, the carburetor/throttle body must be removed and a new gasket in-
stalled. See Chapter 4 for more information.
8 After tightening the bolts/nuts, reinstall the aiicleaner housing or in-
take hose.
29 Air filter replacement
1 At the specified intervals, the air filter should be replaced with a new
one. A thorough program of preventive maintenance would also call for the
filter to
be
inspected periodically between changes, especially if the ve-
hicle is often driven in dusty conditions.
2 The air filter is located inside the air cleaner housing, which is
mounted on top of the carburetor or at the right front corner of the engine
compartment on fuel-injected models.
Carbureted models
Refer to illustrations 29.3a. 29.3b and 29.4
3 Release the clips, remove the wing nut and lift the top plate off the air
cleaner housing
(see illustrations).
4 Lift the air filter out of the housing
(see illustration).
If it’s covered
with dirt, it should be replaced.
5 Wipe the inside of the air cleaner housing with a rag.
6 Place the old filter (if in good condition) or the new filter (if replacement
is necessary) into the air cleaner housing.
7 Reinstall the top plate on the air cleaner, then tighten the wing nut and
snap the clips Into place.
Fuel-injected models
Round filter housing
Refer fo illusfrafions 29.9a, 29.9b and 29.10
8 Detach the air intake hose.
9 Release the ckps and pull the arr flow sensor out of the air cleaner
housing
(see illustrations).
 Loading...


