Chapter 1 Tune-up and routine maintenance
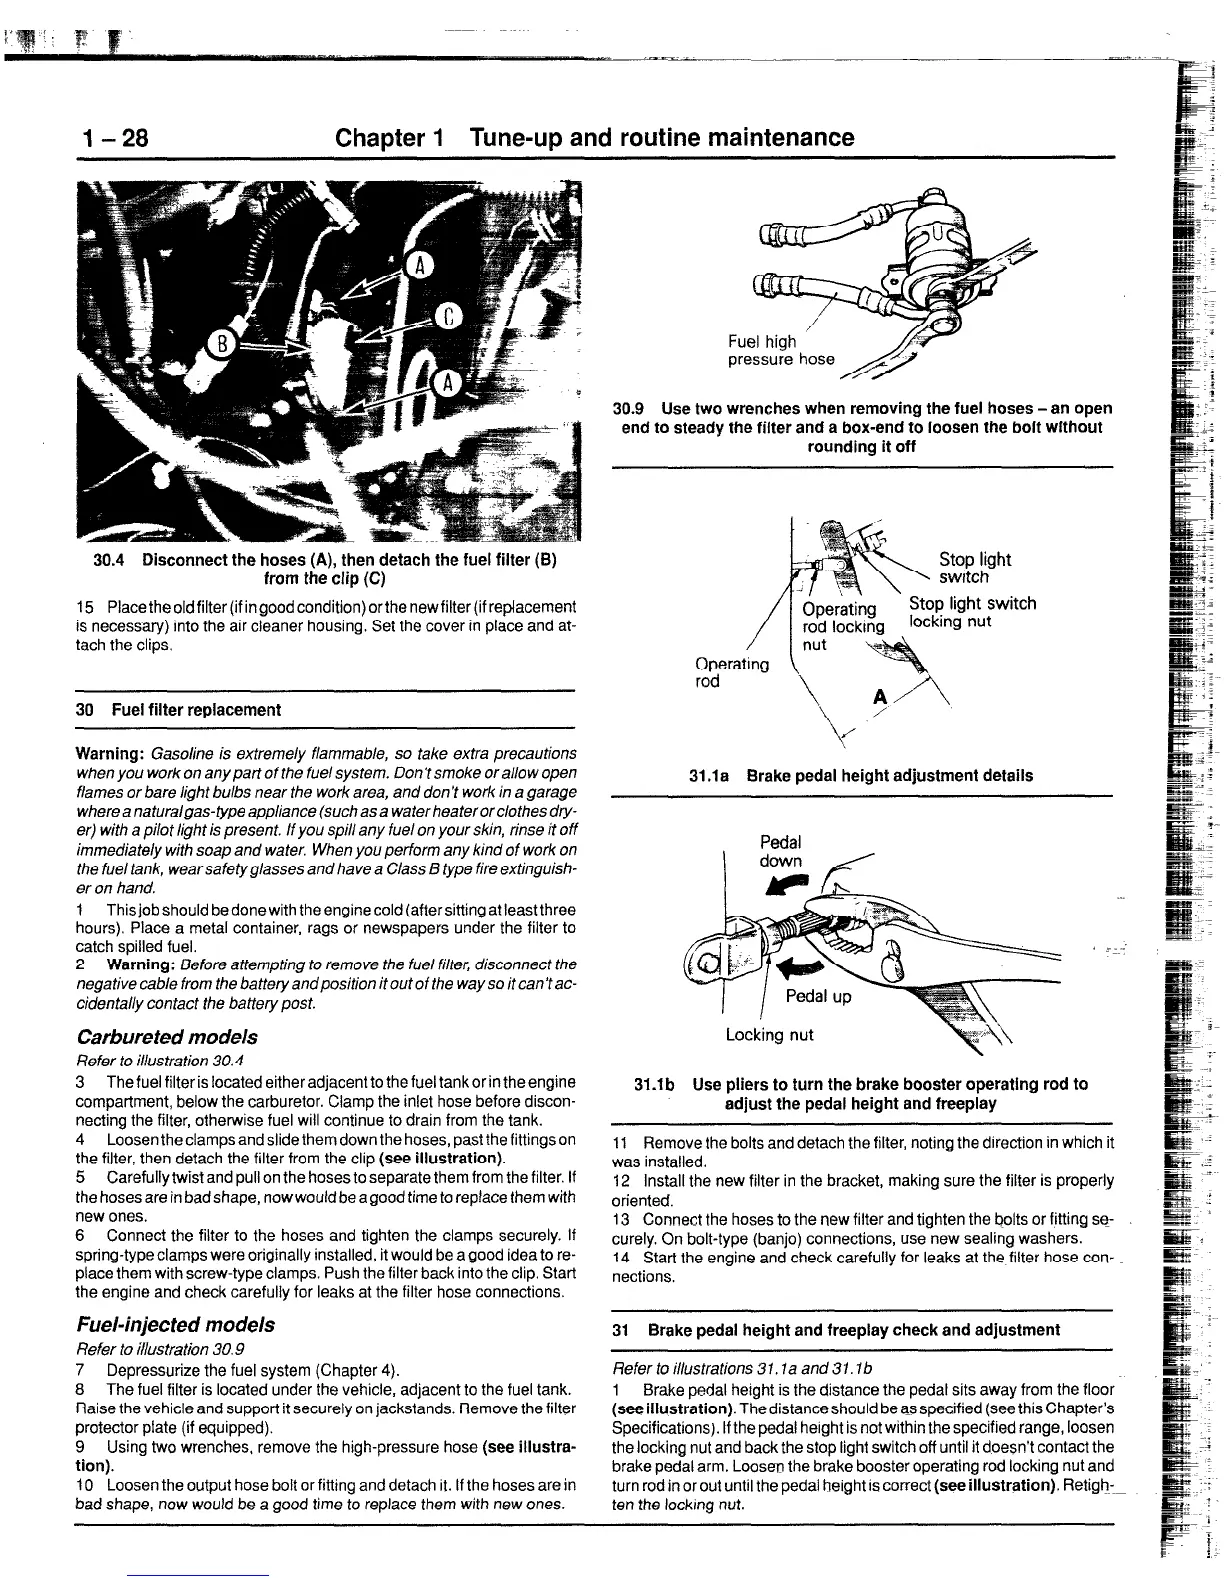
30.4 Disconnect the hoses (A), then detach the fuel filter (B)
from the clip (C)
15 Place the old filter (if in good condition) or the new filter (if replacement
is necessary) into the air cleaner housing. Set the cover in place and at-
tach the clips.
30 Fuel filter replacement
Warning: Gasoline is extremely flammable, so take extra precautions
when you work on any part of the fuel system. Don’t smoke or allow open
flames or bare light bulbs near the work area, and donY work in a garage
where a naturalgas-type appliance (such as a water heater or clothes dry-
er) with a pilot light is present. If you spill any fuel on your skin, rinse it off
immediately with soap and water. When you perform any kind of work on
the fuel tank, wearsafetyglasses and have a Class B type fire extinguish-
er on hand.
1 Thisjobshould bedonewith theenginecold (aflersitting at leastthree
hours). Place a metal container, rags or newspapers under the filter to
catch spilled fuel.
2 Warning: Before attempting to remove the fuel filter, disconnect the
negative cable from the battery andposition it out of the way so it can’t ac-
cidentally contact the battery post.
Carbureted models
Refer to illustration 30.4
3 The fuel filter is located either adjacentto the fuel tankorin theengine
compartment, below the carburetor. Clamp the inlet hose before discon-
necting the filter, otherwise fuel will continue to drain from the tank.
4 Loosentheclampsandslidethemdown the hoses, pastthefittingson
the filter, then detach the filter from the clip (see illustration).
5 Carefully twist and pull on the hoses to separate them from the filter. If
the hoses are in bad shape, nowwould be a good time to replace them with
new ones.
6 Connect the filter to the hoses and tighten the clamps securely. If
spring-type clamps were originally installed, it would be a good idea to re-
place them with screw-type clamps. Push the filter back into the clip. Start
the engine and check carefully for leaks at the filter hose connections.
Fuel-injected models
Refer to illustration 30.9
7 Depressurize the fuel system (Chapter 4).
8 The fuel filter is located under the vehicle, adjacent to the fuel tank.
Raise the vehicle and support it securely on jackstands. Remove the filter
protector plate (if equipped).
9 Using two wrenches, remove the high-pressure hose (see illustra-
tion).
10 Loosen the output hose bolt or fitting and detach it. If the hoses are in
bad shape, now would be a good time to replace them with new ones.
30.9 Use two wrenches when removing the fuel hoses -an open
end to steady the filter and a box-end to loosen the bolt without
rounding it off
31.la Brake pedal height adjustment details
Pedal
Locking nut
31.lb Use pliers to turn the brake booster operatlng rod to
adjust the pedal height and freeplay
11 Remove the bolts and detach the filter, noting the direction in which it
was installed.
12 Install the new filter in the bracket, making sure the filter is properly
oriented.
13 Connect the hoses to the new filter and tighten the bolts or fitting se-
curely. On bolt-type (banjo) connections, use new sealing washers.
14 Start the engine and check carefully for
leaks
at the filter hose con-
nections.
31 Brake pedal height and freeplay check and adjustment
Refer to illustrations 37. la and 31. Ib
2
Brake pedal height is the distance the pedal sits away from the floor
see illustration). The distance should be as specified (see this Chapter’s
Specifications). If the pedal herght is not within the specified range, loosen
the locking nut and back the stop light switch off until it doesn’t contact the
brake pedal arm. Loosen the brake booster operating rod locking nut and
turn rod in or out until the pedal height is correct (see illustration). Retigh-~
ten the lockmg nut.
 Loading...


