Chapter 1 Tune-up and routine maintenance
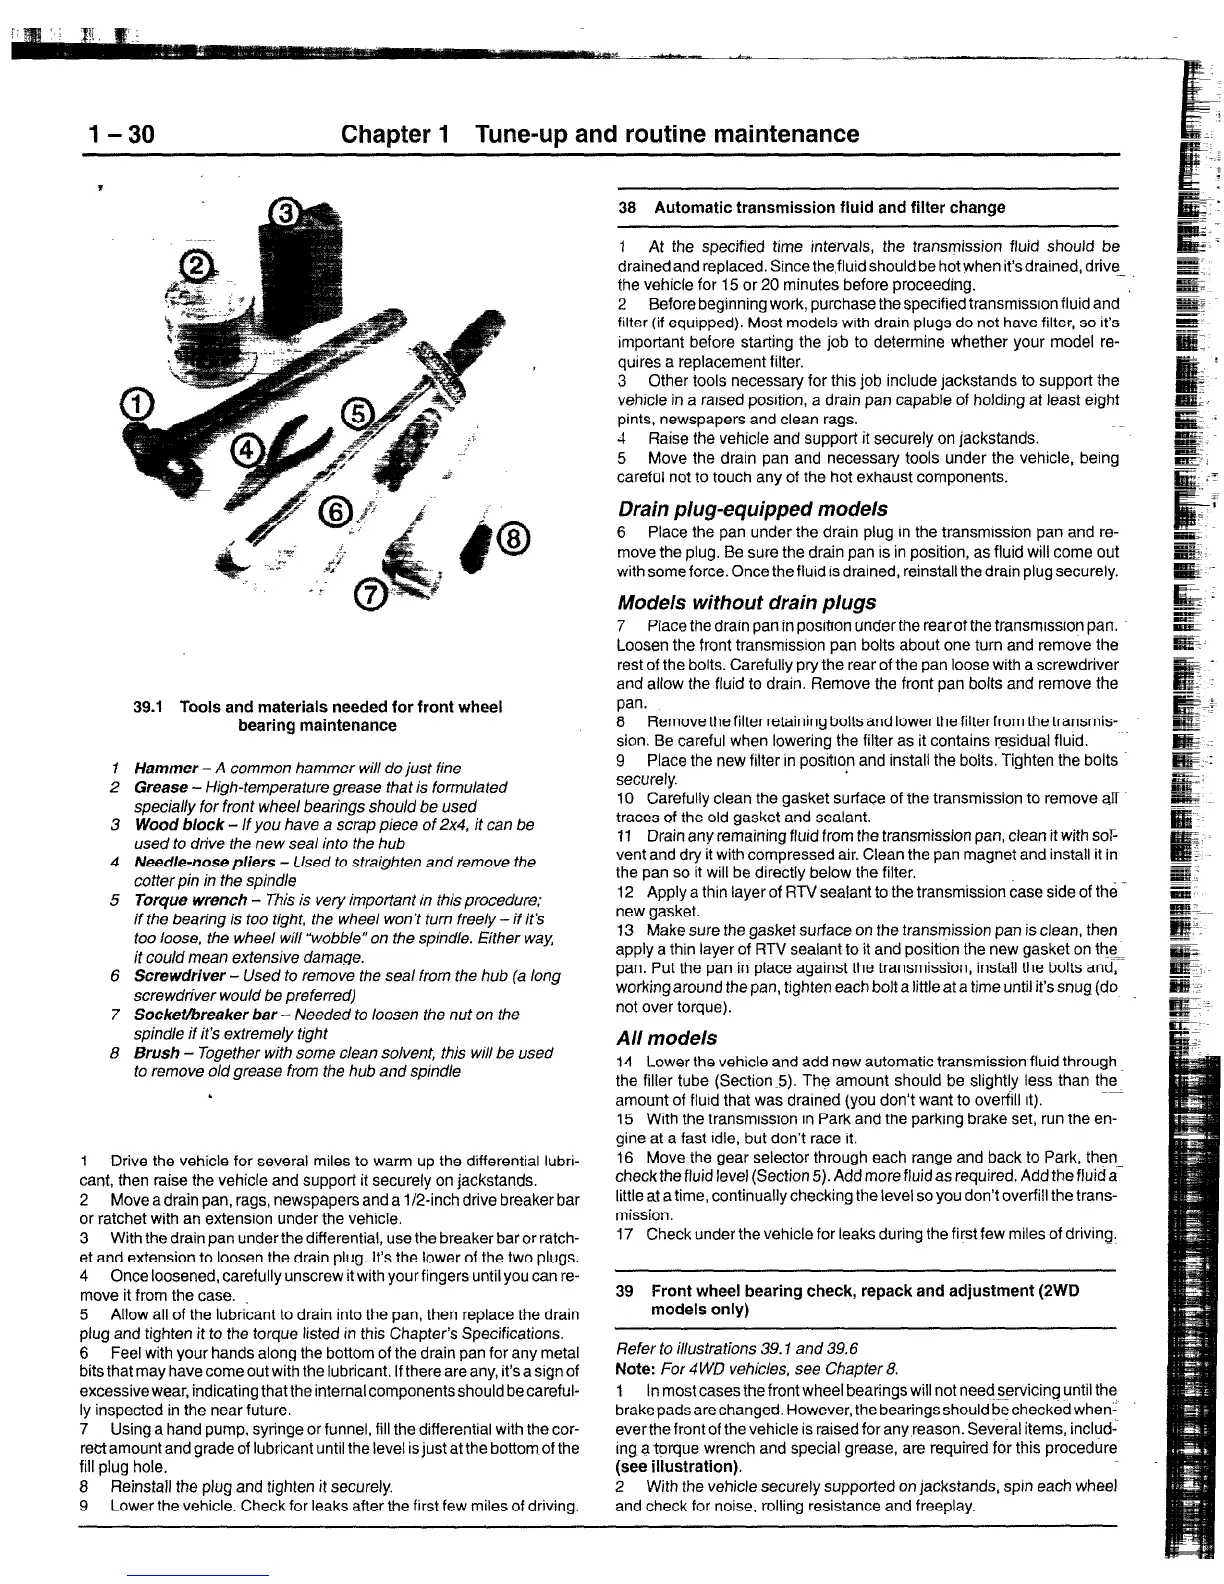
39.1 Tools and materials needed for front wheel
bearing maintenance
Hammer-A common hammer will do just fine
Grease - High-temperature grease that is formulated
special/y for front wheel bearings should be used
Wood block - If you have a scrap piece of 2x4, it can be
used to drive the new sea/ into the hub
Need/e-nose pliers - Used to straighten and remove the
cotter pin in the spindle
Torque wrench - This is very important in this procedure;
if the bearing is too tight, the wheel won’t turn free/y-if it’s
too loose, the wheel wiii ‘lvobbie“ on the spindle. Either way
it could mean extensive damage.
Screwdriver - Used to remove the seal from the hub (a long
screwdriver would be preferred)
Socket/breaker bar - Needed to loosen the nut on the
spindle if it’s extremely tight
Brush - Together with some clean solvent, thk will be used
to remove old grease from the hub and spindle
.
1 Drive the vehicle for several miles to warm up the differential lubri-
cant, then raise the vehicle and support it securely on jackstands.
2 Move a drain pan, rags, newspapers and a i/2-inch drive breaker bar
or ratchet with an extension under the vehicle.
3 With the drain pan under the differential, use the breaker bar or ratch-
et and extension to loosen the drain plug. It’s the lower of the two plugs.
4 Once loosened, carefully unscrew it with your fingers until you can re-
move it from the case.
5 Allow all of the lubricant to drain into the pan, then replace the drain
plug and tighten it to the torque listed in this Chapter’s Specifications.
6 Feel with your hands along the bottom of the drain pan for any metal
bits that may have come out with the lubricant, If there are any, it’s a sign of
excessivewear, indicating that the internal componentsshould becareful-
ly inspected in the near future.
7 Using a hand pump, syringe or funnel, fill the differential with the cor-
rectamount and grade of lubricant until the level is just at the bottom of the
fill plug hole.
8 Reinstall the plug and tighten it securely.
9 Lower the vehicle. Check for leaks after the first few miles of driving.
38 Automatic transmission fluid and filter change
1 At the specified time intervals, the transmission fluid should be
drained and replaced. Since the fluid should be hot when it’sdrained, drive
_
the vehicle for 15 or 20 minutes before proceeding.
2 Before beginning work, purchase the specified transmrssron fluid and
filter (if equipped). Most models with drain plugs do not have filter, so It’s
important before starting the job to determine whether your model re-
quires a replacement filter.
3 Other tools necessary for this job include jackstands to support the
vehicle in a ratsed posrtion, a drain pan capable of holding at least eight
pints, newspapers and clean rags.
-f Raise the vehicle and support it securely on jackstands.
5 Move the drain pan and necessary tools under the vehicle, being
careful not to touch any of the hot exhaust components.
Drain plug-equipped models
6 Place the pan under the drain plug rn the transmission pan and re-
move the plug. Be sure the drain pan is in position, as fluid will come out
with some force. Once the fluid is drained, reinstall the drain plug securely.
Models without drain plugs
7 Place the drain pan in position under the rearof the transmission pan.
Loosen the front transmrssion pan bolts about one turn and remove the
rest of the bolts. Carefulfy pry the rear of the pan loose with a screwdriver
and allow the fluid to drain. Remove the front pan bolts and remove the
pan.
8 Remove the filter retaining bolts and lower the filter from the transmis-
sion. Be careful when lowering the filter as it contains residual fluid.
9 Place the new filter In position and install the bolts. Tighten the bolts
securely.
10 Carefully clean the gasket surface of the transmission to remove aff
traces of the old gasket and sealant.
11 Drain any remaining fluid from the transmission pan, clean it with sop
vent and dry it with compressed air. Clean the pan magnet and install it in
the pan so it will be directly below the filter.
12 Apply a thin layer of RTV sealant to the transmission case side of the
new gasket.
13 Make sure the gasket surface on the transmission pan is clean, then
apply a thin layer of RTV sealant to it and position the new gasket on the==
pan. Put the pan in place against the transmission, install the bolts and,
working around the pan, tighten each bolt a little at a time until it’s snug (do
not over torque).
All models
14 Lower the vehicle and add new automatic transmission fluid through
the filler tube (Section5). The amount should be slightly less than the
amount of flurd that was drained (you don’t want to overfill it).
15 With the transmissron In Park and the parking brake set, run the en-
gine at a fast Idle, but don’t race it.
16 Move the gear selector through each range and back to Park, then
check the fluid level (Section 5). Add more fluid as required. Add the fluida-
little at a time, continually checking the level so you don’t overfill the trans-
mission
17 Check under the vehicle for leaks during the first few miles of driving.
39 Front wheel bearing check, repack and adjustment (2WD
models only)
Refer to iiiustrations 39. I and 39.6
Note: For 4WD vehicles, see Chapfer 8.
1
In most casesthefront wheel bearings will not needservicing until the
brake pads are changed, However, the bearings should be checked when-
everthe front of the vehicle is raised for any reason. Several items, includ-
ing atprque wrench and special grease, are required for this procedure
(see illustration).
2 With the vehicle securely supported on jackstands, spin each wheel
and check for noise, rolling resistance and freeplay.
 Loading...


