-
89
-
'16 • SCM-T-199
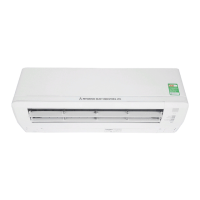
6. FORMING PIPING AND DRAIN HOSE
1. Forming piping
Piping is possible in the right, rear, downward, left, left rear or left downward direction.
NOTE
Sufcientcaremustbetakennottodamage
the panels when connecting pipes.
Cut out the panel smoothly along the
line in case of side or bottom piping.
Rear
Downward
Left
rear
Left hand side piping Right hand side piping
Piping in the left direction
Piping in the left rear direction
Piping in the right rear direction
Piping in the right direction
Forming of pipings.
• Holdthebottomofthepipingandxdirection
before stretching it and shaping it.
Taping of the exterior
• Tape only the portion that goes through the wall.
• Always tape the wiring with the piping.
Pipings
Drain hose
2.Drainchangeprocedures
(1) Remove the screw and drain hose.
(2) Remove the drain cap by hand or pliers.
(3) Insert the drain cap which was removed at procedure (2) securely using a hexagonal wrench etc.
(4) Install the drain hose and screw securely.
Screw
Drain cap
CAUTION
Incorrect installation of drain hose and cap can cause water leakage.
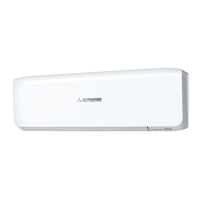
7. DRAINAGE WORK
• Arrange the drain hose in a downward angle.
• Avoid the following drain piping.
d
Wavy
The drain hose
tip is in water.
The gap to the ground
is 5 cm or less.
The drain hose tip
is in the gutter.
Odor from
the gutter
• Pour water to the drain pan located under the heat exchanger, and ensure that the water is discharged outdoor.
• When extended drain hose is present inside the room, insulate it securely with heat insulator available in the market.
Wall
Since this air-conditioner is designed to collect dew drops on the rear surface to the
drain pan, do not install the connecting wire above the gutter.
CAUTION
Incorrect drainage work can cause water leakage.
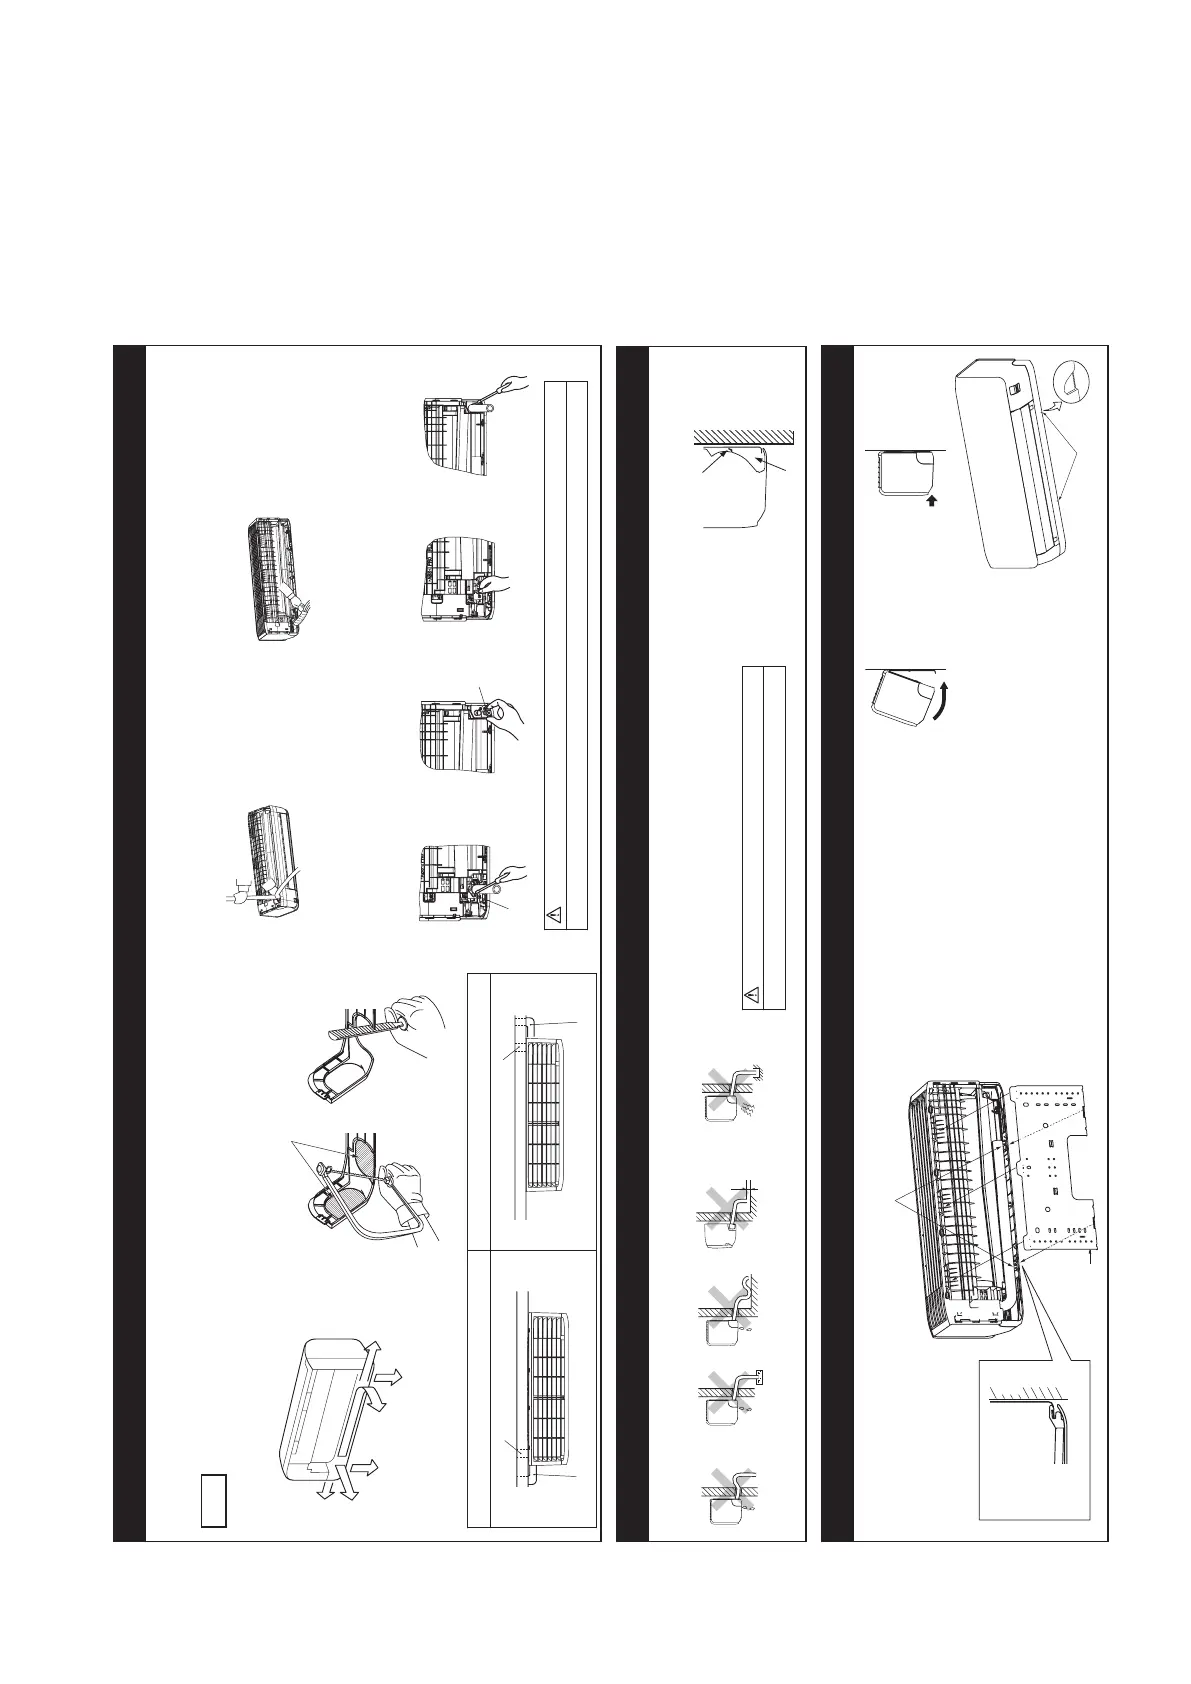
8.INSTALLINGINDOORUNIT
1.
Installing the indoor unit to installation board
Installation board
Indoor unit base latch
Wall
Installation board
Indoor unit
Base latch (2 locations)
(1) Pass the pipe through the hole in
the wall, and hook the upper part
of the indoor unit to the installation
board.
(2) Gently push the
lowerparttox
the indoor unit
base lower latch to
installation board.
2.Removingtheindoorunitfrominstallationboard
(1) Push up at the marked portion of the indoor unit base latch,
and slightly pull it toward you (both right and left hand sides).
(The indoor unit base latch can be removed from the installation
board.)
(2) Push up the indoor unit upward so that it can be removed from
installation board.
 Loading...