Do you have a question about the Moen Weymouth S73204 and is the answer not in the manual?
Provides contact details for installation help, missing, or replacement parts.
Recommends specific tools for safe and easy faucet replacement.
Instructions for recording model number and registering the product online.
Detailed list of all faucet components with corresponding part numbers.
Provides essential safety precautions before removing an old faucet.
Aligning the deck gaskets on the sink before installing the faucet body.
Installing the faucet body and handle receptors onto the sink.
Installing the hot and cold handle receptors into the faucet body.
Using the installation tool to secure the faucet body with washer and nut.
Installing mounting washer and nut onto handle receptors based on deck thickness.
Clipping the adapter tee and inserting the hose adapter for the pulldown hose.
Installing the hose protector onto the faucet body.
Inserting the pulldown hose into the spout and feeding it through the faucet body.
Connecting the pulldown hose to the hose adapter with an audible click.
Installing the outlet hoses into the adapter tee.
Confirmation that the pulldown hose installation into the adapter tee is complete.
Attaching supply hoses to shut-off valves and tightening them securely.
Guidance on selecting between lever or cross handles for installation.
Removing plug buttons and set screws using a hex wrench.
Removing the existing handles from the handle receptors.
Installing alternate handles onto the handle receptors, ensuring correct positioning.
Installing set screws and plug buttons to secure the new handles.
Selecting and attaching handle cap styles, using lubricant on the backside.
Turning on water supply and running faucet for 15 seconds to check flow.
Turning the faucet off after the initial water flow test.
Installing the spray wand onto the pulldown hose and tightening it securely.
Verifying that the pulldown hose is fully threaded onto the spray wand.
Locating the mark and securely installing the hose weight on the pulldown hose.
Detailed explanation of Stream, Spray, and Boosted modes on the spray wand.
Removing and rinsing the screen and o-ring from the spray wand to resolve flow issues.
Reinstalling components and verifying water flow after troubleshooting.
Recommended cleaning procedures for Spot Resist finishes to maintain appearance and warranty.
Details of the limited lifetime warranty covering product defects and exclusions.
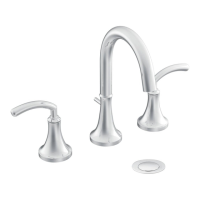
| Collection | Weymouth |
|---|---|
| Product Type | Bathroom Faucet |
| Style | Traditional |
| Number of Handles | Two-Handle |
| Mounting Type | Deck Mount |
| Spout Reach | 5.5 inches |
| Flow Rate | 1.2 GPM |
| Valve Type | Ceramic Disc |
| Connection Size | 1/2 inch |
| Holes Required | 3 |
| ADA Compliant | Yes |
| Warranty | Limited Lifetime |
| Finish | Chrome |
| Handle Type | Lever |
| Material | Metal |
| Installation Type | Deck Mounted |