www.mojotone.com
7
The faceplate will be secured by the washers and
nuts from the components being mounted through
it. Ensure the faceplate is straight before tightening
down the components and installing the knobs.
Mount indicator lamp using its pre-assembled
hardware. Unthread the hardware from the com-
ponent and insert it through the chassis and cor-
responding faceplate cut out. Reapply hardware
and tighten with adjustable wrench and pliers.
Mount your Main and Standby switches using
their pre-assembled hardware.
Mount potentiometers using their pre-assembled
hardware and 1/2” nut driver. Make sure poten-
tiometers are mounted with their lugs facing up
towards the open end of the chassis.
PRO Tip: When mounting the pots, make sure the
toothed locking washer goes between the potenti-
ometer and the chassis. The at washer will go on
the outside of the chassis and the nut will tighten
down.
Once you have the pots securely installed, turn the
shaft of the pot all the way counter-clockwise. In-
stall the knob on each pot, making sure the point-
er of the knob is pointing to “0” on the faceplate.
Use a small at head screwdriver to tighten the set
screw in the back of the knob securely on the pot
shaft. If the knob isn’t moving smoothly, loosen the
set screw, back the knob off of the pot 1/16‘‘ and
re-tighten.
Mount J2 input jacks using their pre-assembled
hardware and an adjustable wrench. Pay close
attention to the orientation of the jacks on the
wiring diagram.
PRO Tip: Pre-install and solder any resistors on the
jacks before mounting it to the chassis wherever
possible.
Mount 9-pin tube sockets using (4) 4-40 1⁄4” (for the
preamp tube sockets) and 4-40 x 3/8” (for the power
tube sockets and spring retainers) screws and keps
nuts and tighten down with adjustable wrench and
screwdriver. Be sure to mount the retainer springs on
the EL84 and EZ81 sockets and the ground tab.
Mount can capacitors using (4) 6-32 1/2“ screws and
keps nuts and tighten down with adjustable wrench
and screwdriver. Be sure to mount the ground tab.
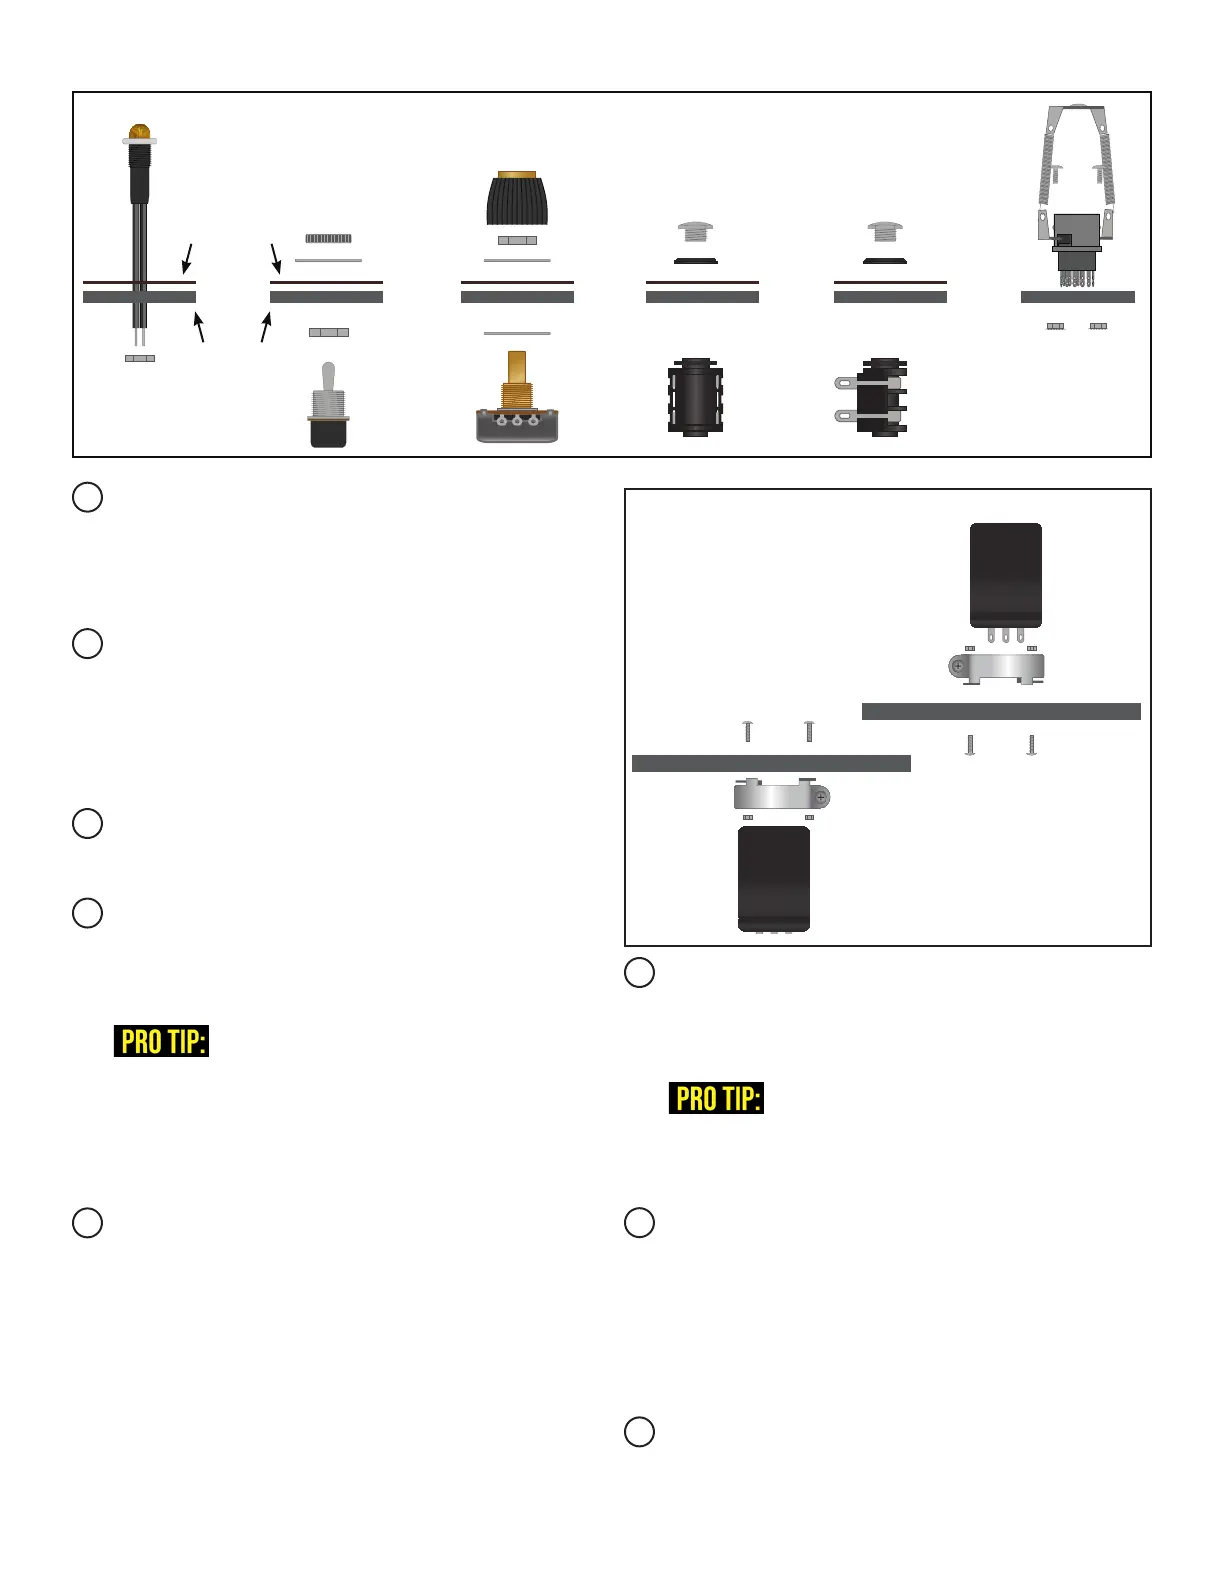
CHASSIS CROSS-SECTION FOR COMPONENT ASSEMBLY
CHASSIS CROSS-SECTION FOR CAN CAP. ASSEMBLY
MOUNTING FROM
OUTSIDE CHASSIS
MOUNTING FROM
INSIDE CHASSIS
POWER & STANDBY
SWITCH
FACEPLATE
CHASSIS
POTENTIOMETER
& KNOB
INPUT JACKS 9-PIN
SOCKET
INDICATOR
LAMP