Installation Instructions/Custom Panel Dimensions
STEP 20 DISHWASHER WET TEST
• Turnon power supply (or plug power cord into outlet,
ifequipped).
• Startthe unit to checkfor leaks.
- PushRINSEONLYpad.
- PushSTART/RESETpad one time.
- Closedoor.
• Checkto be surethat water enters the dishwasher.Ifwater
doesnot enter the dishwasher,check to be surethat water
and power are turned on.
• Checkfor leaksunder the dishwasher.Ifa leakisfound,
turn power supply off,then tighten connections. Restore
power after leak iscorrected.
• Checkfor leaksaround the door.A leakaround the door
could be caused by door rubbing or hitting against
adjacent cabinetry. Repositionthe dishwasher if
necessary.SeeStep13, 14 and 15.
• Thedishwasher willdrain and turn off about 5 minutes after
itwas started. Checkdrain lines.If leaksare found, turn off
power supply and correct plumbing as necessary.Restore
power after corrections are made. SeeStep 10 and 17.
• Opendishwasher door and make sure most of the water
hasdrained. If not, checkthat disposer plug has been
removed and/or air gap isclear.SeeStep 17. Alsocheck
drain line to be sure it isnot kinked.
• Runthe dishwasher through another "RinseOnly" cycle.
Checkfor leaks and correct if required.
STEP 22 SET WATER HARDNESS
Modelswith bulk dispenser only. Skip this step if your
dishwasher does not havethe bulk dispense feature.
• Locatethe hard water test strip setaside in Step1.
• Removestrip from package.
• Turnon the hot water and hold the strip under the stream,
following the directions on the package.
• Usethe valueon the test strip to calibrate your dishwasher
for water hardness.Referto the sectiontitled "Water
HardnessCalibration" in your Owner's Hanual for
information on how to calibrate your dishwasher.
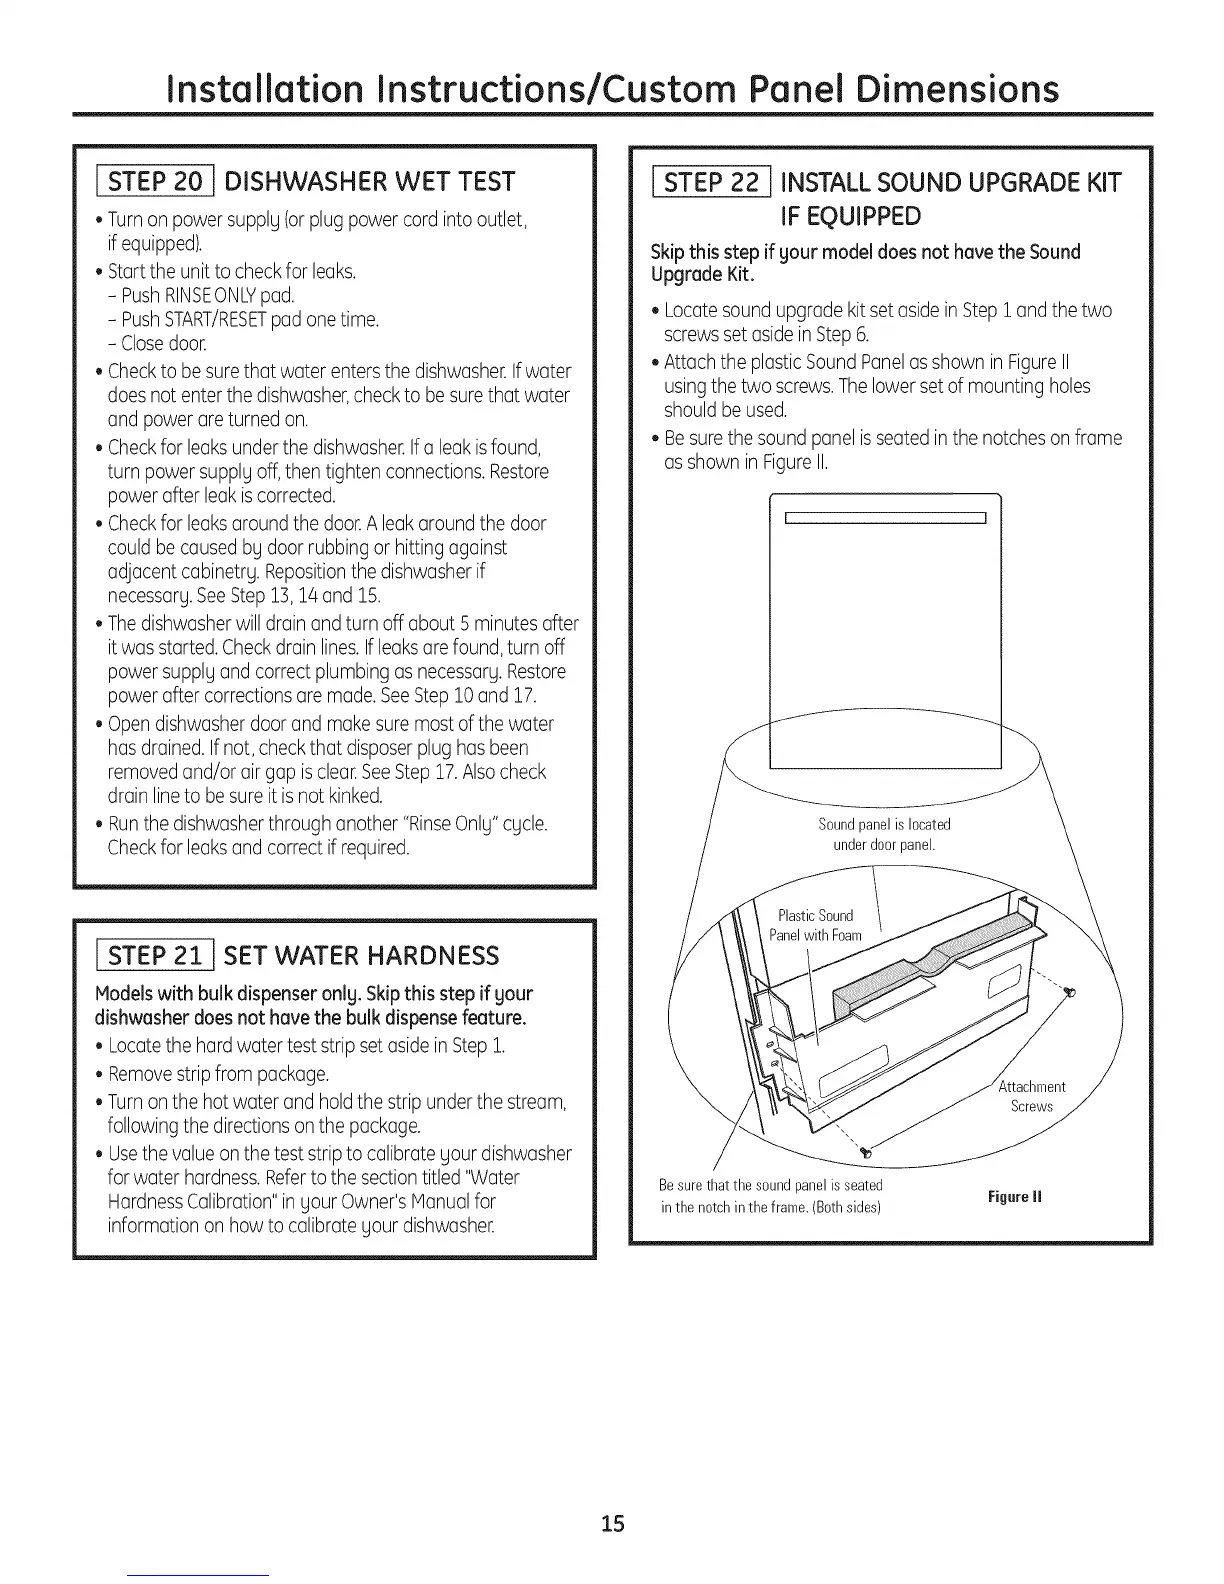
STEP 22 INSTALL SOUND UPGRADE KIT
IF EQUIPPED
Skipthis step if gour model does not have the Sound
Upgrade Kit.
• Locate sound upgrade kit set aside in Step1 and the two
screwsset aside in Step6.
• Attach the plastic Sound Panelasshown in FigureII
usingthe two screws.Thelowerset of mounting holes
shouldbe used.
• Besurethe sound panel is seated inthe notches on frame
asshown in FigureII.
[ 1
Soundpanelis located
underdoorpanel,
Besurethat the soundpanelisseated
in the notchinthe frame. (Bothsides)
Figure II
15