EasyManua.ls Logo

Moog MINIMOOG MODEL D User Manual

Moog MINIMOOG MODEL D
84 pages
To Next Page IconTo Next Page
To Previous Page IconTo Previous Page
Page #11 background image
11 | Getting Started
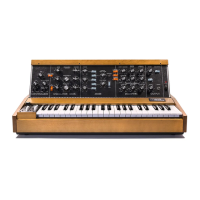
Begin by carefully removing your new Minimoog Model D from its packaging. It’s
recommended that you save all original packing material, should you ever need to
safely move or ship the instrument. In addition to the instrument itself, Minimoog
Model D also includes this owner’s manual, a power adapter, and the connecting
power cord.
SETUP & CONNECTIONS
The front panel of Minimoog Model D is hinged, so use caution and avoid grasping the
top of the panel when lifting or moving the instrument.
Place Minimoog Model D on a stable surface, such as a table or keyboard stand. Be
sure the instrument is placed at a comfortable playing height. The front panel can
remain flat, or it can be tilted to a convenient angle for accessing the controls.
To get started, you will need to supply Minimoog Model D with power and connect it
to an audio monitoring system, or listen using a set of headphones.
AC POWER
Minimoog Model D uses a universal power supply that can operate using AC power
sources ranging from 100 to 240 volts at either 50 or 60 cycles (Hz). The included
power supply features a detachable IEC-style power cable.
1. Connect the included IEC power cable to the Minimoog Model D power supply.
2. Connect the power supply cable to the Minimoog Model D locking XLR-4 connector.
3. Connect the other end of the power cable to a suitable AC wall outlet.
4. Finally, use the POWER switch to turn on your new Minimoog Model D.
NOTE: The power supply connects to the Minimoog Model D using a locking connector. To
release this connector from the instrument, simply press the locking tab at the base of the
connector and gently pull up on the connector plug. Do not pull on the cable itself.
RAISING THE PANEL
1. Grab the front panel by the top wood edge and tilt it forward toward the keyboard.
2. Flip up the hinged metal kickstand located in the area under the rear panel.
3. Position the top edge of this kickstand against one of the four screw heads
protruding slightly from the rear of the panel. (Each screw head will support the
panel at a dierent angle.)
4. To lower the panel, again tilt the panel forward until the hinged kickstand returns to
its original position, then gently lower it.
Getting Started
Question and Answer IconNeed help?

Do you have a question about the Moog MINIMOOG MODEL D and is the answer not in the manual?

Moog MINIMOOG MODEL D Specifications

General IconGeneral
TypeAnalog Synthesizer
PolyphonyMonophonic
Envelope Generators2 (ADSR)
Weight32 lbs
Year Released1970
Oscillators3
Oscillator WaveformsTriangle, Sawtooth, Square
Filter24dB/octave low-pass
LFO1
Keyboard44-note
ModulationModulation Wheel, Aftertouch
External Inputs1
ControlsKnobs, switches
Outputs1/4" mono output, headphone output
Power SupplyAC power adapter

Summary

New Features

Keyboard Improvements

Details on the Fatar TP-9 keyboard and its performance capabilities.

Dedicated LFO

Describes the new dedicated LFO and its features.

Expanded Patch Bay

Information on new control output jacks for expanded connectivity.

Power-On Commands

Explanation of how to access global settings via power-on sequences.

MIDI Connectivity

Details on MIDI connectivity features including In, Out, and Thru jacks.

External Power Supply

Information on the universal external power supply for improved stability.

Left-Hand Controller Updates

Updates to the Mod and Pitch wheels for enhanced performance.

Getting Started

Setup and Connections

Guidance on unboxing, placing, and connecting the Minimoog Model D.

AC Power Connection

Instructions for connecting the instrument to AC power using the provided adapter.

Raising the Panel

Step-by-step guide on how to tilt the front panel for better access.

Creating Sound

Audio Monitoring

How to connect the Minimoog to an audio system for monitoring sound output.

Headphone Monitoring

Instructions for using the dedicated headphone output for private listening.

Oscillator Bank

Oscillator Controls

Details on tuning, octaves, and pitch adjustments for oscillators.

Oscillator Waveforms

Explains the different harmonic content of various waveforms.

Oscillator-3 Specifics

Describes unique controls for Oscillator-3 and modulation features.

Controllers Section

OSC. 3/FILTER EG Switch

Selects modulation source for the MODULATION MIX knob.

Noise/LFO Switch

Selects Noise or LFO as a modulation source.

Modulation Mix Knob

Adjusts the balance between two selected modulation sources.

Left-Hand Keyboard Panel

Glide Controls

Details on the Glide knob and switch for pitch transitions.

LFO Rate and Decay Switch

Adjustments for LFO speed and decay function.

Modulation and Pitch Wheels

Controls for real-time pitch bending and modulation effects.

Keyboard Overview

Mixer & Noise

External Input Volume

Controls the level of external audio sources.

Noise Generator Options

Explains the function of White and Pink noise sources.

Modifiers Section

Filter Controls

Details on Cutoff Frequency, Emphasis, and Filter Modulation.

Keyboard Control Switches

How keyboard input affects filter cutoff frequency (key tracking).

Filter Contour Envelope

Controls for the filter envelope generator (Attack, Decay).

Loudness Contour Envelope

Controls for the loudness envelope generator (Attack, Decay, Sustain).

Output Section

Main Output Functions

Controls and functions for the main audio output.

Phones Output Details

Details on the headphone output and volume control.

A-440 Tuner Switch

Built-in reference tuner for pitch calibration.

Top Patch Panel

MIDI Ports

MIDI IN, THRU, and OUT connections for external communication.

Control Outputs

After Pressure, Pitch, and Velocity CV outputs.

Gate and Velocity Outputs

Gate and Velocity signal outputs for CV synthesis.

Audio Outputs

High and Low level audio outputs for connecting to other gear.

Audio Input

External audio signal input for processing through the synth.

Control Inputs

Inputs for controlling Loudness, Filter, Oscillators, and modulation sources.

Performance Tips & Techniques

Processing External Audio

Using the Minimoog filter to process external sound sources.

Enhancing Keyboard Performance

Using Velocity and After Pressure for expressive playing.

Creating FM Effects

Techniques for achieving Frequency Modulation effects.

Creative Switching Techniques

Using switches to create harmonies and layered sounds.

Oscillator Tuning Procedure

Oscillator 1 Tuning Steps

Procedure for tuning Oscillator-1 and setting its scale.

Octave Trim Adjustment

Tuning procedure for octave accuracy between oscillators.

Oscillator 2 Tuning Steps

Procedure for tuning Oscillator-2 and setting its scale.

Oscillator 3 Tuning Steps

Procedure for tuning Oscillator-3 and setting its scale.

Global Settings

Power-On Commands Overview

Accessing global settings by holding keys during power-on.

Note Priority & Legato Triggering

Configuring note priority and legato behavior.

Gate Source & Velocity Control

Setting gate sources and velocity CV range.

Keyboard Tuning & MIDI Settings

Error tuning, MIDI channel, transpose, and reset options.

MIDI Output & Velocity Curves

MIDI pitch, mod, aftertouch, local, and velocity curve settings.

MIDI Tuning & Pitch CV Zero Volt

Custom tuning tables and pitch CV zero volt settings.

Signal Flow Diagram

Specifications

Physical & Environmental Specs

Dimensions, weight, temperature range, and operating conditions.

Sound Generation Components

Details on oscillators, noise generator, LFO, and external input.

Filter, Contour Generators & VCA

Specifications for the filter, envelope generators, and VCAs.

Audio I/O & Keyboard Specs

Audio output levels, headphone specs, and keyboard features.

Control Voltage & MIDI Interfaces

Specs for control voltage I/O and MIDI jack functionality.

Power Supply Details

Information on the external power supply unit.

Moog Music Standard Warranty

Returning Product for Service

Procedure for obtaining RMA and returning the product for service.

Warranty Service & Initiation

Information on warranty coverage and how to initiate a claim.

Service & Support Information

International Warranty & Service

Warranty policy and service for customers outside the USA.

Instrument Care Instructions

Guidelines for cleaning and maintaining the instrument.

Related product manuals