122
USING THE BROWSER (Continued)
SAVING PRESETS AND TIMBRES
Presets and Timbres are saved to memory
using the SAVE button on the Front Panel.
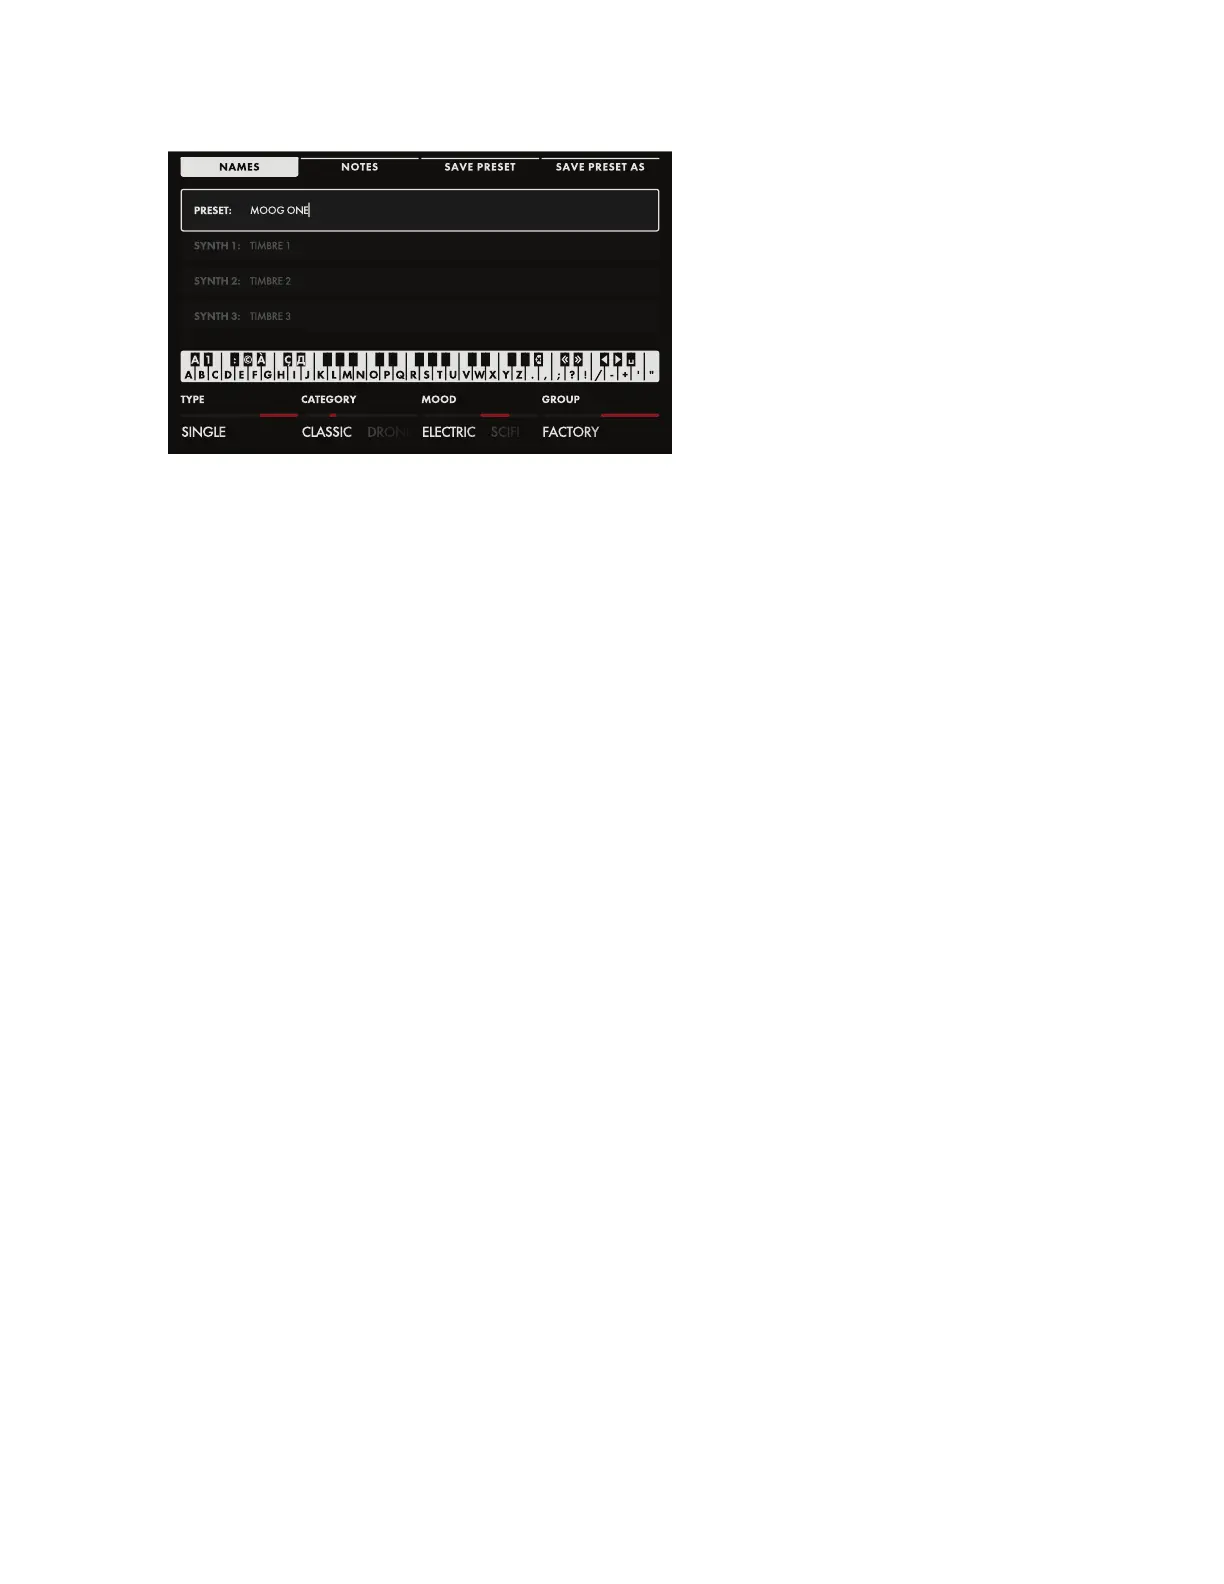
Pressing the SAVE button will reveal
the Preset Save screen. The four Soft
Buttons across the top of the screen will
read NAMES, NOTES, SAVE PRESET,
AND SAVE PRESET AS. When the screen
opens, the NAMES Soft Button will already
be selected, and the Preset Name will be
highlighted.
SAVE PRESET
If you have edited an existing Preset, and wish to save it under the same name, press the SAVE
PRESET Soft Button at the top of the screen. You can also press the SAVE button on the Front Panel
to save the Preset.
SAVE PRESET AS
Moog One allows you to enter names and text directly from the keyboard. The white keys (naturals)
enter the characters; the black keys (accidentals) select the character set (C#1 - D#2), move the cursor
(F#5, G#5), delete a character (A#4), and add a space (A#5). Hold the (A#4) key to delete multiple
characters. The Decrement and Increment keys (C#5 and D#5, respectively) can correct the letter/
character immediately preceding the cursor to the previous or next symbol in the current character
set, changing an M to an L or an N, for example with a single key press.
NOTE: The note numbers given above relate to the onscreen keyboard, and do not reect the key’s
actual MIDI Note number, etc.
TIP: You can also enter text directly, using a standard USB keyboard connected to the Moog One’s USB HOST port.
When you are done, press the SAVE PRESET AS Soft Button at the top of the screen. Preset names
must be unique; if the name you have entered is already in use, a popup box will ask if you want to
overwrite the Preset of the same name. Press the YES Soft Button to overwrite the existing Preset;
press the NO Soft Button to return to previous screen and edit the name. Then you can press the SAVE
AS. Soft Button again and save the Preset under the new name.
ADDING TAGS
Along the bottom edge of the SAVE screen are the Soft Knobs allowing you to assign TYPE,
CATEGORY, MOOD, and GROUP Tags to the Preset, making it more discoverable in a search. Rotate
the Soft Knobs to select a value for each search criteria. While all of the criteria come with some
preloaded suggestions, each performer is free to create their own CATEGORY, MOOD, and GROUP
divisions. Only TYPE has xed options - SINGLE, LAYER, SPLIT, and MULTI. Generally, one would
use SINGLE for a Preset using a single Synth. SPLIT for multiple Synths playing in different areas of
the keyboard, LAYER for multiple Synths stacked on the same keys, and MULTI for a Preset combing
SPLITS and LAYERS, etc.
ADDING NOTES
In addition to naming/renaming and adding Tags, you can also add performance notes to be saved along
with your Preset. These notes can be quick reminders or application cues, such as “Use this version for
all live shows” or “Pan wide for the stereo Master Effect” etc. Press the NOTES Soft Button and enter
any notes into the popup box using the ENTERING TEXT methods from the previous step. When you
are done entering notes, use the SAVE or SAVE AS… Soft Buttons to save these notes with the current
Preset; or press the NAMES Soft Button to close the notes box and return to the NAMES screen.