Page 4
TMC-647-(Rev E) - 01/06
MOORE FANS LLC, Marceline, MO 64658 Phone (660 ) 376-3575 FAX (660) 376-2909
2.2.4 FOR AUTOMATIC HUBS
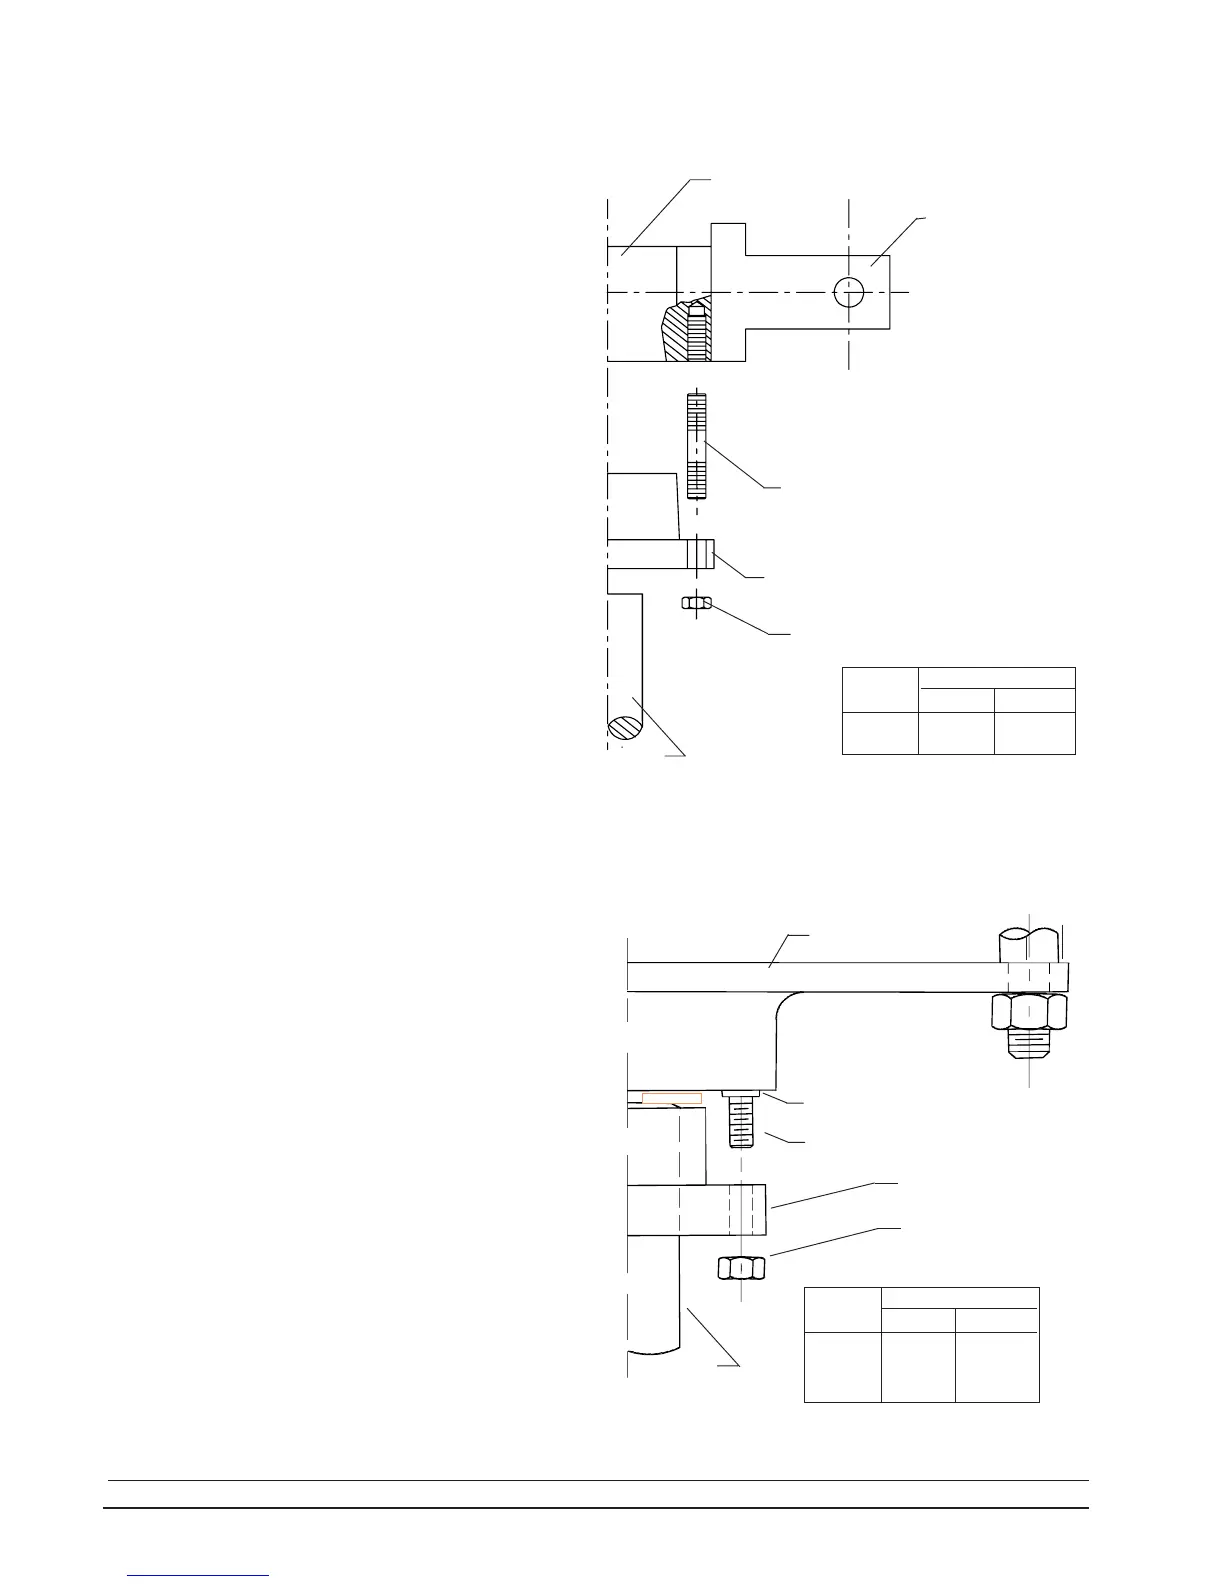
FAN HUB
SHAFT
STAINLESS NUT
(Specially Coated)
Q D BUSHING
STAINLESS STEEL BUSH-
ING STUD
BUSHING STUD WASHER
STAINLESS NUT (Specially Coated)
Q D BUSHING
STAINLESS STEEL BUSHING
STUD
MAXIMUM TORQUE
FT-LBS
20
M-KGS
2.77
BUSHING
SIZE
SF
SHAFT
FAN HUB
BLADE CLEVIS
All Series 19 fans are manual tapered-bore hubs for
installation on Size SF QD bushings. They differ from the
other series in two respects. Because of the small hub size, an
air seal is not provided and blade tubes are not required The
blade clevises are threaded directly onto the hub.
Install the (3) stainless steel bushing studs in the fan hub
and hand-tighten only.
Slip the bushing onto the shaft and check the key for
proper fit. Be sure the shaft is completely through the bush-
ing.
Carefully clean the bore of the hub and the outside of the
bushing with a clean, dry cloth. Use no lubricants in this
installation. Use of lubricants can cause hub breakage.
Do not clean or alter the lubricant coating on the hex
nuts.
Install the fan hub on the bushing with the studs extend-
ing through the bushing flange. Place the stud nuts on the
studs and tighten the nuts alternately, keeping the pull on all
of them as nearly equal as possible while drawing the hub
onto the bushing until the bushing tightly grips the shaft.
Caution should be used to prevent the hub from cocking on
the bushing.
Tighten the nuts to the torque shown in the table at
right.. Do not over-torque. Excessive torque can cause hub
or bushing breakage.
MAXIMUM TORQUE
FT-LBS
20
40
90
BUSHING
SIZE
SF
E
J
M-KGS
2.77
5.53
12.44
If the (3) stainless steel bushing studs are not already
installed in the fan hub, install them at this time. Hand-tighten
only.
Slip the bushing onto the shaft and check the key for
proper fit. Be sure the shaft is completely through the bushing
but not extending beyond it. The end of the shaft should be
flush with the top of the bushing.
Carefully clean the bore of the hub and the outside of the
bushing with a clean, dry cloth. Use no lubricants in this
installation. Use of lubricants can cause hub breakage.
Do not clean or alter the lubricant coating on the hex
nuts.
Air seals are installed by the factory whenever crating
requirements permit. If the air seal is already installed, lift the
hub by grasping the hub tubes or clevises. Do not lift the hub
by the air seal.
Lower the hub onto the bushing with the (3) stainless
steel studs provided in the hub extending through the bush-
ing flange.
Place the stud nuts on the studs and tighten the nuts
alternately, keeping the pull on all of them as nearly equal as
possible while drawing the hub onto the bushing until the
bushing tightly grips the shaft. Caution should be used to
prevent the hub from cocking on the bushing.
Tighten the nuts to the torque shown in the table at right.
Do not over-torque. Excessive torque can cause hub or
bushing breakage.
2.2.3 FOR SERIES 19 HUBS ONLY
INSTALLATION