23
02/02
SAFETY OPERATION
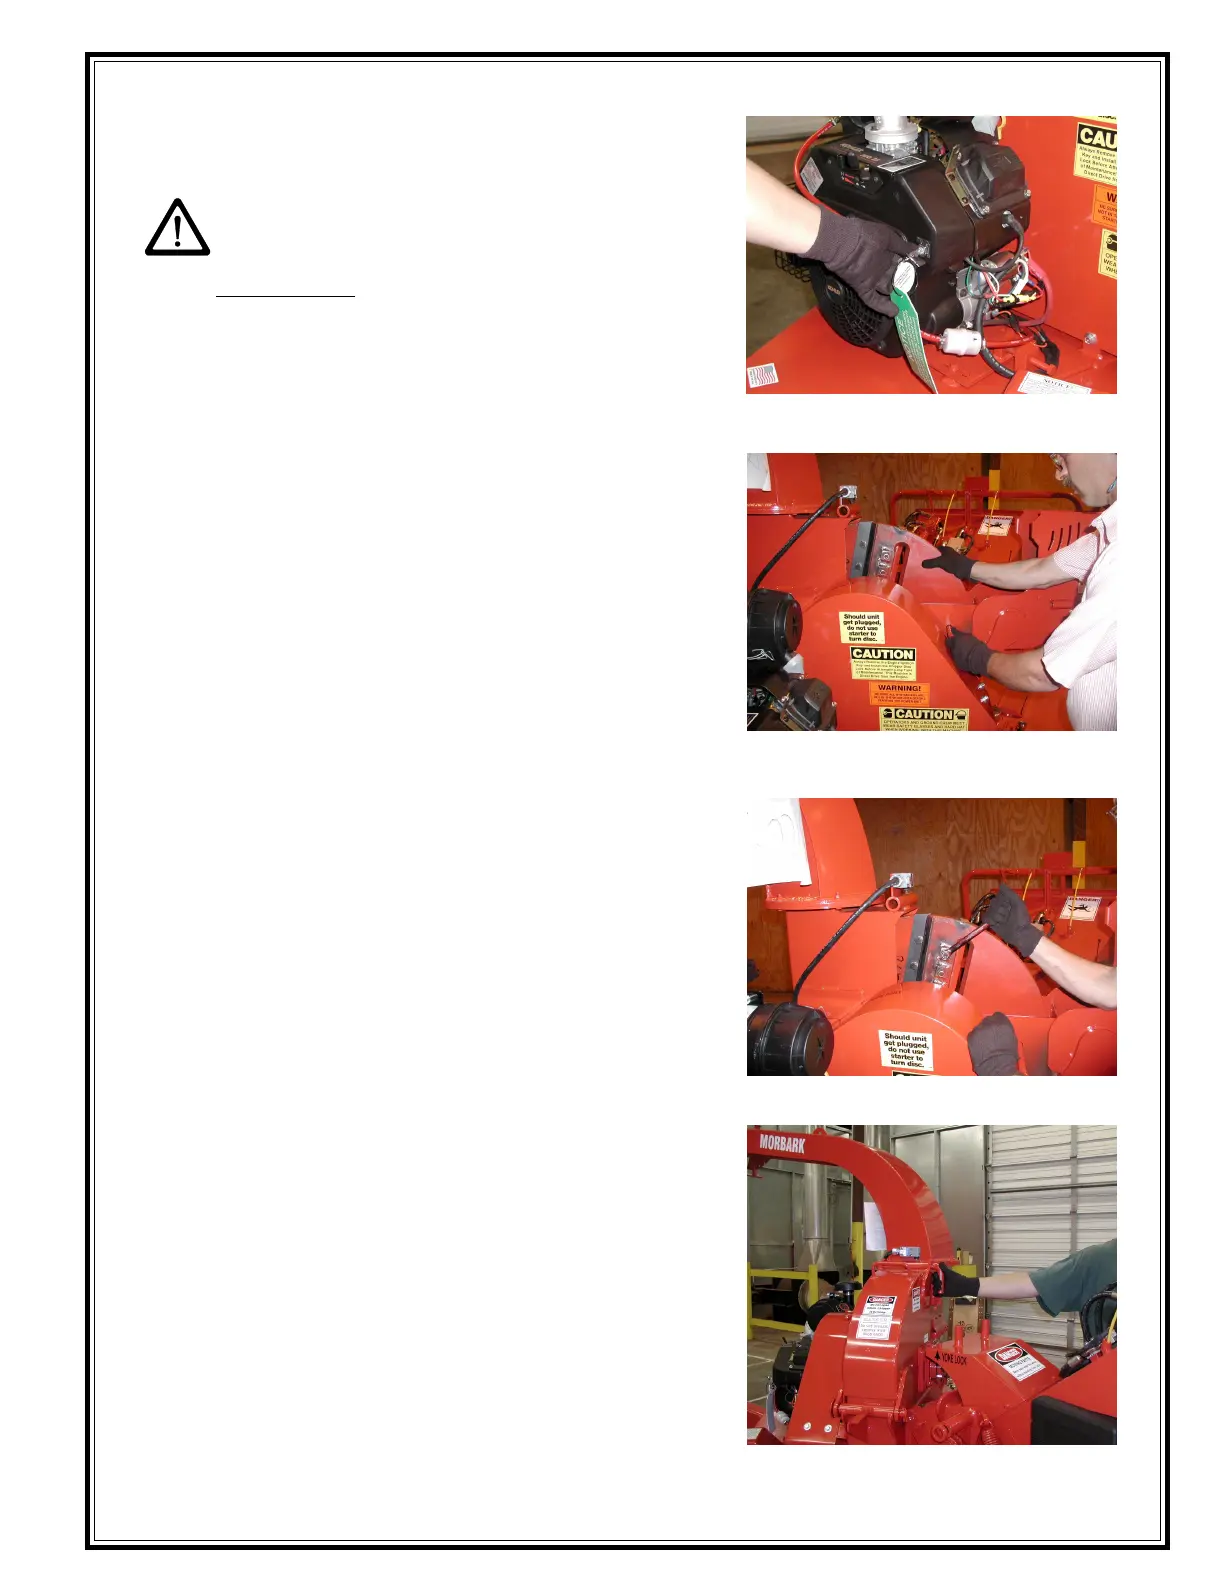
INSPECTING CHIPPER KNIVES
CAUTION
BEFORE INSPECTING KNIVES
Always remove ignition key and install
disc lock pins.
NOTE: ALWAYS USE LOCK OUT
PROCEDURES
1. Remove the pin from the chipper hood and open
the chipper hood.
2. Turn disc by hand until first knife is accessible.
3. Install the disc lock pin, rotate the disc until the pin
enters the access hole on the chipper disc.
4. Inspect knives. If knives need to be replaced, refer
to "Changing Chipper Knives" section (page 31).
5. If knives are in good condition, check the1/2-13
knife bolts for tightness. (Refer to the torque chart
on pg.36)
6. Remove the disc lock pin and rotate the disc by
hand until the next knife is accessible.
7. Replace disc lock pin.
8. Repeat steps 6 & 7 until all knives are checked.
9. After inspecting all knives and bolts, remove
the disc lock pin.
10. Close the chipper hood, install the chipper hood
pin, and safety clip.
MAKE ONE LAST VISUAL INSPECTION
1. Check tightness of all bolts.
2. Clear infeed of all debris.
3. You are now ready to begin chipping.
NOTE:
Do not leave the machine unattended with the engine
running.
It is recommended that at least two people remain at the
job site during machine operations.
Always have an adequate fire extinguisher and first aid kit
handy at all times.
Remove the ignition key before attempting any
maintenance.
Make sure Disc Lock Pin is properly installed
all the way through to the other side.
Reinstall Disc Hood Pin.
Check all knife bolts for proper torque.