02/02
32
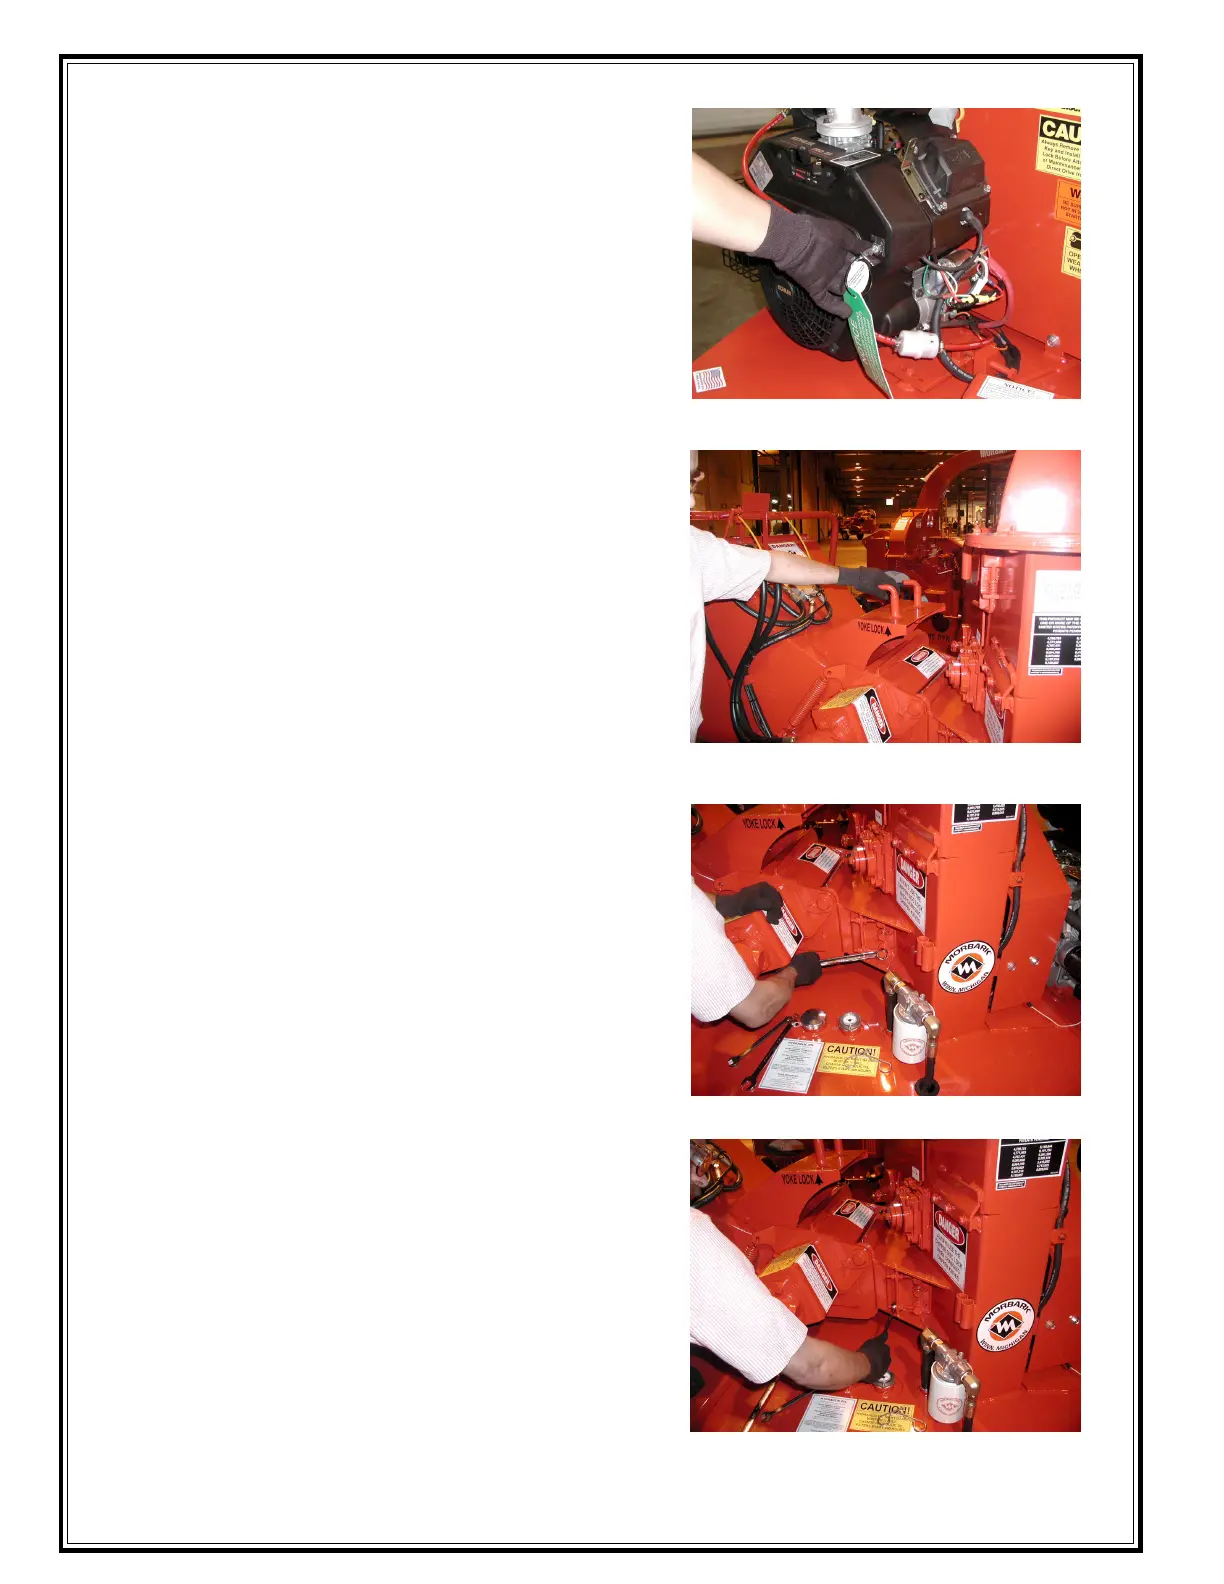
GENERAL MAINTENANCE
INSPECTING AND ADJUSTING THE
KNIFE ANVIL CLEARANCE
The anvil should be adjusted to a minimum of .060 and a
maximum of .100 from the cutting edge of the highest
chipper knife.
To inspect and adjust the knife anvil clearance, follow these
steps:
1. Turn the engine off and remove the ignition key and coil
wire (on gasoline power units.) Wait until the disc
comes to a complete stop.
Note: ALWAYS USE LOCKOUT PROCEDURES
2. Remove the bottom nuts on both yoke springs.
3. Raise the yoke assembly by using the tongue jack and
pad welded o the road side of the machine(facing the
rear of the machine) and install both yoke lock pins.
Note: the yoke lock pins are located on the side of the
infeed. It is absolutely essential to install these pins prior to
working beneath the feed wheel. Make sure these pins are
completely inserted. These pins prevent the feed wheel and
yoke from falling accidently.
4. The anvil clearance can be checked by reach-
ing into the infeed spout.
5. Use a feeler gauge to check the clearance
between the knife anvil and the cutting edge of
each knife. Set anvil to the knife that is located
closest to the anvil.
6. Loosen the three anvil bolts by using a 15/16"
socket or wrench.
7. Adjust the anvil to the desired position using the
two eye bolts located behind the anvil bolts.
8. Retighten the anvil bolts. (Refer to torque chart on page
36.)
9. Turn the disc counter clock wise to check for
proper clearance on the other knives, ensuring
that the closest knife is no closer than .060-.100".
Remove Ignition Key before attempting
any maintenance.
Trap the Infeed Yoke with the Yoke Lock
Pins.
Loosen the Three Anvil Bolts.
Adjust the Anvil using the Two Eye Bolts.