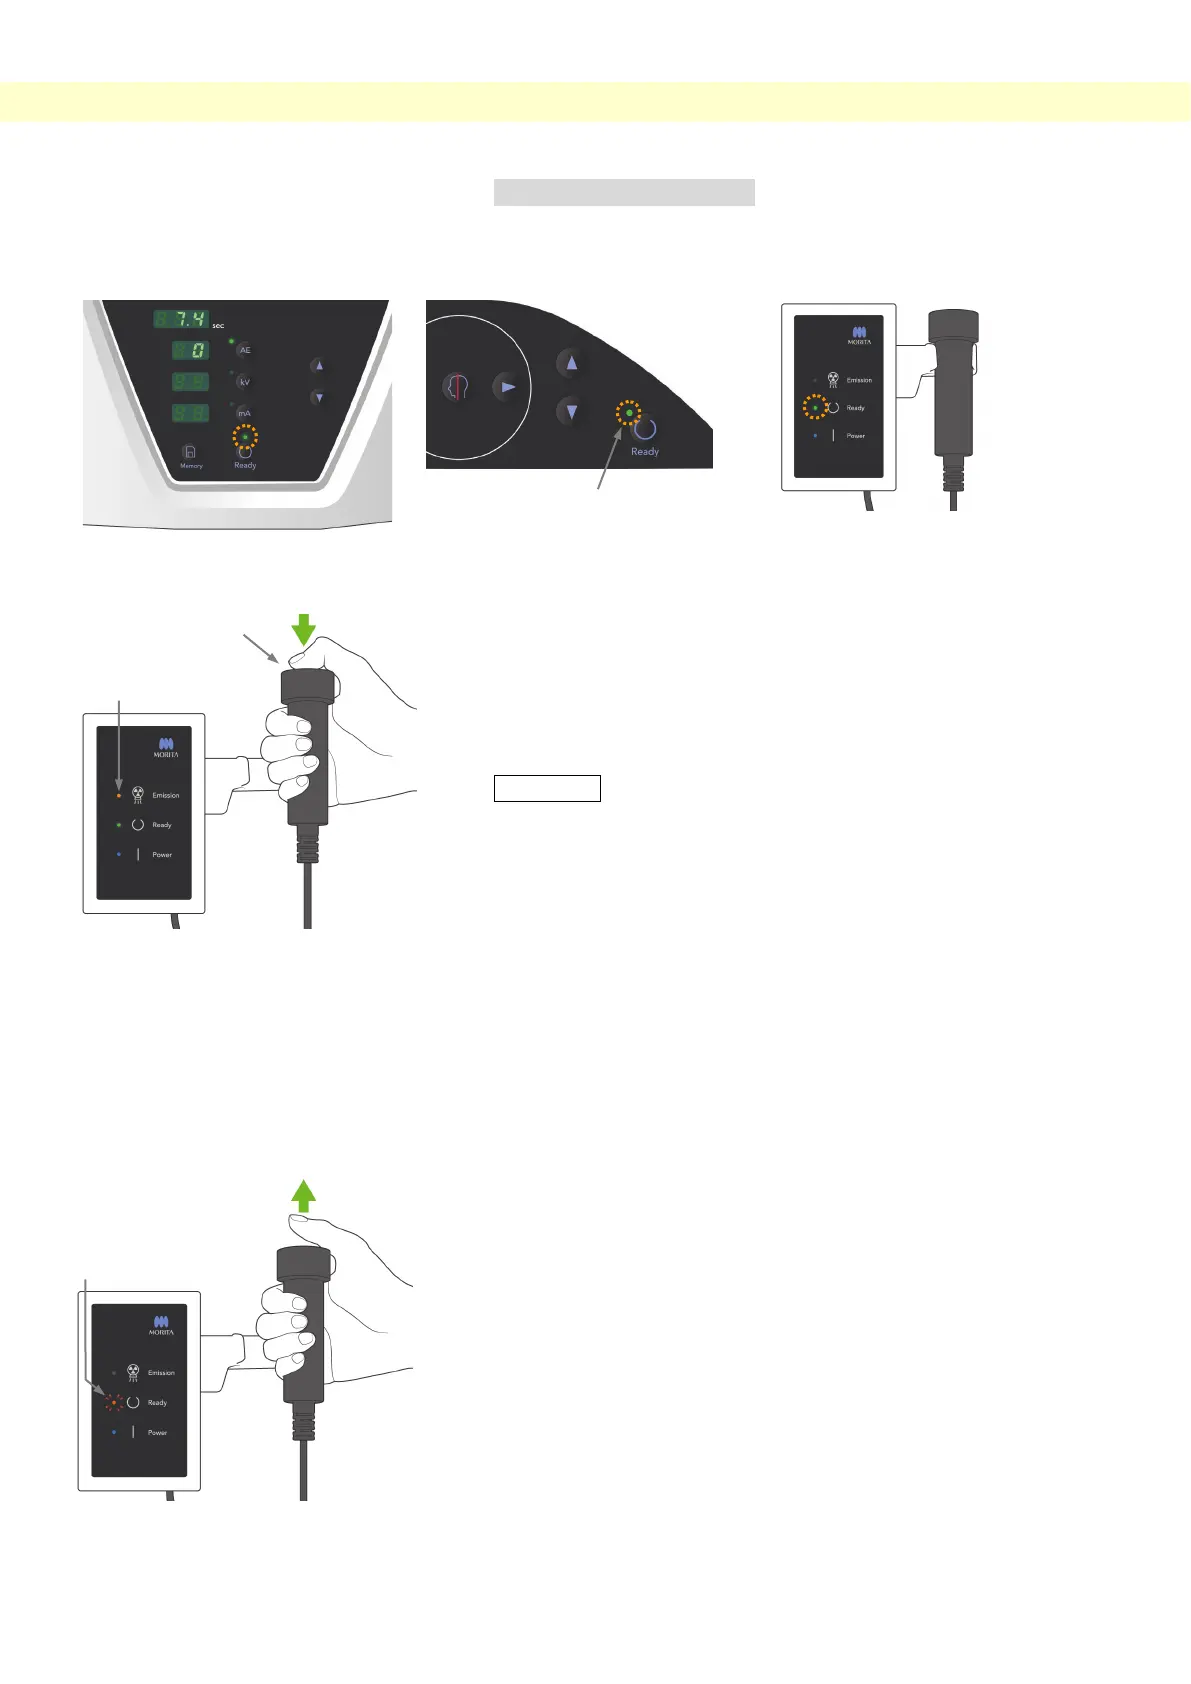
Panorama Exposures
(5) Panorama Exposures
1. Make sure the green Ready LED is on; check the arm,
patient frame or control box.
2. Pick up the handswitch and hold down the emission button.
The arm will start to rotate and X-rays will be emitted.
During X-ray emission, the yellow Emission LED on the
control box will light up and an audible signal will sound.
* During X-ray emission, the LED on the cassette will be
amber.
Usage Note
♦ Error number 18 (Err. 18) appears if the computer is not
ready.
If this happens, turn off the main switch. When the
computer is ready, turn the main switch back on.
If the cassette is not in the panorama cassette holder,
insert it and press the Ready key on the arm operation
panel again.
3. Keep holding the emission button down. X-ray emission
and arm rotation will stop, the Emission LED will go out,
and the audible signal will stop. Then the arm will go to its
patient egress position. This completes the exposure
procedure.
Now release the emission button.
The Ready LED will blink and be amber to show that the
image is being transmitted. After transmission is completed,
the Ready LEDs on the arm and control box will change to
green and blink on and off.
 Loading...