How to fix inconsistent density in Morita veraviewepocs 2d Medical Equipment images?
- EEmily CarpenterSep 12, 2025
To fix inconsistent density in images from your Morita Medical Equipment, configure the application with the tool bar.
How to fix inconsistent density in Morita veraviewepocs 2d Medical Equipment images?
To fix inconsistent density in images from your Morita Medical Equipment, configure the application with the tool bar.
What to do if Morita veraviewepocs 2d Medical Equipment X-ray is terminated and the computer isn't receiving the image?
If you're experiencing issues with your Morita Medical Equipment where the computer isn't receiving the X-ray image and the X-ray is terminated, it may be a LAN cable transmission problem. Reconnect and confirm the LAN cable connection. You may also need to restart the i-Dixel application.
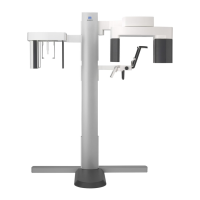
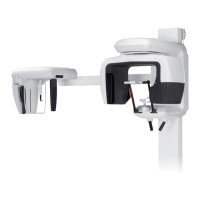
Why Morita Medical Equipment Panorama & Cephalo images are too light or black?
If you're experiencing issues like images being too light, having lines, large white borders, partial images, or being completely black with your Morita Medical Equipment Panorama & Cephalo, it may be due to noise interference or a short, temporary power cut. Turn the unit off, ensure patient and user safety, and then turn it back on to see if normal operation is restored. Also, ensure the power supply is AC 108 to 132 V (including line voltage regulation) with at least 20 A capacity for EX-1, AC 220/230/240 V, 16 A for EX-2, and that the unit is properly grounded. Avoid using devices that might produce noise during exposure.
What to do if Morita Medical Equipment displays message 30 about communication issues?
If your Morita Medical Equipment displays message number 30, indicating a communication problem with the driver software, it may be because exposure was initiated without selecting a patient page or when the software wasn't ready. Close the message on the computer monitor, select a patient page, press the Ready key, repeat the Ready procedure (press Ready key or emission button), and then make the exposure.
What to do if Morita veraviewepocs 2d Medical Equipment shows 'Computer is not ready to capture images'?
If your Morita Medical Equipment displays the message 'Computer is not ready to capture images', it could be due to the computer running out of memory from repeated exposures and image reconstruction. Restart the i-Dixel application to resolve this.
What to do if Morita veraviewepocs 2d Medical Equipment spontaneously resets or switches don't work?
If your Morita Medical Equipment spontaneously returns to its initial state or the switches are unresponsive, turn the unit off, ensure patient and user safety, and then turn it back on to see if normal operation is restored. Also, ensure the power supply is AC 108 to 132 V (including line voltage regulation) with at least 20 A capacity for EX-1, AC 220/230/240 V, 16 A for EX-2, and that the unit is properly grounded.
What does Morita veraviewepocs 2d Medical Equipment message No.: 39 mean?
Morita Medical Equipment message No.: 39 indicates that the high-voltage circuit is not working and X-ray is terminated. Turn the unit off, wait 1 minute, and then turn it back on.
How to resolve uneven image density with Morita veraviewepocs 2d Medical Equipment?
To resolve uneven image density with your Morita Medical Equipment, adjust the density using the i-Dixel tool bar settings.
What does it mean if there is a message in Morita veraviewepocs 2d Medical Equipment arm display?
If there's a message in the arm display of your Morita Medical Equipment, it could indicate that the patient is leaning or pulling on the frame. Have the patient relax and avoid leaning or pulling on the frame.
What does Morita veraviewepocs 2d message No. 30 mean?
Morita Medical Equipment message No. 30 indicates that communication with the driver software cannot be established, possibly because the application software isn't ready or is busy processing data. Start the application software if it's not already running. If the computer is reconstructing an image or processing something else, wait for it to finish.
X-ray Tube Voltage | 60-90 kV |
---|---|
X-ray Tube Current | 1-15 mA |
Focal Spot Size | 0.5 mm |
Field of View | Panoramic |
Image Receptor | CCD Sensor |
Patient Positioning | Standing or Sitting |
Power Supply | AC 120/230 V, 50/60 Hz |
Imaging System | Digital Panoramic |
Explains the importance of safety precautions and recording installation details.
Defines WARNING, CAUTION, and Usage Note symbols for user awareness.
Warns against using wireless devices in the examination area to prevent interference.
Details requirements for X-ray shield locations and protective gear.
Advises caution when X-ray irradiating patients with implantable electronic devices.
Identifies key parts of the main unit like Arm, Lift, X-ray Head.
Details the control box and patient frame elements like buttons and displays.
Identifies parts specific to the optional Cephalo Unit, e.g., Nasion Plate, Craniostat.
Describes buttons and controls on the patient frame and arm operation panels.
Lists device parts and consumable items like cassettes and bite blocks.
Outlines initial steps before operation, including software startup and turning on the unit.
Details pre-operation safety checks to ensure safe functioning.
Step-by-step guide for performing panorama X-ray exposures.
Step-by-step guide for performing cephalo X-ray exposures.
Describes steps to take after the unit has been used, including turning it off.
Instructions for routine cleaning and maintenance of the unit's components.
Details items to check during regular annual inspections for proper function.
Lists components and their service life, noting critical safety parts and ordering info.
Addresses issues like no power and unresponsive switches, providing remedies.
Troubleshoots problems related to computer screen messages and arm display errors.
Covers image quality issues and abnormal unit behavior, providing solutions.
Provides a guide to resolving issues based on specific error message numbers.
Presents a step-by-step flowchart for verifying the Digital Direct Auto Exposure.
Details the setup process and how to make exposures for DDAE verification.
Explains how to compare DAP values and interpret the verification results.
Lists general specs like product name, model, safety classifications, and intended use.
Details technical parameters of the X-ray tube, exposure times, voltage, and current.
Covers image resolution, quality metrics, and X-ray dose data.
Outlines requirements for computers, connectivity, and environmental operating conditions.
Declares the device's compliance with EMD standards regarding radio frequency emissions.
Details the device's immunity to electromagnetic disturbances and required environments.