MORTEX PRODUCTS INC 501 TERMINAL RD FORT WORTH, TX 76106 Page 12
CARBON MONOXIDE HAZARD
If the gaskets on the combustion air blower assembly or
the ue box cover are damaged or deteriorated, leaks
in the combustion system may develop. Leaks in the
combustion system will cause incomplete combustion
which may allow high levels of carbon monoxide to leak
into the living space.
Under no circumstances should the furnace be operated
if the combustion air blower or ue box gaskets are
damaged or deteriorated. Turn the furnace o and do
not operate it until these gaskets have been replaced.
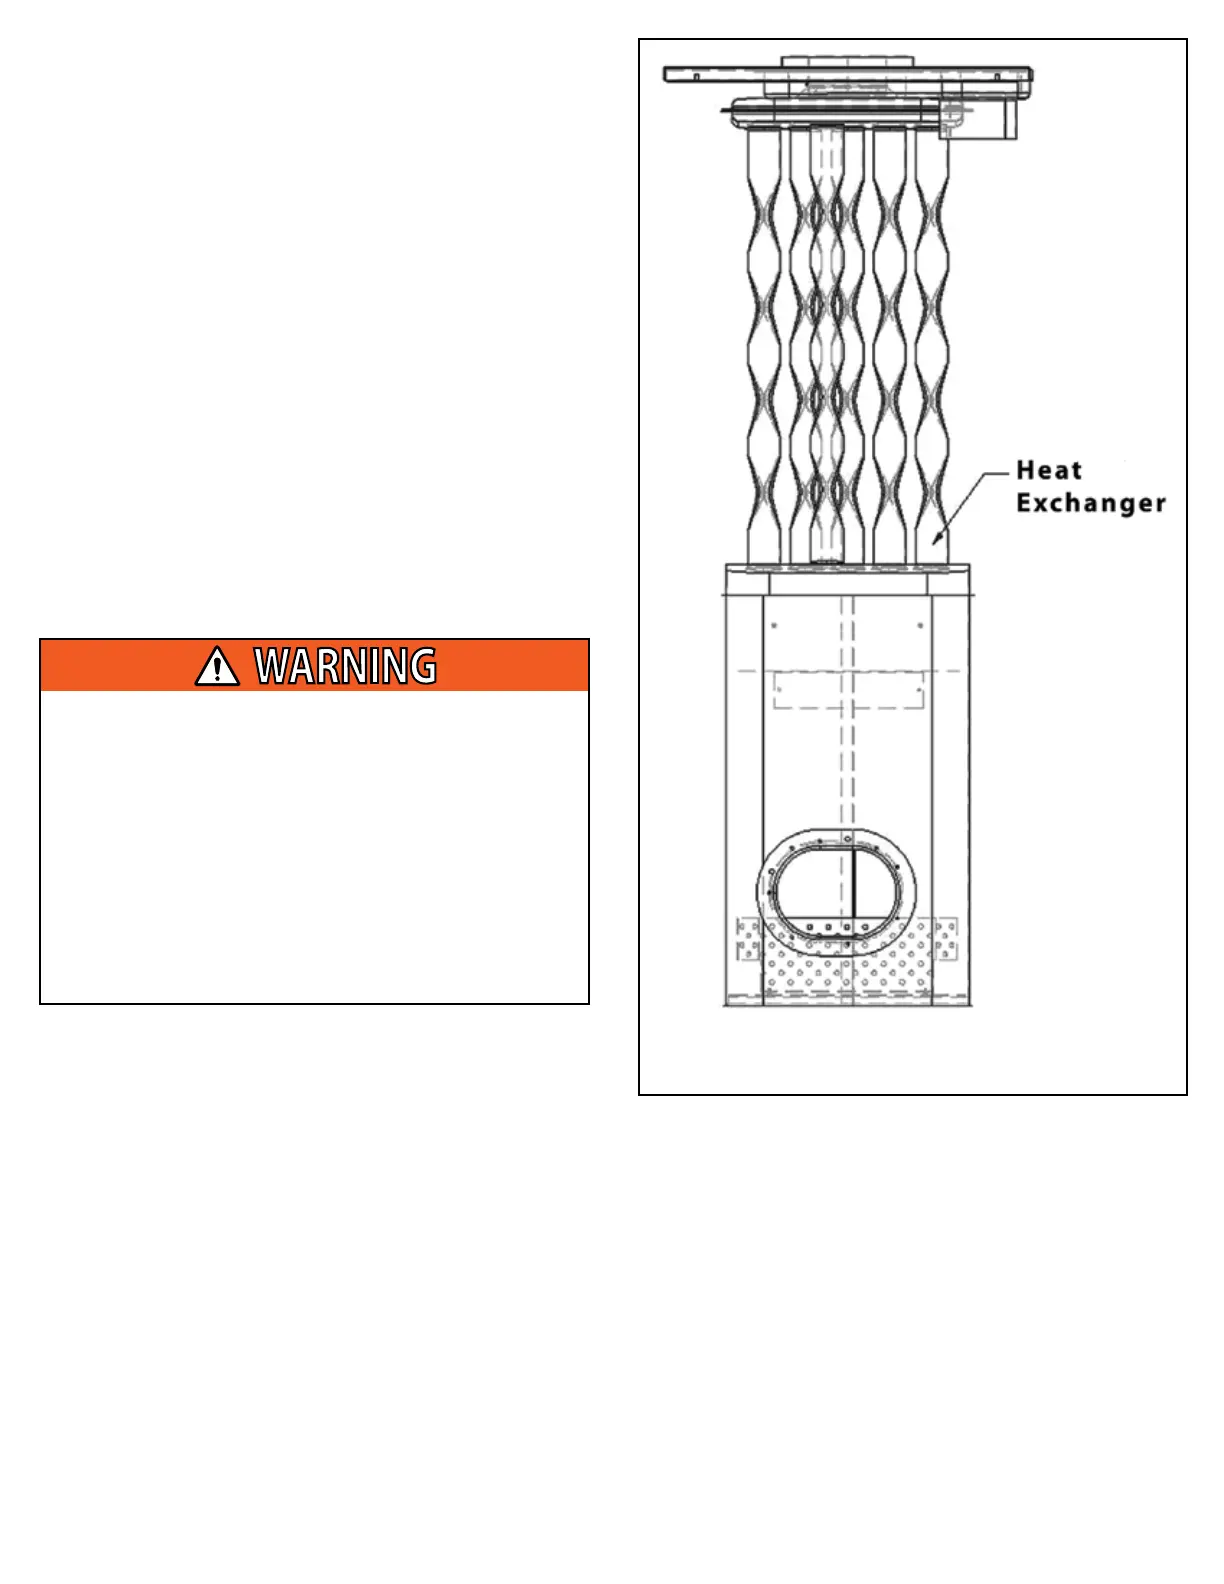
Figure 9: Heat Exchanger Assembly w/ Baes
Cleaning the Heat Exchanger
1. Remove the burner assembly as described in steps 1-8 in
“Burner Removal and Cleaning” on the previous page of this
manual.
2. Remove the combustion air baes from the burner box.
The combustion air baes are secured to the vestibule panel
with two screws on each bae located on the top and bottom
of the bae.
3. Use a brush and a vacuum cleaner to remove soot, dust, and
debris from the inside of the heat exchanger.
4. Check all of the baes for cracks or deterioration.
5. Use a mirror to check the bae inside the drum at the top of
the heat exchanger for cracks or deterioration.
6. Check the heat exchanger for any visible signs of cracks or
holes.
7. Use a brush and vacuum cleaner to clean soot, dust, and
debris from the inside of the burner box.
8. Reinstall the combustion air baes in the burner box.
The combustion air baes are secured to the vestibule panel
with two screws on each bae located on the top and bottom
of the bae.
9. Reinstall the burner assembly as described in steps 9-16 of
“Burner Removal and Cleaning” on the previous page of
this manual.