USER MANUAL | FOLDING WHEELCHAIRS – ADJUSTMENTS AND MAINTENANCE
NOTE: If you ignore these Warnings or fail to inspect or maintain your wheelchair as directed in the manual , you may fall, tip over or lose control of the wheelchair and seriously
injure yourself or others or damage the wheelchair.
20
8.4.3 CLEANING YOUR WHEELCHAIR
– Use a soft clean cloth with soap and water to clean
your wheelchair.
– Rinse and dry the wheelchair adequately.
– DO NOT use solvent cleaners.
– DO NOT use abrasive cleaners.
– DO NOT use a pressure cleaner.
PAINT FINISH AND FRAME
– Clean the painted surfaces with mild soap at least once
a month.
– Protect the paint with a coat of non-abrasive auto wax
every three months.
AXLES AND MOVING PARTS
– Clean around axles and moving parts WEEKLY with a slightly
damp cloth.
– Wipe off dust or dirt on axles or moving parts.
UPHOLSTERY
– Hand-wash only (machine washing may damage fabric).
– Hang to dry only. DO NOT machine dry as heat will damage
fabric.
8.4.4 STORING AND SHIPPING YOUR WHEELCHAIR
– When not in use, keep your chair in a clean, dry area. Failure to
do so may result in your chair rusting and/or corroding.
– If your chair has been in storage for more than a few weeks you
should make sure it is working properly. You should inspect and
service, if necessary, all items in section 11. Safety Inspection
Checklist.
– If your chair has been in storage for more than two months, it
should be inspected by a qualified technician.
– When shipping you wheelchair use a strong cardboard box to
protect the wheelchair from any impact. Inspect the wheelchair
once it’s received.
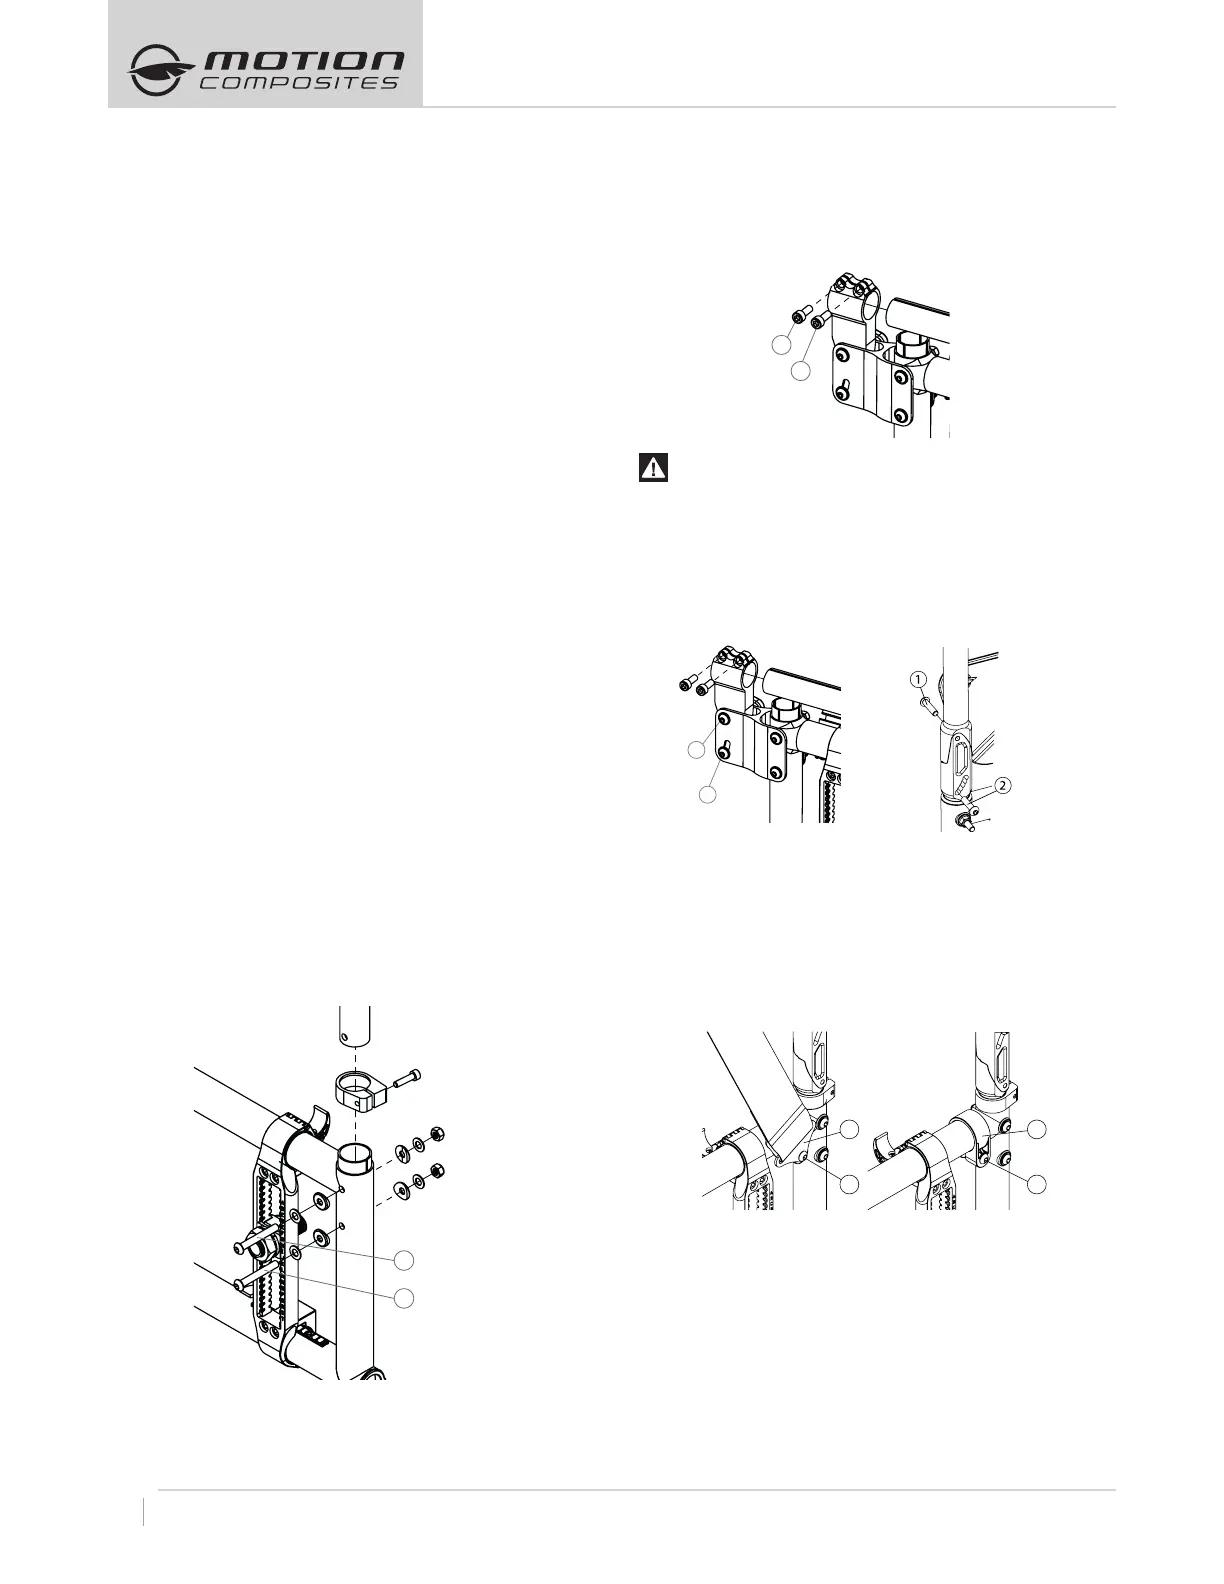
8.5 BACKREST
8.5.1 REMOVING/INSTALLING THE BACK CANES
– Loosen the top bolts (1) and (2), which are also used to support
the armrest socket (Swing Away and Flip Back armrest).
– Slide the back post to remove it from the tube.
– Reinstall the back post in the reverse order and tighten
screws snugly.
– Tighten bolts (1) and (2) firmly.
– Wheelchairs equipped with Flip Back armrests; tighten screw
(1) while paying special attention to the force needed to flip
back the armrest.
.
8.5.2 DEPTH ADJUSTABLE OPTION
– Loosen screw (1 and 2) which are also used to support the
armrest socket (Flip Back armrest).
– Reinstall the back post in the reverse order and tighten screws
snugly.
– Tighten bolts and firmly.
WARNING
Weight Limit 175 lb (79 kg) and not WC-19 compatible9
8.5.3 ADJUSTING THE BACK ANGLE
– Loosen screw (1) and remove screw (2) from the levelling
device.
– Adjust to desired angle by sliding the mechanism.
– Reinstall screw (2) and tighten both screws to fit snugly.
– Settings: 5° increments from 85° to 110° (Kids 90° to 105°).
Fig. a Fig. b
8.5.4 REMOVING/INSTALLING THE POSITIONONG BELT
– Remove Screw (1) in order to remove the positioning belt clamp
(2) (Fig. a)
– Reinstall screw (1) directly on the frame clamp (3) (Fig. b)
– Tighten screw (1) until it is properly tightened.
– Repeat the same steps on the other side .
Fig. a Fig. b
8.5.5 ADJUSTING THE BACKREST HEIGHT
– Loosen the screw (1) that holds the back upholstery.
– Pull backrest upholstery down several centimeters in order to
access screw (2) that holds the push handle.
– Remove screw (2) and the backrest handle.
– To adjust the backrest height, with the help of a threaded rod
(0,75-20), move the dowel nut (3), which is located inside the
handle.
– Once this step is completed, use screw (2) to hold the dowel nut
(3) while removing the threaded rod.
– Remove screw (2) and reinstall backrest handle.
– Align screw (2) with the mounting hole.
1
2
1
2
1
2
1
2
1
3
 Loading...