Disassembly/Reassembly Procedures: Radio Reassembly 8-17
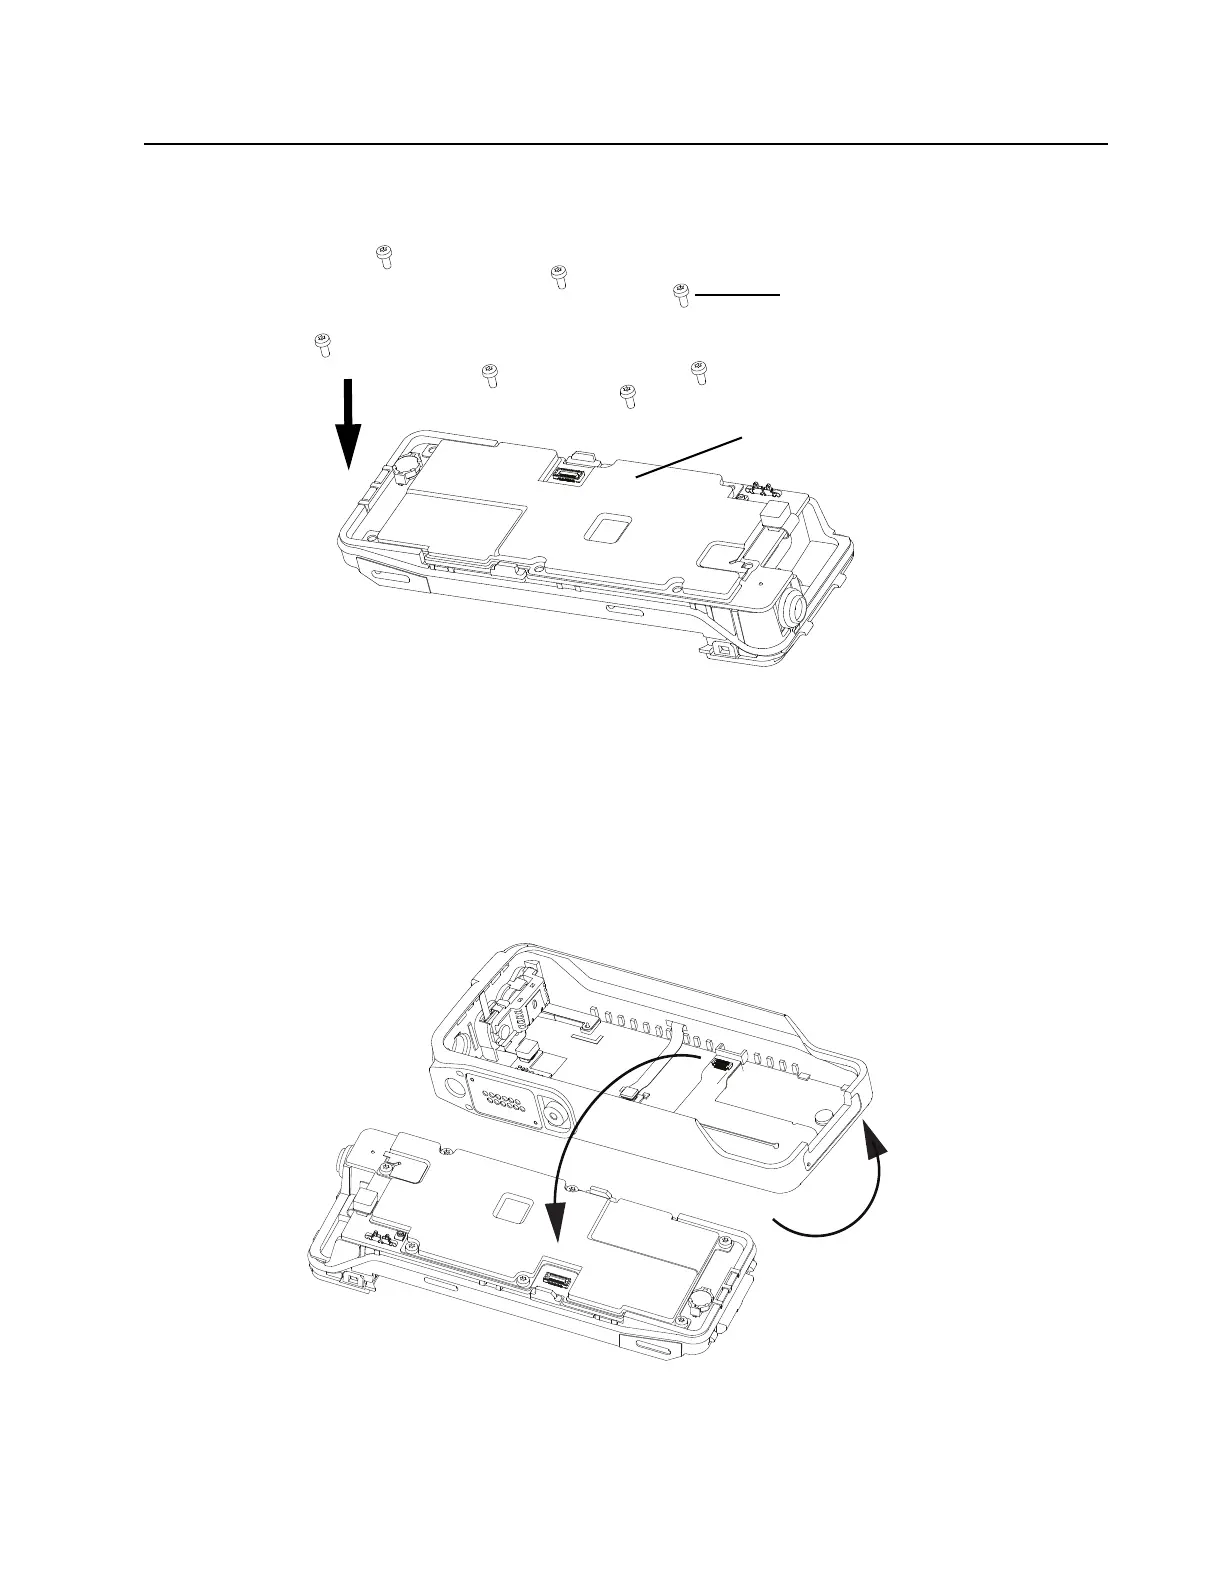
2. Torque all seven Chassis Screws (25†††) with a Torx IP6 Bit and a Torque Driver to 3.0 in-lbf
in the sequence as shown in Figure 8-20.
Figure 8-20. Torque in the Chassis Screws.
8.6.4 Reassemble the Main Subassemblies (A and B)
1. Complete the steps in Section 8.6.2. through Section 8.6.3.
2. Connect the connector on main flex to main board. Slide the Chassis assembly into the Front
Housing as shown in Figure 8-21.
Figure 8-21. Slide chassis assembly into Front Housing
NOTE: Main Flex needs to be seated properly before assembly.
1
5
4
7
2
3
6
Chassis Screws
Secondary Shield
 Loading...