4. Pipe joints and couplings (Pressure test)
1. Raise the piston up to the end of the run.
2. Work the hand pump until the pressure is stabilized.
3. Keep the pipes under pressure for 5 min. and observe the possible pressure fall because of leaks (note the pressure might decrease due to cooling of oil).
4. Check the pipe joints and couplings are correct.
5. Overload pressure switch, low hysteresis
1. Close the shut-off valve. Connect the terminals to a multimeter (if digital, in a continuity position; if analogical, in low resistance position).
2. Operating the pump would cause a pressure of 1 bar above the Maximum Static Pressure.
3. Adjust the pressure switch using a screwdriver until the contact is energized, thus receiving the appropriate signal from the multimeter.
6. Minimum pressure in cylinder (for indirect acting lifts 2:1). Screw 6
1. Wedge the lift car using the safety gear.
2. Press the manual lowering pushbutton and check the piston does not go down.
3. If it does, tighten the cylinder minimum pressure screw until it does no longer go down.
4. Free the lift car using hand pump.
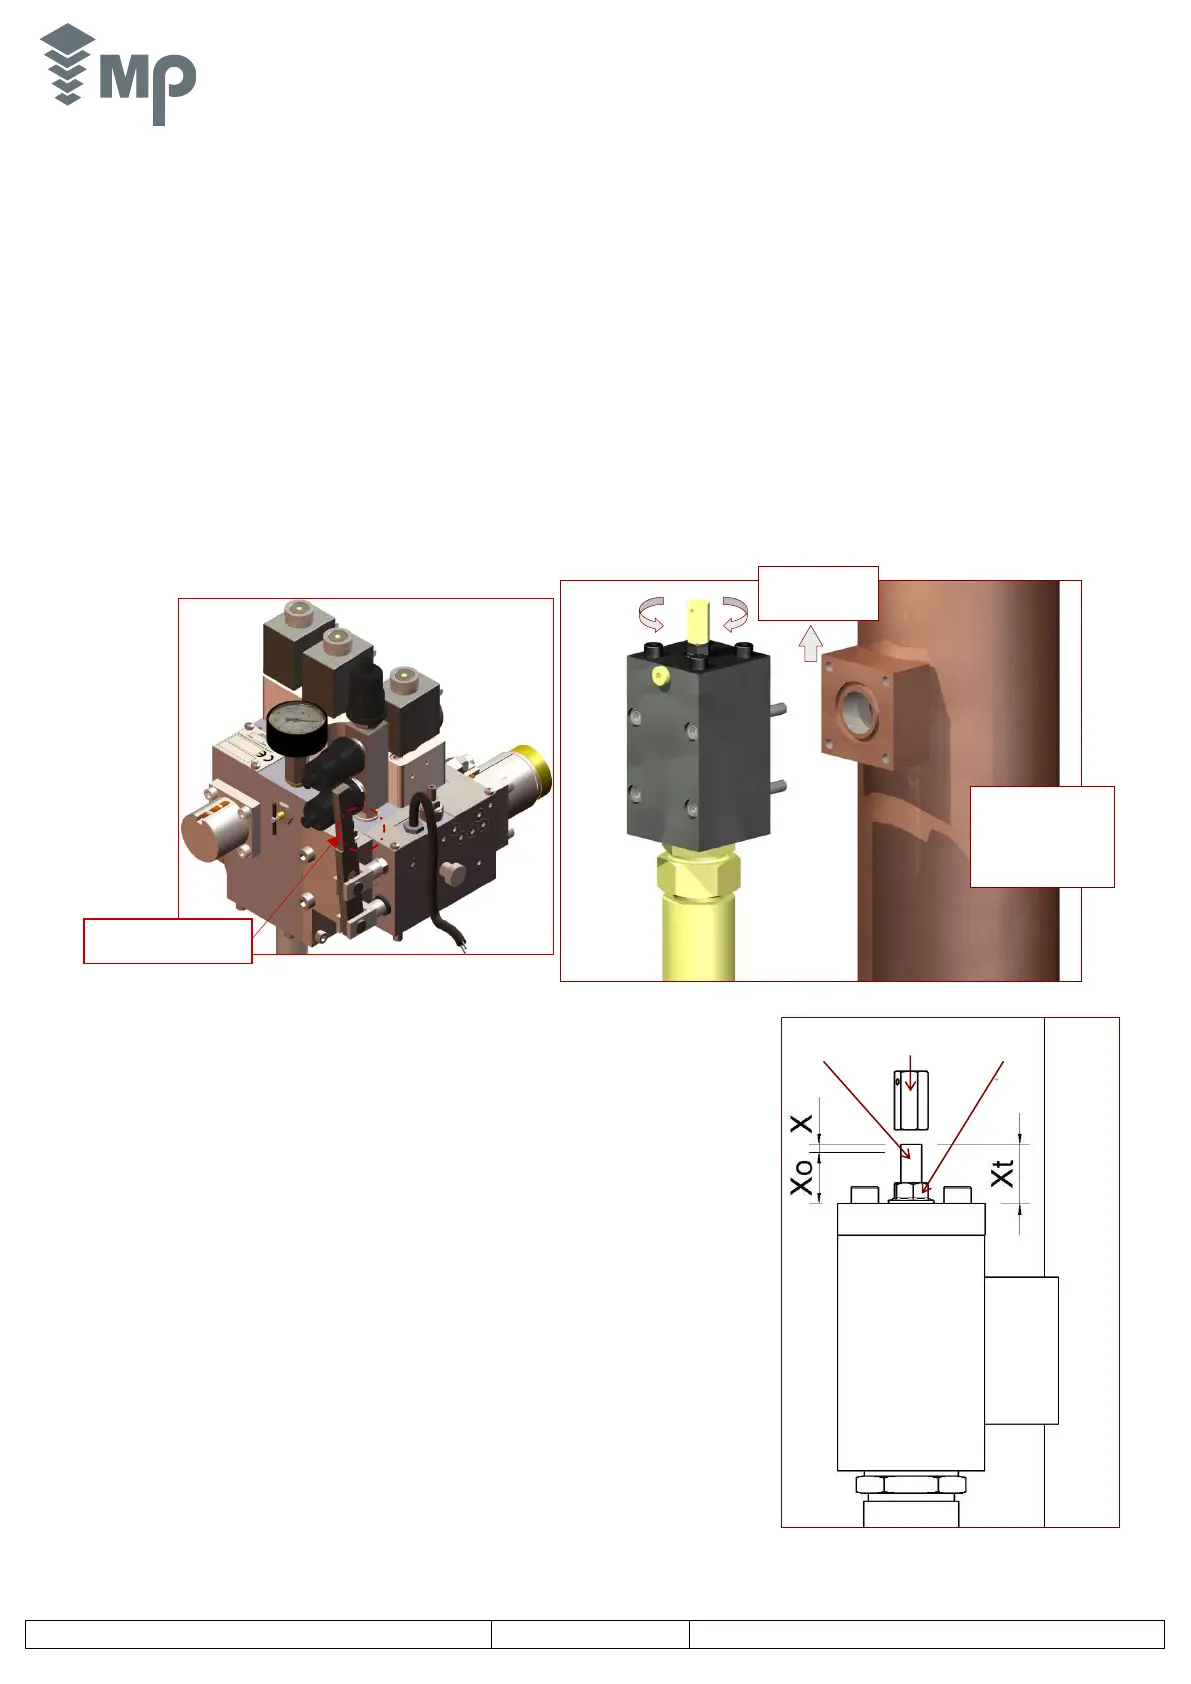
7. Excluding the manometer from the circuit
1. Turning the manometer protecting key anticlockwise enables working pressure to be read at any time.
2. Protecting key must remain locked (fully tightened) to ensure the correct operation of the manometer.
8. Rupture valve
DESCRIPTION
This device consists of a valve that stops the flow of oil when the downward speed of the lift
exceeds a preset value.
The Rupture Valve Test must be done with the FULL LOAD in the lift according to EN 81-2 and EN
81-20 standard.
1. Testing the rupture valve at free fall speed.
- Run the car with full load to the highest floor.
- Fully tighten the screw to test the rupture valve.
- Run the car to the lowest floor.
- The car should descend at a higher speed than the rated speed.
- The pipe rupture valve should trip at 130% of the rated speed.
When this happens, the flow of oil from the cylinder is cut off and the lift stops.
- Fully loosen the testing crew. This will allow the lift to operate normally in descent
but the lift will stop if the oil line breaks.
- Move the lift up to reset the rupture valve.
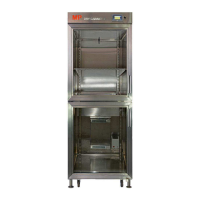
2. Valve adjustment (if the valve does not trip).
- This operation will only be done if the valve is not adjusted from the factory.
- Run the car to the highest floor.
- Unscrew the locknut.
- Move the car down.
- Tighten the adjusting screw according to the formula X
t
=X+X
o,
obtained from the
curves of the rupture valve certificate of conformity.
- Screw the locknut