7
3.1 General Information
The mounting location is important to the performance and operating life of the controller. The
environment must be dry and protected from water ingress. If required, the controller may be in-
stalled in a ventilated enclosure with sufficient air flow. Never install the MPPT unit in a sealed
enclosure. The controller may be mounted in an enclosure with sealed batteries, but never
with vented/
flooded batteries. Battery fumes from vented batteries will corrode and destroy the
MPPT circuits.
Multiple MPPT
can be installed in parallel on the same battery bank to achieve higher
charging current. Additional parallel controllers can also be added in the future. Each MPPT
must have its own solar array.
!
CAUTION: Equipment Damage or Risk of Explosion
Never install the MPPT in an enclosure with vented/ Flooded batteries. Battery
fumes are fl ammable and will corrode and destroy the MPPT circuits.
!
CAUTION: Equipment Damage
When installing the MPPT in an enclosure, ensure suf fi cient ventilation.
Installation in a sealed enclosure will lead to over-heating and a decreased product
lifetime.
NOTE : Mounting
When mounting the Mas MPPT ,ensure free air through the controller heat sink fins. There
should be at least 150mm of clearance above and below the controller to allow for cooling. If mounted
in an enclosure, ventilation is highly recommended.
Installaon3.0
3.2 Wiring
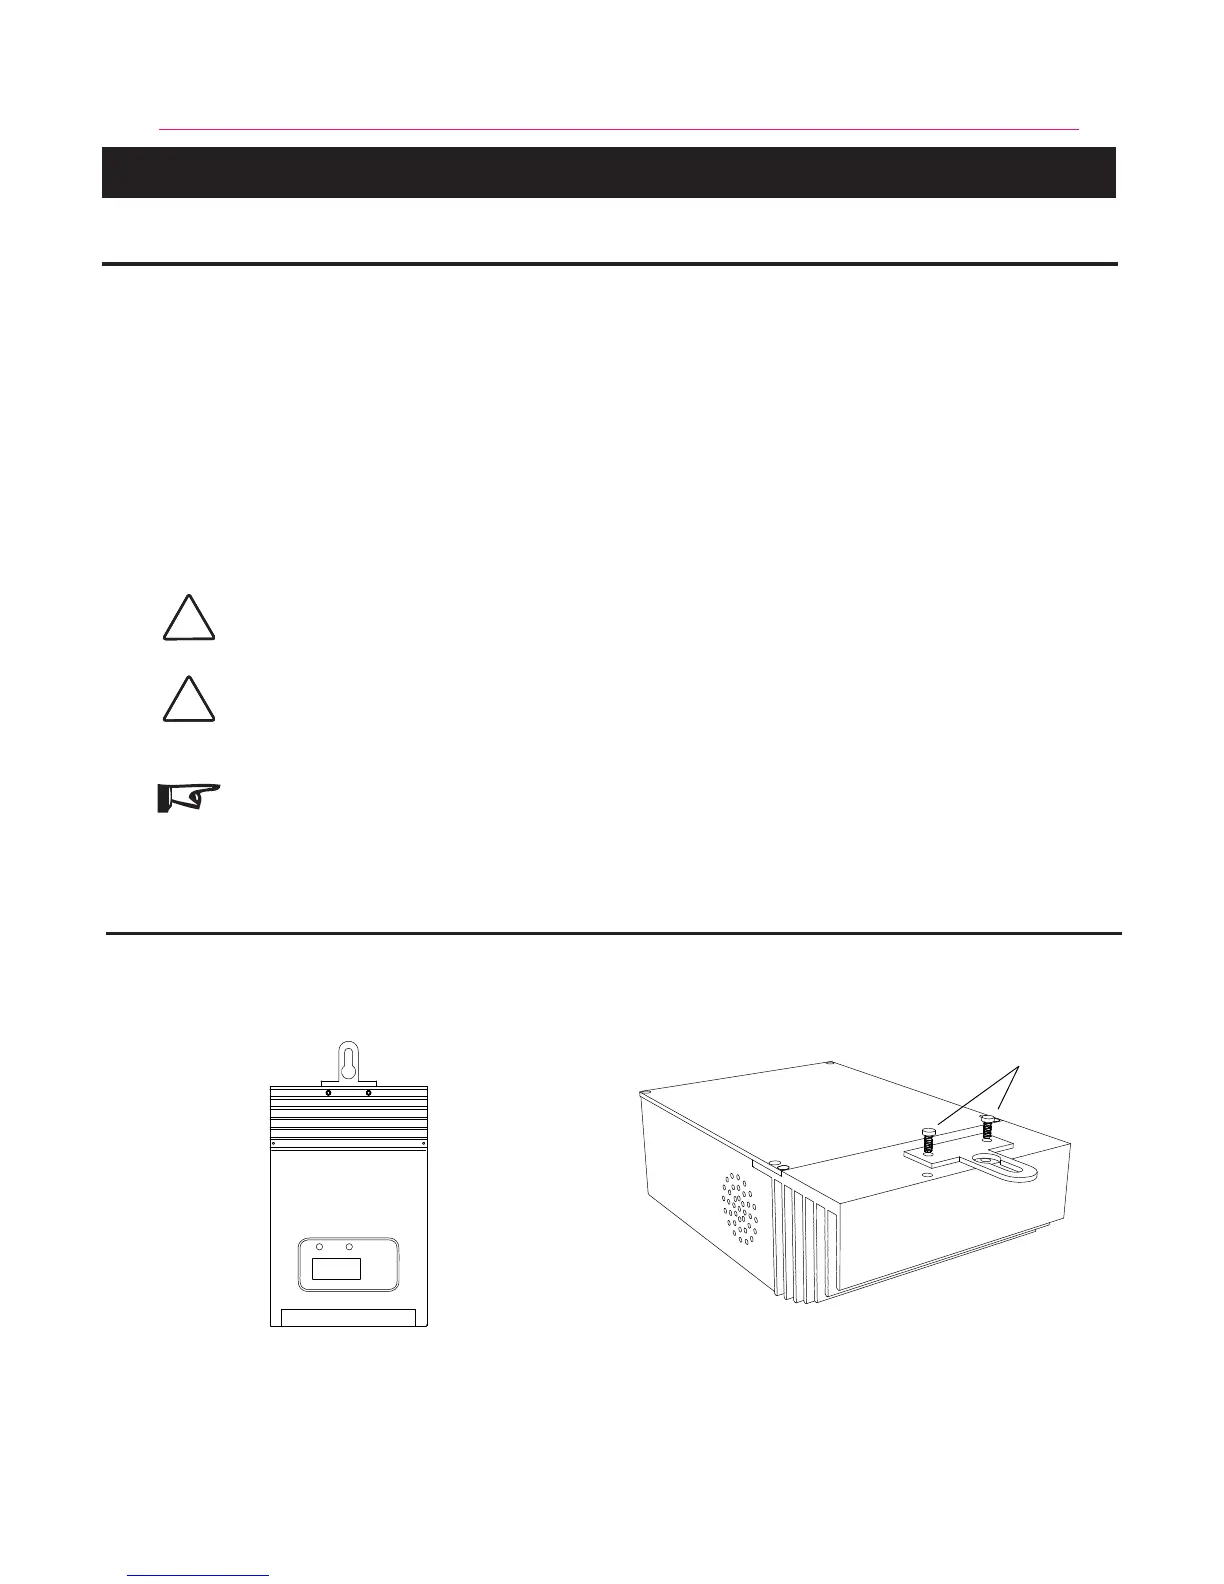
Step 1 - Mount to a Vertical Surface
Figure 3-1. Attaching the mounting hanger
M4 Screw