TEMPO
®
/ TEMPO/PLUS
®
/ TEMPO/REMOTE
®
/ TEMPO/EXT
®
• Owner’s Manual
6
TEMPO
®
/ TEMPO/PLUS
®
/ TEMPO/REMOTE
®
/ TEMPO/EXT
®
• Owner’s Manual 7
Step 4
Firmly connect the connector near the
“CONTROL END” marking to the back of the
control.Turn on power to the steam generator
and test the control to verify correct connec-
tions. Test per the instructions on page 9. Pro-
ceed with installation and verication of proper
control function.
IMPORTANT:
Turn power to the steam generator OFF
before installing the control. Failure to turn
the power off will result in a inoperable
control.
Step 5
Remove & discard peel-off paper to expose
adhesive liner as shown in Diagram 4.
Installation Instructions for TEMPO
®
& TEMPO/PLUS
®
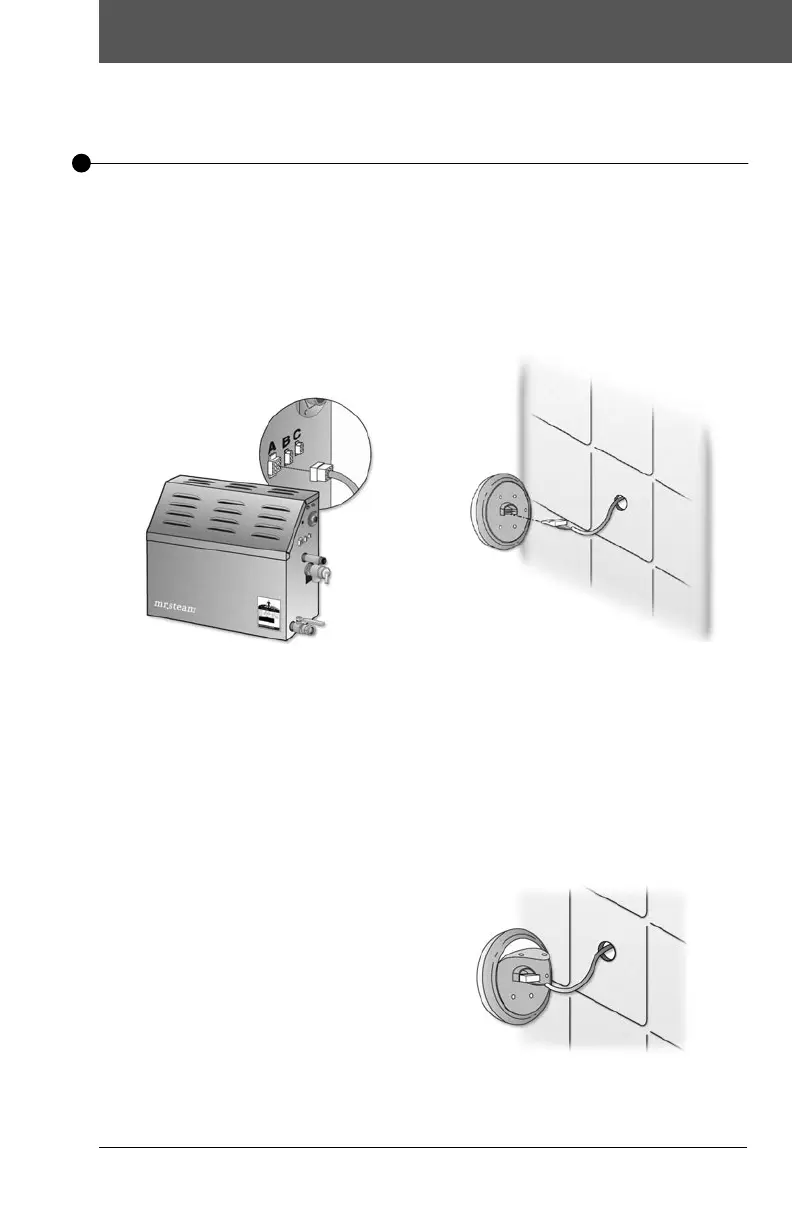
Step 3
Route the control cable ( provided with the
control ) from the wall cutout to the steam gen-
erator. Locate the end marked “GENERATOR
END” at the steam generator. Connect the
5/8” square connector to the steam generator
connector “A” as shown in diagram 2.
NOTE: The connector is keyed
IMPORTANT: Be careful not to strain, staple,
pinch or otherwise damage the control cable.
Route cable as required to permit replacement.
Diagram 2
Diagram 4
Diagram 3
 Loading...