TEMPO
®
/ TEMPO/PLUS
®
/ TEMPO/REMOTE
®
/ TEMPO/EXT
®
• Owner’s Manual
6
TEMPO
®
/ TEMPO/PLUS
®
/ TEMPO/REMOTE
®
/ TEMPO/EXT
®
• Owner’s Manual 7
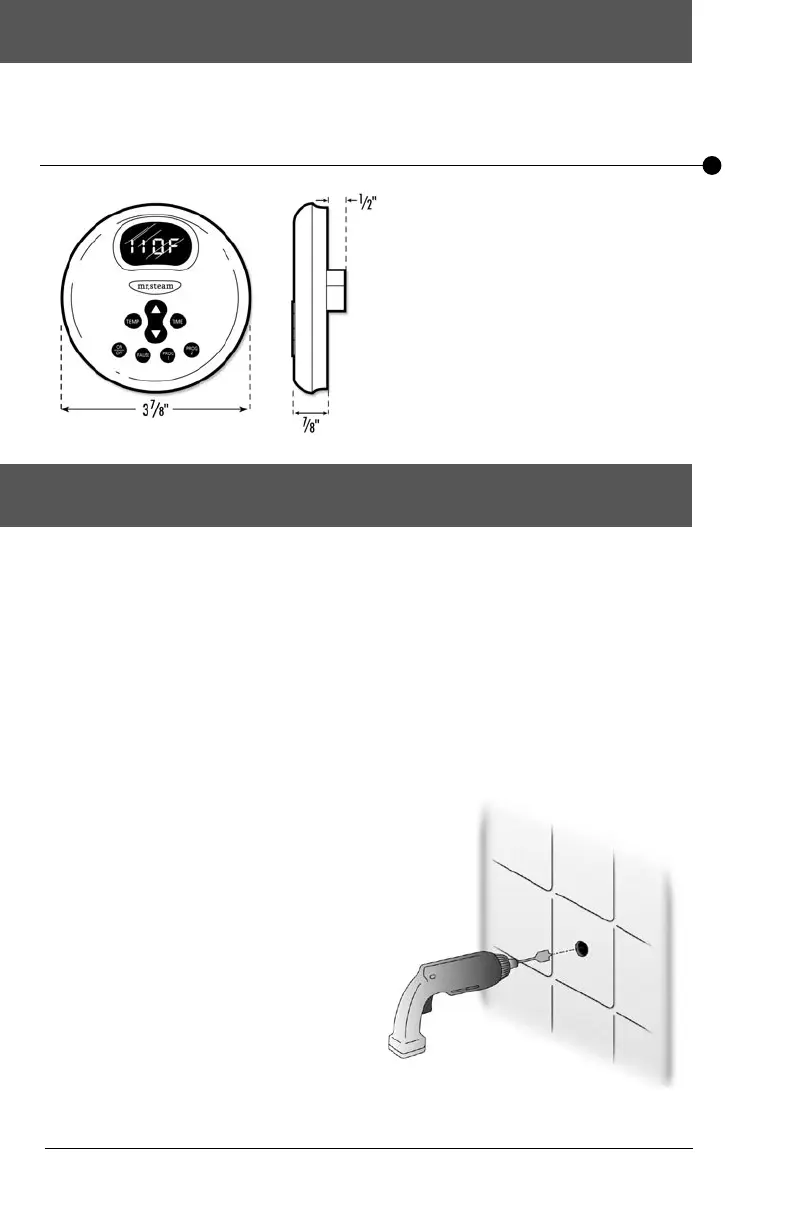
Dimensional Information for TEMPO
®
& TEMPO/PLUS
®
Installation Instructions for TEMPO
®
& TEMPO/PLUS
®
BOX CONTENTS:
• TEMPO
®
or TEMPO/PLUS
®
Control
• Control Cable (30 ft.)
• Steam Head
• Tube of Silicon Sealant
• Owner’s Manual
IMPORTANT:
Turn power to the steam generator OFF before installing the control.
Failure to turn the power off may result in a inoperable control.
Step 1
Determine the desired installation location of
the control. The TEMPO
®
and TEMPO/PLUS
®
controls are designed to be installed inside
or outside the steam room as a matter of
personal preference.
If the control is installed inside the steamroom
the control must be located:
• 4-5 feet above the oor
• away from the steamhead and not exposed
to direct steam emission
• on a vertical wall
The control cable length is 30 feet. Insure that
the control and/or steam generator are located
accordingly. Contact a MrSteam technical ser-
vice representative if a longer cable is required.
If the control is installed outside the steam
room a Remote Temperature Probe Part
Number MSTS must be installed inside the
steam room.
Insure MrSteam steam generator is TEMPO
®
compatible and has a serial number 355500
or higher.
IMPORTANT: See installation instructions
supplied with the Temperature Probe before
rough-in or installation of the control.
Step 2
Make a one-inch diameter hole in the desired
control location (Diagram 1). Do not oversize
or undersize the hole.
Diagram 1
 Loading...