TEMPO
®
/ TEMPO/PLUS
®
/ TEMPO/REMOTE
®
/ TEMPO/EXT
®
• Owner’s Manual
22
TEMPO
®
/ TEMPO/PLUS
®
/ TEMPO/REMOTE
®
/ TEMPO/EXT
®
• Owner’s Manual 23
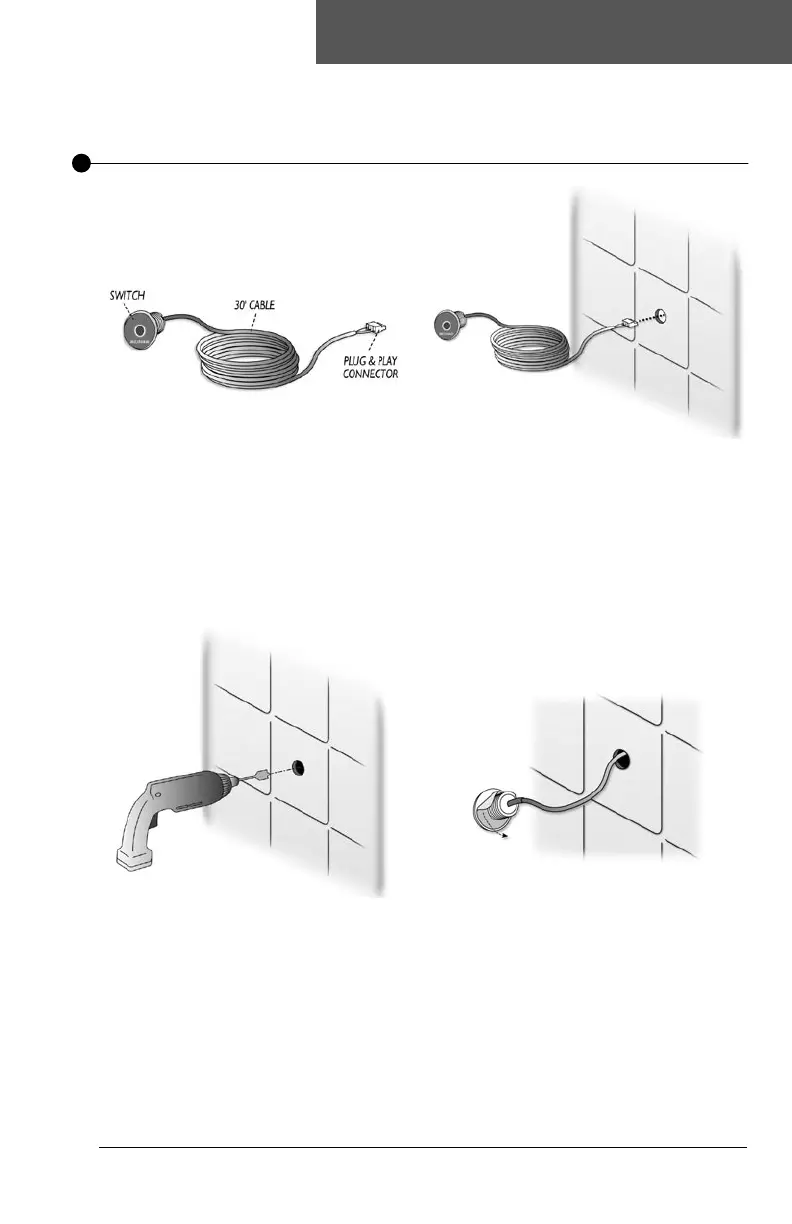
The TEMPO/EXT
®
has a 30 foot cable with a
Plug & Play connector at one end and an
ON/OFF switch at the other end (Diagram 1).
Contact a MrSteam
technical service
representative if a longer cable is required.
Installing the TEMPO/EXT
®
Control
Diagram 2
STEP 1
Drill a 7/8 inch diameter hole in the preferred
wall location.
Do not oversize or undersize the hole.
STEP 2
Route the cable from the wall to the steam
generator (Diagram 3).
Be careful not to strain, staple, pinch or other-
wise damage the control cable.
STEP 3
Remove and discard the peel-off paper from
the switch housing to expose the adhesive as
shown in Diagram 4.
Diagram 3
Diagram 4
Diagram 1

 Loading...