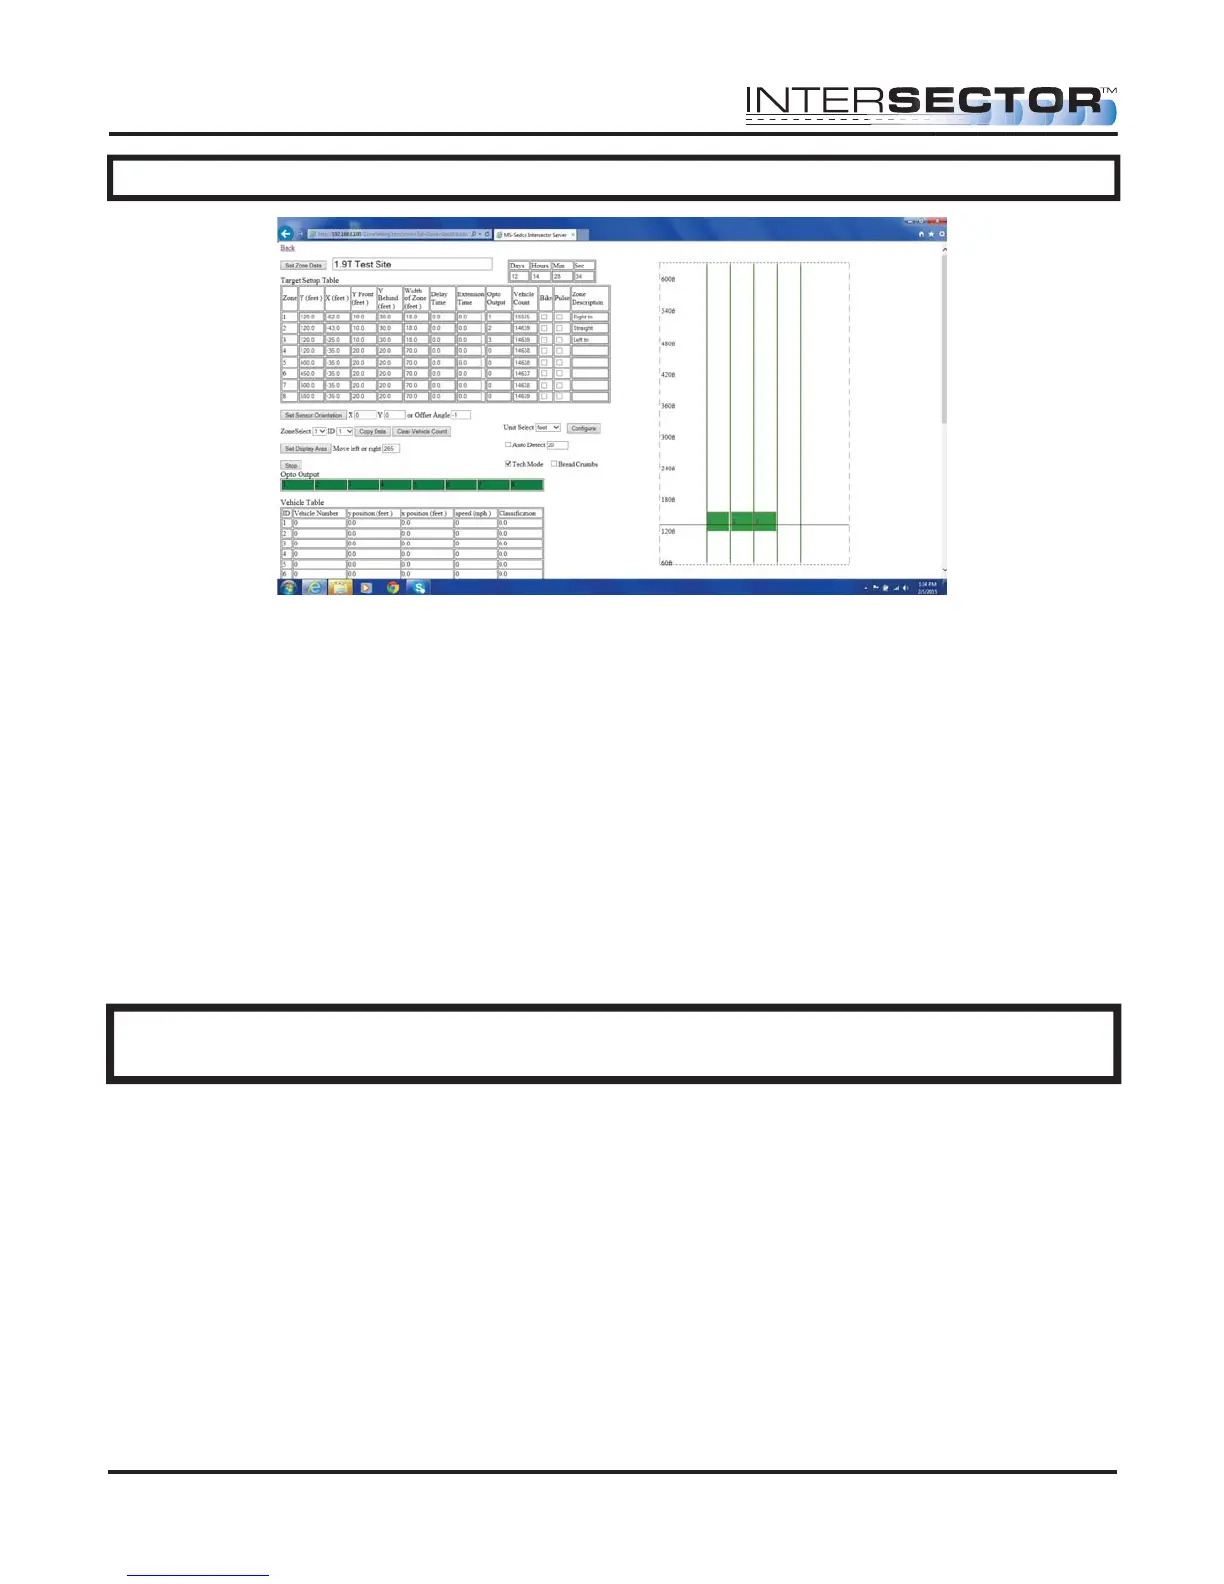
ADJUSTMENTS
Observe the location that the zone is shown on the DATA DISPLAY. If the zone needs to
be moved or resized, use the following guidelines:
• To move the zone left, The X coordinate value should be decreased. If necessary,
the value can be negative. (Example: -38.00)
• To move the zone right, the X coordinate value should be increased.
• To move the zone farther away (up on the screen), the Y coordinate value should
be increased.
• To move the zone closer (down on the screen), the Y coordinate value should be
decreased.
• To make the zone wider or narrower, increase or decrease the value for Width of
Zone.
• Increasing or decreasing the values for Y Front or Y Behind will lengthen or make
the zone shallower.
NOTE: For instructions on saving and loading data using 1.9U software, please refer
to the Addendum at the end of this manual
How to save the data acquired per approach for an intersection.
• First click on SET ZONE DATA. This saves all of the data for that approach of the
INTERSECTOR that you are working with to the address bar at the top of your
browser.
• From the ‘add to favorite’ click on new folder. Name the folder to reflect the
specific Intersection.
• From the ‘add to favorite’ click on the folder that you just made. In the box titled
MS Sedco, type in the approach name of the direction and save. (Example: South
bound 16th and Main)
• If you need to re-install a setup for that approach, go to your Favorites. Select the
desired folder and locate the correct approach. Opening this file will
automatically load the setup information into the INTERSECTOR.
INTERSECTOR
Microwave Motion and
Presence Sensor Installation Instructions
MS Sedco INTERSECTOR Installation Instructions Page 18 INTERSECTOR-1.9Uv092717