14
Water Filling
4.1 Check the spa liner is at the selected area and point
the drain valve toward a suitable draining area before
filling water.
4.2 Fill the spa tub with fresh water to a level between
Minimum and Maximum line marked on the inside of
the spa wall. Do not over fill the spa. It is recommend-
ed to fill the spa with lukewarm water for quick heating and energy saving.
WARNING:
ƕ:DWHUOHYHOPXVWUHDFKWKH0LQLPXPZDWHUOLQHEXWQRWH[FHHGWKH0D[LPXPOLQHWRDYRLG
pump failure.
ƕ1HYHUSRXUZDWHUZLWKDWHPSHUDWXUHKLJKHUWKDQ&)LQWRWKHVSDGLUHFWO\
ƕ7RDYRLGFRQWUROV\VWHPIDLOXUHGRQRWRSHUDWHWKHVSDXQWLOZDWHUUHDFKHVWKH0LQLPXPOLQH
4.3 After water filling, double check the spa pool air pressure to make sure the manometer points out the
Green section.
4.4 Install the filter cartridge. Please refer to the instruction on P19.
4.5 Place the zipper spa cover over the spa tub, and make sure the spa cover zipper are closed and lock
the cover by the digital lock in the accessory pack (for round models only).
IMPORTANT:
Ɣ,QVSHFWWKHVSDDLUSUHVVXUHUHJXODUO\IRUOHDNSUHPDWXUHZHDURUGHWHULRUDWLRQ
Ɣ&KHFNDQGZD[WKH]LSSHUUHJXODUO\WRPDNHLWVPRRWKIRURSHUDWLRQDQGDYRLGVSOLWV
4.
4
BUBBLE
3.4
UP DOWN
HEATER
BUBBLE
FILTER
TIMER
°C
BUBBLE
3.5
Green
Yellow
2YHU,QIODWLRQ
Red
Button
(a)
UP
DOW
N
HEA
T
ER
BUB
B
L
E
F
IL
T
ER
T
IME
R
°C
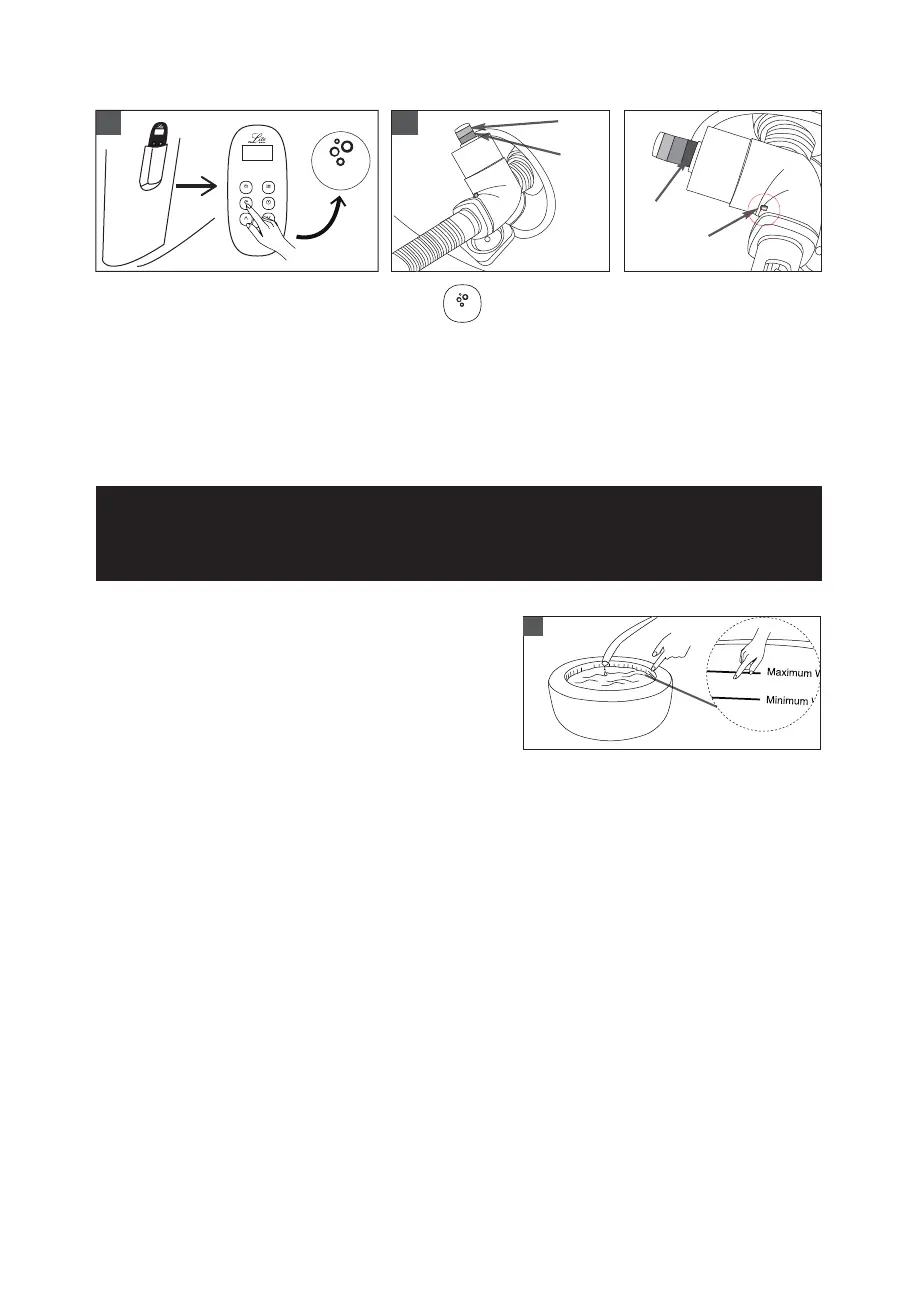
3.6 When inflation is completed. Press Bubble button again to turn it off. Disconnect the inflation
hose on both ends. Replace the air valve cap back.
NOTE:
Ɣ$OZD\VDOLJQWKHWKUHDGVWRSURSHUO\RSHQDQGFORVHWKHDLUYDOYHFDS
Ɣ,IRYHULQIODWHGUHPRYHWKHLQIODWLRQKRVHIURPWKHVSDDLUYDOYHVLGHpress the black button (a) on
the manometer to release some air and stop until the manometer points to the right color section.
NOTE: Deflation Instruction
1. Unscrew the manometer cap on the spa pool to deflate the spa.
2. Once the deflation is completed, replace the cap back.



 To Next Page