User Manual
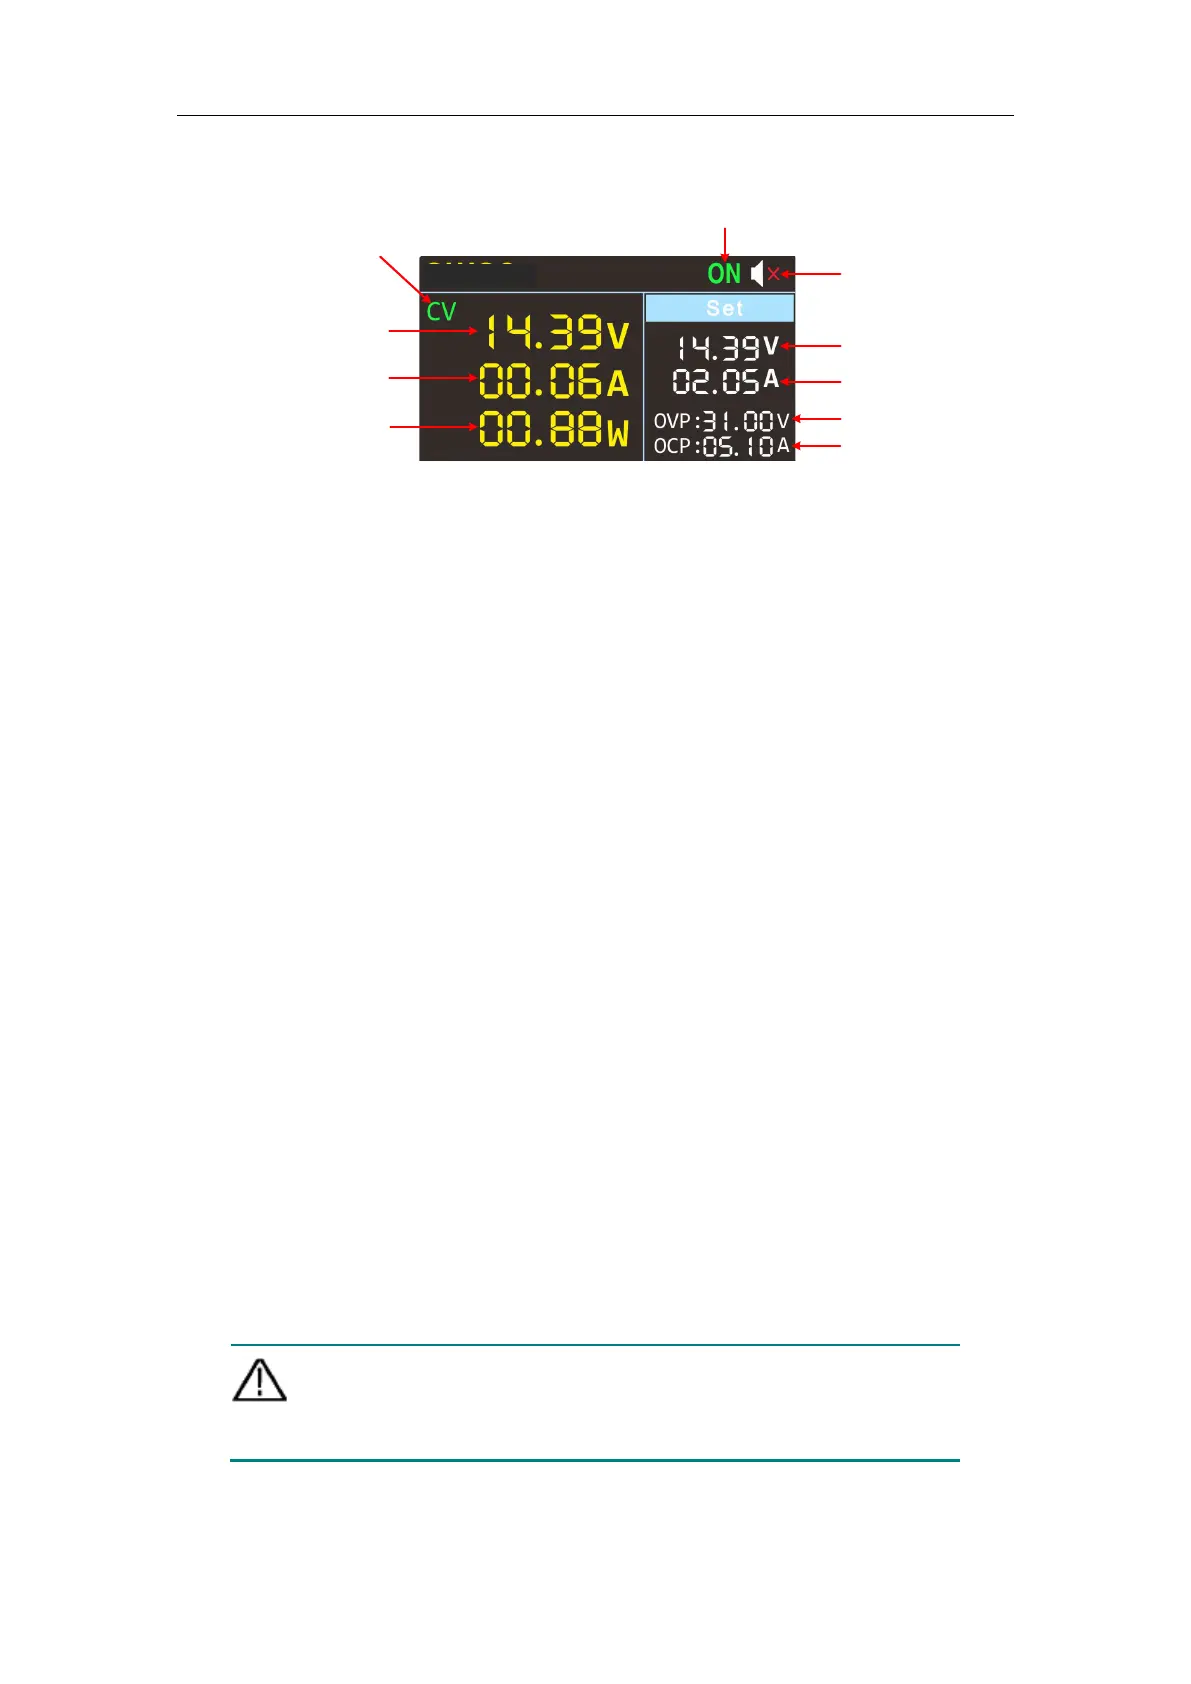
2.1.3 User Interface
Buzzer status
Actual voltage output
Actual current output
Actual power output
Set values of voltage
Set values of current
Set values of O.V.P
Set values of O.C.P
CV: Constant Voltage output
CC: Constant Current output
Channel output status
Figure 3-3 User Interface
2.2 General Inspection
When you have got a new power supply, it is suggested that you should
perform a general inspection on the instrument according to the following
steps.
Check whether there is any damage on it due to transportation
If the packing boxes or foam cushions are found to have serious damage, keep
them in a safe place until the complete instrument and accessories have
passed the electrical and mechanical tests.
Check the accessories
Check that all the parts and accessories are included and in serviceable
condition.
Check the complete instrument
If the instrument is damaged in its appearance or it fails in normal operation or
performance test, do not use it and contact the supplier directly.
2.3 Power Inspection
(1) Use the power cord supplied with the accessories to connect the
instrument to the AC power.
Warning:
To prevent electric shock, make sure that the instrument is
properly grounded.
(2) Press the power button on the front panel, the button light will be on, and
the startup screen will be displayed on the screen.