M120
4.4Electricalconnections
Includedwiththedeliveryisa2.5mlongpowercablewithaplugforconnectiontoanearthedoutlet.The
voltageandfrequencyarespeciedontheunitidenticationplate,seesection1.4,Marking.
4.5Continuousfanoperation
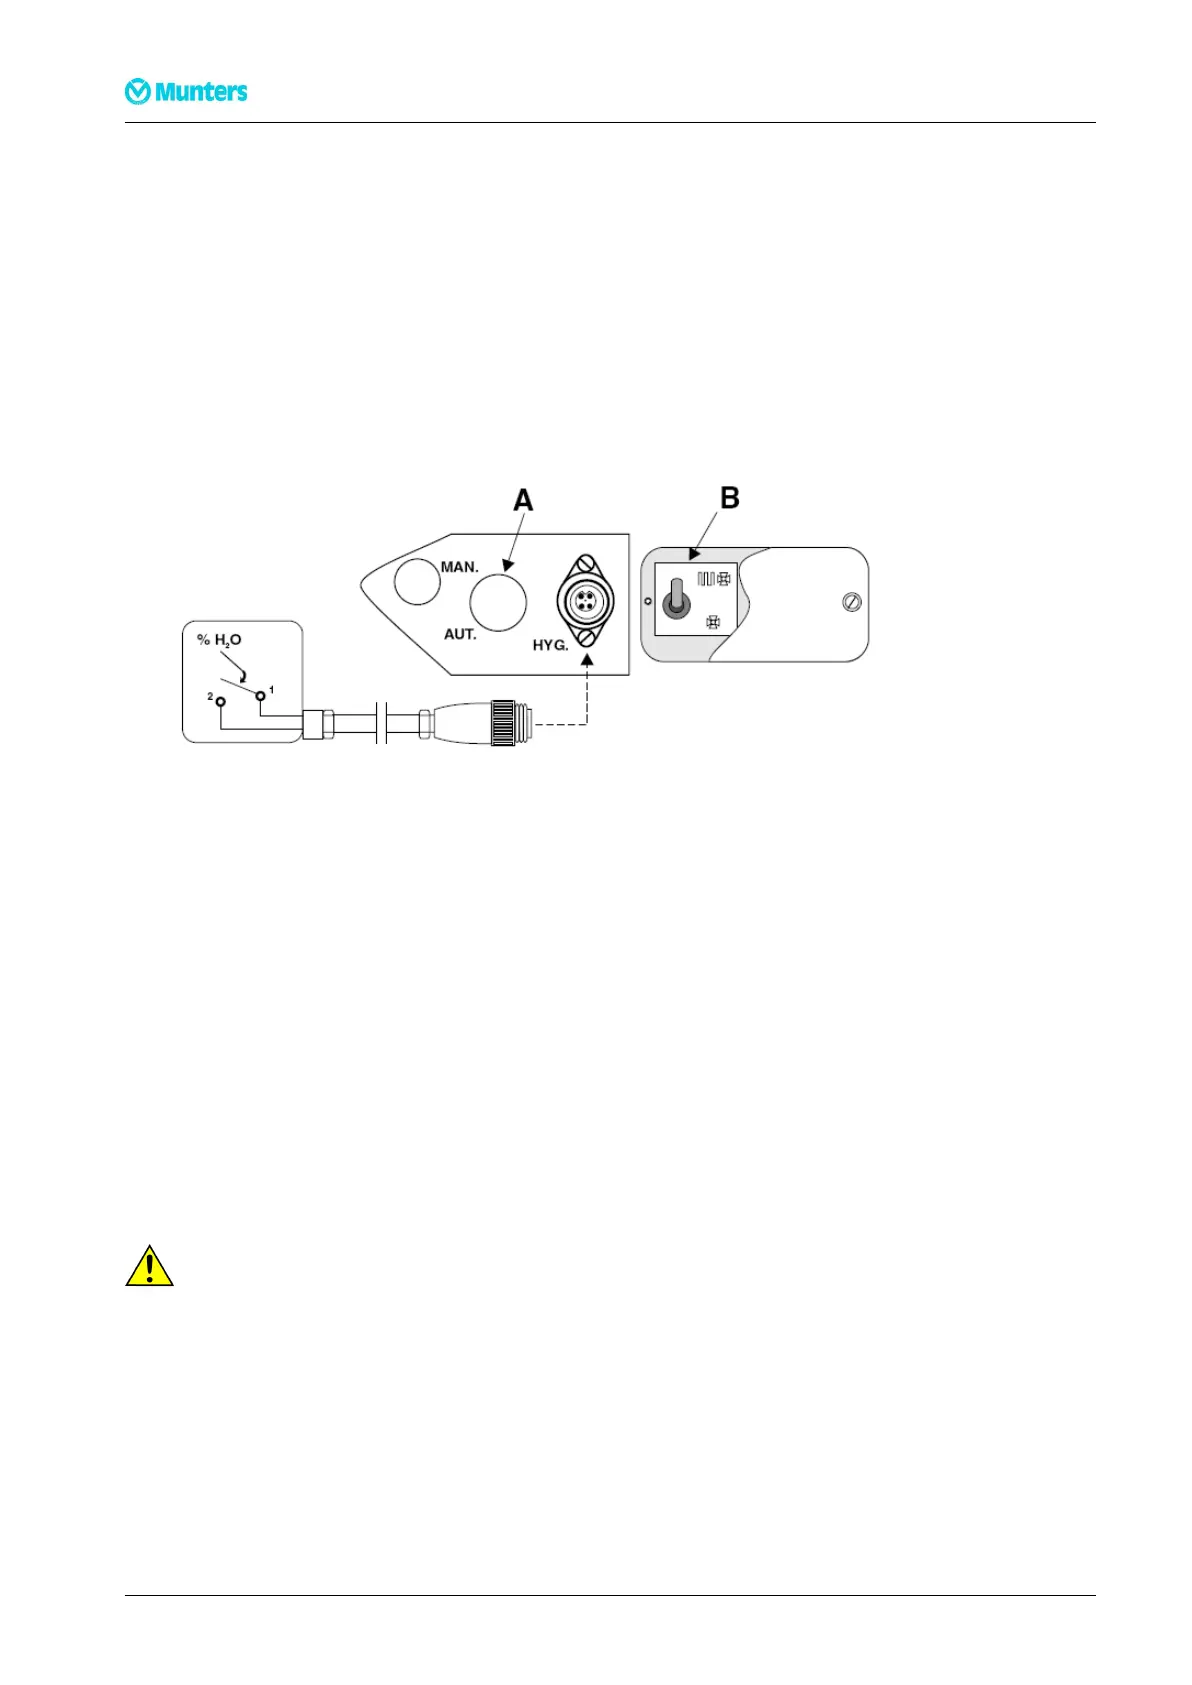
Ifcontinuousfanoperationisrequiredremovethecoverplatetotherightofthehumidistatsocket,see
Figure4.6.SetswitchBtothedownposition.Retthecoverplate.
4.6Connectingthehumidistat
Figure4.6Connectingthehumidistat
Whenthedehumidieristobecontrolledbyahumidistat,removetheswitchcover(A),movetheswitchto
theAUTpositionandreplacethecover.OndeliverytheswitchissettotheMANposition.Thehumidistat
isconnectedbyinsertingthehumidistatplugintothesocketmarkedHYGlocatednexttotheterminal
blockcover.
Aroomhumiditysensoristobemounted1-1.5mabovetheoor.Itmustbepositionedsothatitisnot
directlyexposedtodryairfromtheunitortohumidairowinginthroughopeningdoors.Positionitaway
fromheatsourcesanddirectsunlight.
Thehumidistatmustbeasingle-stagehumidistatandconnectedsothatthecontrolcircuitcloseswhen
relativehumidityincreases.Theconnectioncablemustbescreenedandequippedwithacopperconductor
withaminimumcross-sectionareaof2x0.75mm
2
.
Followtheinstructionsbelowtoassembleandconnectthehumidistatconnectionkit(ArticleNo.
19024039E).
CA CA
CA
UTION! UTION!
UTION!
Werecommendthatonlyaqualiedelectricianshouldconnectthehumidistatplugtothecable.
9Installation190TGB-1008-H1402