11
ONLY FOR X-702 HELMETS
• Cut along the pre-cut lines of the plastic tab on the back of the comfort padding.
• Position the wiring underneath the plastic tab (Fig. 31).
N.B.
: the side parts of the antenna must be positioned above the buttons to allow the correct
hooking of the comfort padding (Fig. 32).
Fig. 31
Fig. 32
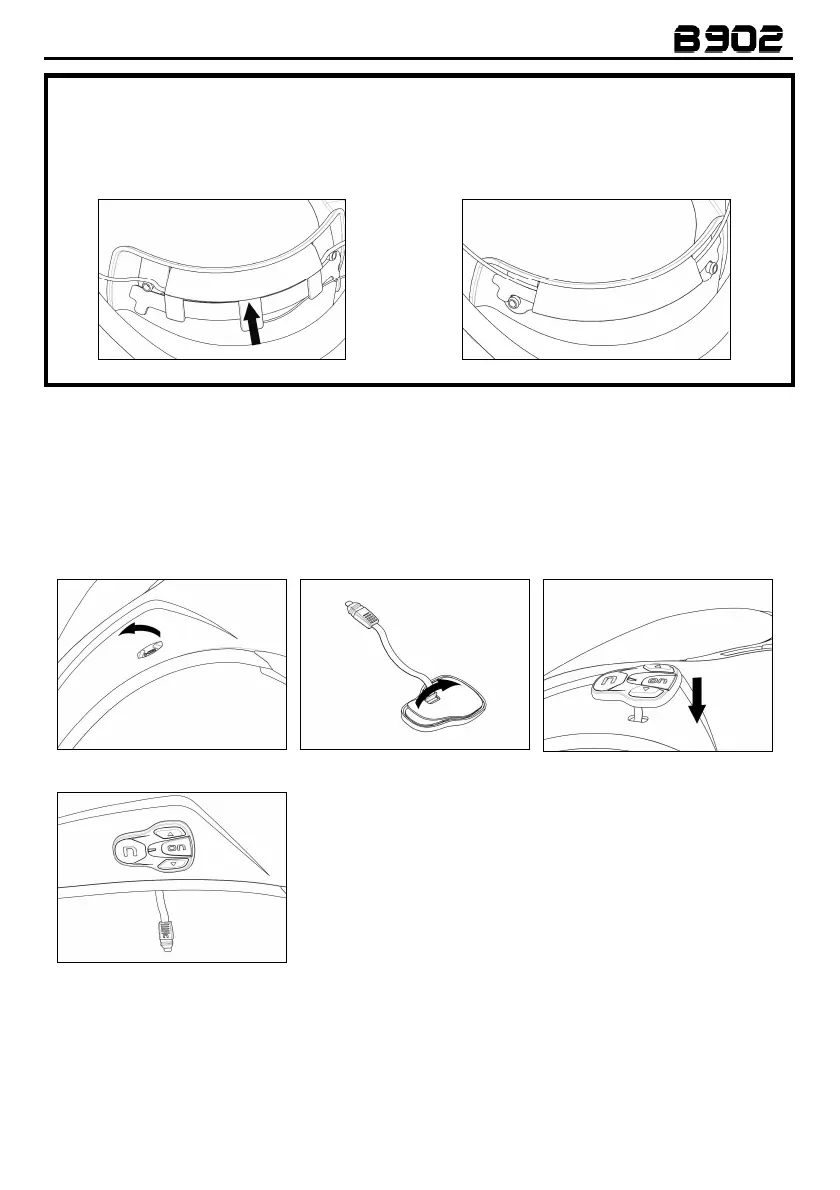
• Remove the small N-Com cap positioned on the left side of the helmet. To make the operation
easier, we recommend pushing the cap from inside the helmet (Fig. 33).
• Thoroughly clean the outside surface of the shell to make sure that the adhesive keypad sticks
properly. Before you apply the keypad, make sure that the shell area is completely clean and grease
or dirt free.
• Remove the protective film from the back of the adhesive keypad using the special tab (Fig. 34).
• Pass the keypad flex through the hole in the outer shell (Fig. 35).
Fig. 33
Fig. 34
Fig. 35
Fig. 36
• Apply the keypad
to the shell and press down on its entire
surface to make sure that it sticks properly (Fig. 36).
N.B.
: Make sure you do not glue the keypad flex underneath the keypad support.
N.B.
: In the event that the keypad is not positioned correctly, peel it off right away with extreme care
and repeat the positioning.
N.B.
: It takes up to 24 hours for the keypad to stick completely. During this time, do not expose the
helmet to atmospheric agents.
 Loading...