NA
D
19
GB
The selected Surround mode is permanently indi-
cated in the display area and is also shown for 3 sec-
onds in the alpha-numeric display section.
• CD PLAYER CONTROL
(for use with NAD CD Players).
; engages Pause
9 engages Stop
2/; engages Play or toggles between Play and
Pause
∞ or § engages Track skip; press once to go to
the next track or to return to start of current or previ-
ous track.
DISC Go to next disc (for NAD CD changers).
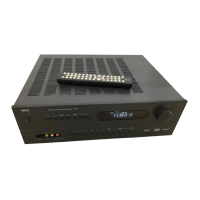
NOTES:
Direct sunlight or very bright ambient lighting may
affect the operating range and angle for the remote
control handset.
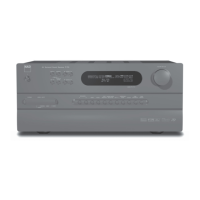
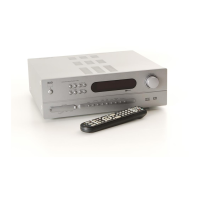
The infrared remote control command receiver,
located on the far left of the display window, receives
commands from the remote control. There must be a
clear line-of-sight path from the remote control to this
window; if that path is obstructed, the remote control
may not work.
ON SCREEN DISPLAY (OSD)
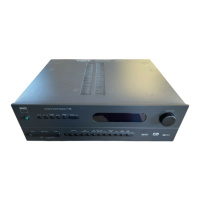
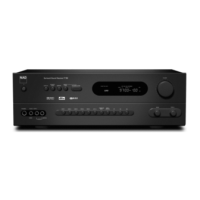
The NAD T 761 is equipped with an elaborate On
Screen Display facility (OSD). As the OSD is an
essential tool to set up the various parameters for
Surround sound correctly it is recommended that you
connect your monitor or television to the T 761.
Depending on your source and/or the television
system used you must first select the correct video
system. If the OSD rolls over the screen you must
select another system: PAL or NTSC.
• While pressing the MEMORY button (No. 6) on
the front panel, press the SPEAKERS A button (No.
12) repeatedly until the desired system is shown in
the display area and OSD.
The OSD can be engaged by pressing one of the
four cursor buttons on the remote control. The
SETUP Menu will appear as below:
Use the cursor buttons on the remote control to
navigate, select the desired menu and options, then
press ENTER to access. The 3 and 4 button are
used to navigate and select an option (indicated by
highlighting the available option), the 1 or 2 button to
change a setting from the highlighted section and
ENTER to choose the desired option. Otherwise,
highlight EXIT and press ENTER to leave.
The OSD menu are at maximum two “layers” deep;
this means that from the main menu (layer 1) you can
select a sub menu (layer 2).
The other sub menus available are:
1. INPUT SETTINGS
• Highlight INPUT SETTINGS in the SETUP menu
and press ENTER on the remote. You will see a
screen similar to the following:
• The available choices in each of the fields can be
selected with the 1 or 2 button on the remote; con-
firm the choice with ENTER button.
AUDIO = identifies the selected audio input (VIDEO
1 THROUGH 5, CD, DISC, TUNER).
VIDEO = identifies the selected video input (VIDEO
1, VIDEO 2, VIDEO 3, VIDEO 4 and VIDEO 5).
MODE = indicates the operating mode of the
selected input (DOLBY DIGITAL, DTS, PRO LOGIC,
EARS, STEREO).
DYNAMIC RANGE = indicates the dynamic range
currently selected (100%, 75%, 50% and 25%) in
Dolby Digital mode only, or N/A for the other modes.
• Highlight SAVE & EXIT and press ENTER to
save the altered settings and return to the SETUP
menu. Otherwise, select DO NOT SAVE & EXIT to
leave without saving any changes.
2. CHANNEL BALANCE
• Highlight CHANNEL BALANCE in the SETUP
menu and press ENTER on the remote. You will see
a screen similar to the following: