24 25
JUICER JUICER
SILICONE PARTS
The silicone parts can be disassembled for deep cleaning. These are
not necessary to remove each time you use the juicer.
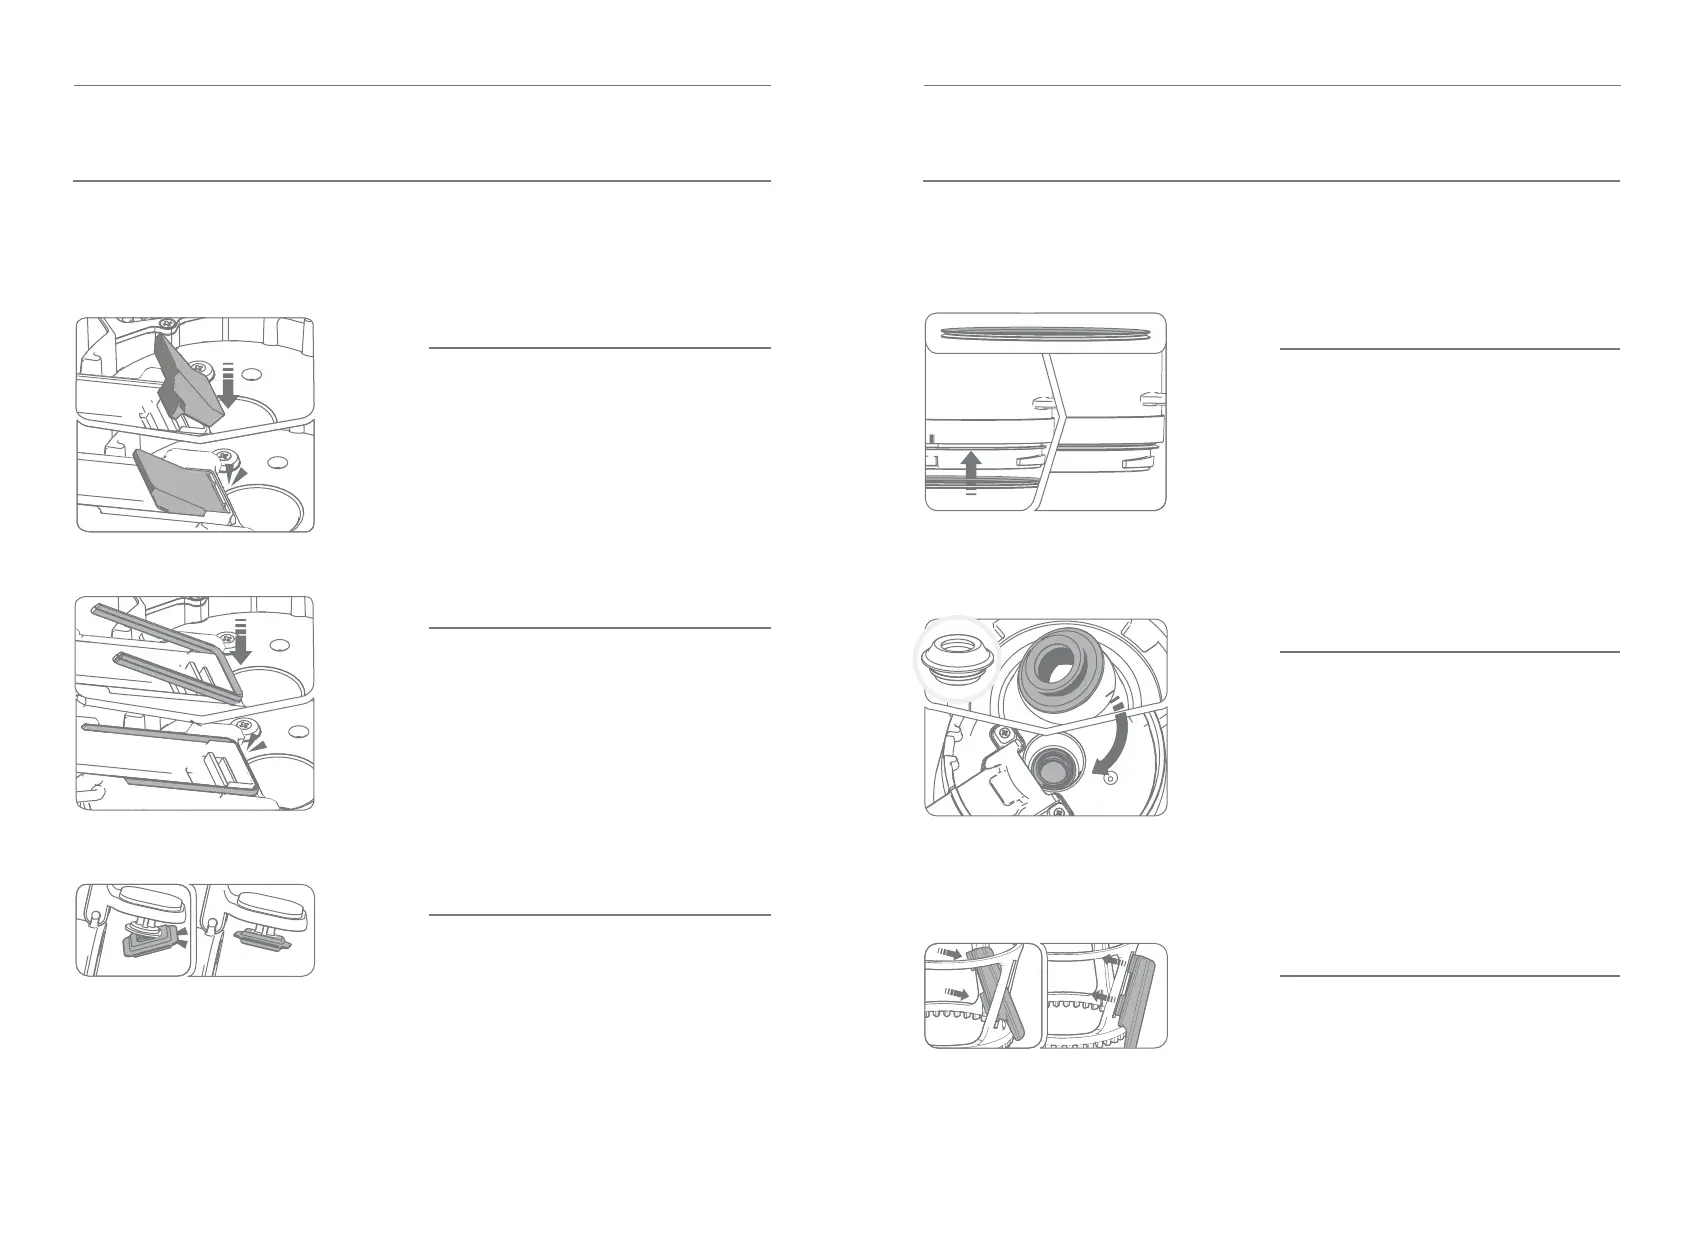
PULP OUTLET GASKET
Located inside the pulp outlet, this gasket helps
to separate the pulp from the juice.
To remove, hold the silicone piece and pull
upwards or away from the outlet.
To install, match the corners with the prole of
the pulp outlet and press down rmly into place.
PULP OUTLET SEAL GASKET
Located inside the pulp outlet, this gasket helps
to seal the pulp outlet.
To remove, hold the silicone piece and pull
upwards or away from the outlet.
To install, hold the silicone piece upright, t into
the slot, and press rmly into place.
JUICE CAP STOPPER
Located inside the juice outlet, this is used to
stop or control the ow of juice.
To remove, pull the silicone stopper starting from
one corner.
To install, insert one edge of the plastic juice cap
into the silicone stopper and then press around
the perimeter.
HOPPER GASKET
Located on the bottom of the hopper, this gasket
helps to seal the hopper to the chamber.
To remove, hold the silicone ring and pull
downwards.
To install, pull the silicone ring upwards so it ts
into its groove. You may need to stretch the ring
as you work your way around the circle.
CHAMBER GASKET
Located in the center of the chamber, this gasket
seals the chamber around the drive shaft.
To remove, hold the silicone ring and pull upwards
from one side.
To install, press one side of the ring into the slot
rst, and then work your way around the circle.
Be sure to check the ring is a smooth circular
shape without any folds or bunches.
SPINNING BRUSH BLADES
Located on the spinning brush, these blades wipe
the outside of the strainer and the inside of the
chamber at the same time.
To remove, hold the inside of the blade and pull
inwards to the center of the ring.
To install, slide the blade through the slot from
inside to outside. Then, pull the blade outwards,
until it locks into place.