7
Central Station Receiver 1 Format
From the table below, enter the central station's receiver format. Use number
buttons
1
through
9
.
NOTE:
Press
G0
for a zero and
0
for a blank space (•). Press
G
1
through
G
4
for
letters B–E, respectively. Press
D
to save. Press NEXT (E) button to
proceed.
NOTE:
Central Station Receiver 2 and 3 Formats can only be entered in
Direct Address Programming. See CS Receiver Options.
Enter User Codes
For default program, enter up to 32 User Codes, with Area 1 and Area 2
Options. Press the (
A) button once to set the cursor to the User Code.
Use the number buttons 0 through 9 to enter the User Number, followed
by
A and a User Code of up to 6 digits. Enter G0 for a blank.
NOTE: If “Enable Global Ambush Code”(Address 0720) is enabled and
“Global Ambush Code” (Address 1054) is left blank(•), do not program the
first two digits of ANY User Code as '99'.
•
Press
D
to save. To proceed to the next User Code, press the A button to set the cursor to the User Number
and change it using the number buttons.
• If the programmed code was less than 6 digits, enter blanks
G0
for the remaining digits.
Example: Program a code of “2222” for user 02, with area 1 options of “Arm/Disarm” and “User Program”:
Enter
02
for the user number,
2222
G0
G0
for a user code,
G09 “(blank) 9” for area 1 options and G0G0 “(blank) (blank)” for area 2 options.
CHANGING OR CANCELING A CODE: To change any code, merely program over the existing code as described
above and press
D
to save. Similarly, to cancel a code, blank out each number of the code press
D
to save.
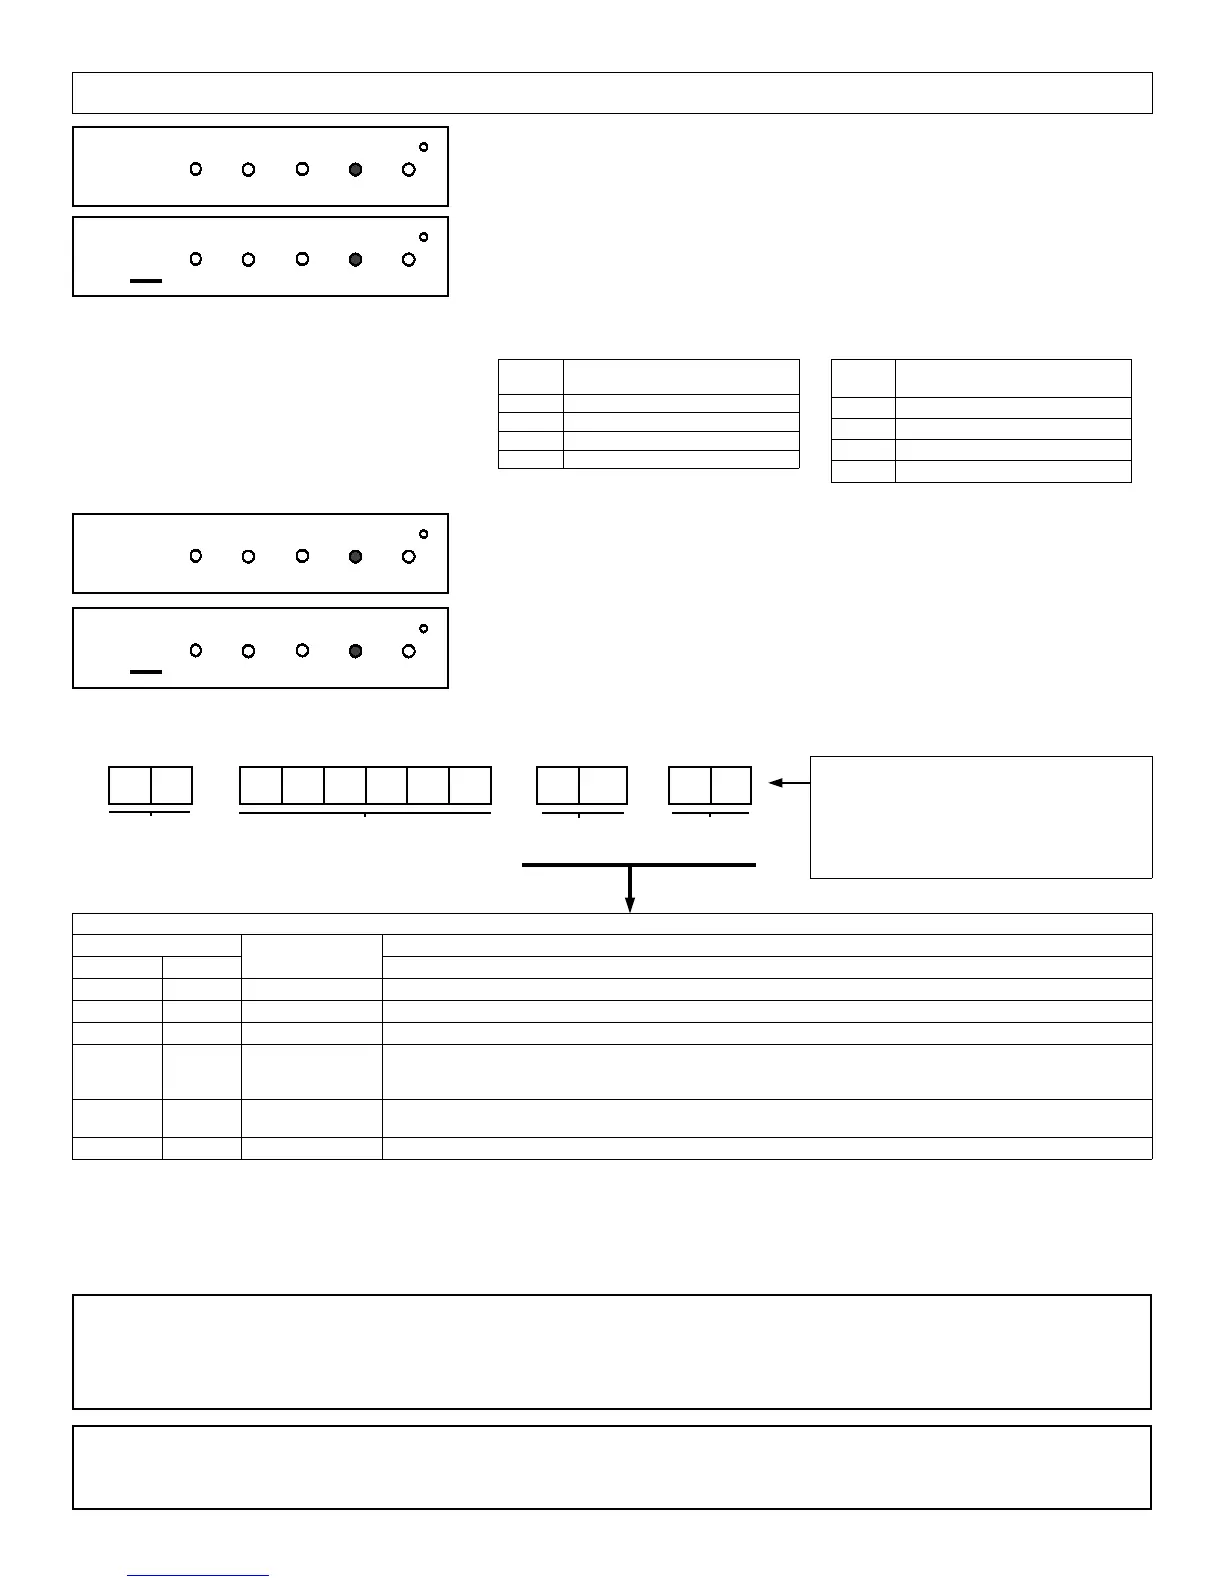
DATA
ENTRY
CS RECEIVER 1 FORMAT
•(blank) Ademco Slow, Silent Knight Slow
2 Radionics Fast
3 Silent Knight Fast
4 Radionics, CD, Franklin Slow
DATA
ENTRY
CS RECEIVER 1 FORMAT
5 Universal High Speed
B SIA
C Ademco Point ID
E Pager
USER AREA OPTIONS - Select the desired Area Options (Area 1 and
OPTION ENABLED
L R
EXPLANATION
blank(•)
blank(•) Disabled User Code not active in this area.
blank(•) 1 Arm/Disarm Allows User Code to arm/disarm this area.
blank(•) 2 Arm Only Prevents User Code from disarming this area.
blank(•) 3 Service A Service Code has restricted arm/disarm rights; if an area is armed with a Service Code, the area can be disarmed
with any valid User Code, including a Service Code. If the area is armed with OTHER than a Service Code, it
CANNOT be disarmed with a Service Code.
blank(•) 4 Access This is normally used to activate a door striker while an area is disarmed. Also program “Access Control on PGM2
Output” (Address 0719) and “PGM2 Output Access Control Timeout” (Address 0711).
blank(•) Add 8 * User Program User Program Option is enabled for Keypad 1 only, wherever it is connected (Area 1 or Area 2).
DATA ENTRIES
User # User Code Area 1 Area2
Options Options
A
Programming the GEM-P816 & GEM-P1632 (v.9A and Earlier)
NOTE: When entering the Area 1
and Area 2 options, press
G0
for a ten. Enter 0
for a blank.
A
(Direct Entry)
26
INTERIOR
BYPASS FIRE/TBL SYS TBL CHIME
INTERIOR
BYPASS SYS TBL CHIME
FIRE/TBL
(
Direct Entry)
27
INTERIOR
BYPASS FIRE/TBL SYS TBL CHIME
INTERIOR
BYPASS SYS TBL CHIME
FIRE/TBL
 Loading...