Do you have a question about the NAPCO StarLink SLE and is the answer not in the manual?
| Power Supply | 12VDC |
|---|---|
| Network | GSM |
| Enclosure | Plastic |
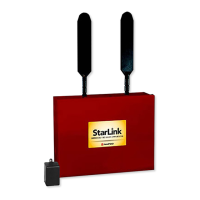
| Antenna | Internal |
| Certifications | FCC, UL |
| Standby Time | 24 hours |
| Additional Features | Remote control |
GSM/GPRS communicator, supports remote downloading.
Enhanced GSM/GPRS communicator, supports remote downloading for specific panels.
CDMA communicator, universal.
Enhanced CDMA communicator, supports remote downloading.
GSM/GPRS communicator for fire alarms.
CDMA communicator for fire alarms.
Describes the signal transmission path from control panel to central station.
Download Cable, 6 feet.
Extended antenna with 15 feet of cable.
Details input voltage, current, and loop ratings for various models.
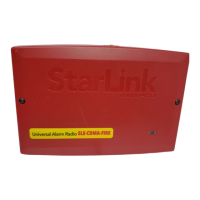
Covers unit dimensions, housing, operating temperature, and humidity.
Describes the +12V and Ground power input terminals.
Details PGM1, PGM2, and PGM3 open collector output functions.
Explains IN1, IN2, GND, and IN3 terminal functions for inputs.
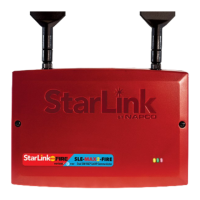
Location of the Red Diagnostic LED on the PC board.
Location of the Yellow Operational Status LED on the PC board.
Location of the Green RF Signal Strength LED on the PC board.
Explains how the Green LED indicates signal strength.
Table correlating LED blinks to RF signal strength (dBm).
Describes the operational behavior of the Yellow LED.
Lists blink codes for various trouble conditions detected by the Red Trouble LED.
Describes the behavior of the Red Diagnostic LED for signal issues.
Explains power options and the need for the SLE-ULPS-R accessory.
Details the function of jumpers in block X5 for various settings.
Explains how the radio functions as primary or backup communicator.
Describes the radio's supervision of GPRS network coverage.
Guide to creating an account and registering modules online.
Recommendations for choosing an optimal mounting location for RF performance.
Describes the front tamper switch on the radio housing.
Wiring diagram and instructions for primary reporting.
Wiring diagram and instructions for backup reporting.
Guidelines for proper wire stripping and insulation.
Details the 12VDC power requirement and current draw.
Instructions to verify radio status via the NapcoComNet website.
Importance of verifying signals received by the central station.
Guide to configuring the central station receiver format.
Example of Point ID (Contact ID) receiver format programming.
Capabilities for transmitting SIA Contact ID and DSC Sur-Gard.
How to use PGM1 output to annunciate radio troubles.
Specific wiring for PGM1 with Napco control panels for trouble reporting.
How control panels detect and report radio troubles.
Enabling the Line Cut feature via advanced settings.
How status changes affect the radio supervision timer.
Necessity of a technician for downloads/updates.
Role of Jumper 1 in firmware update procedures.
Proper wiring for single-conductor terminals.
Proper wiring for barrier-type terminals.
Special wiring for PGM1 when used with GEMC-F8ZCPIM zone.
Special wiring for PGM2/PGM3 with GEMC-F8ZCPIM zones.
Outlines the 36-month warranty period and coverage.
Lists conditions that void the warranty.
Details limitations on consequential and incidental damages.
Defines roles for warranty claims and system testing.