Napoleon.com | BUILT-IN Series
Getting Started |
9
Getting Started
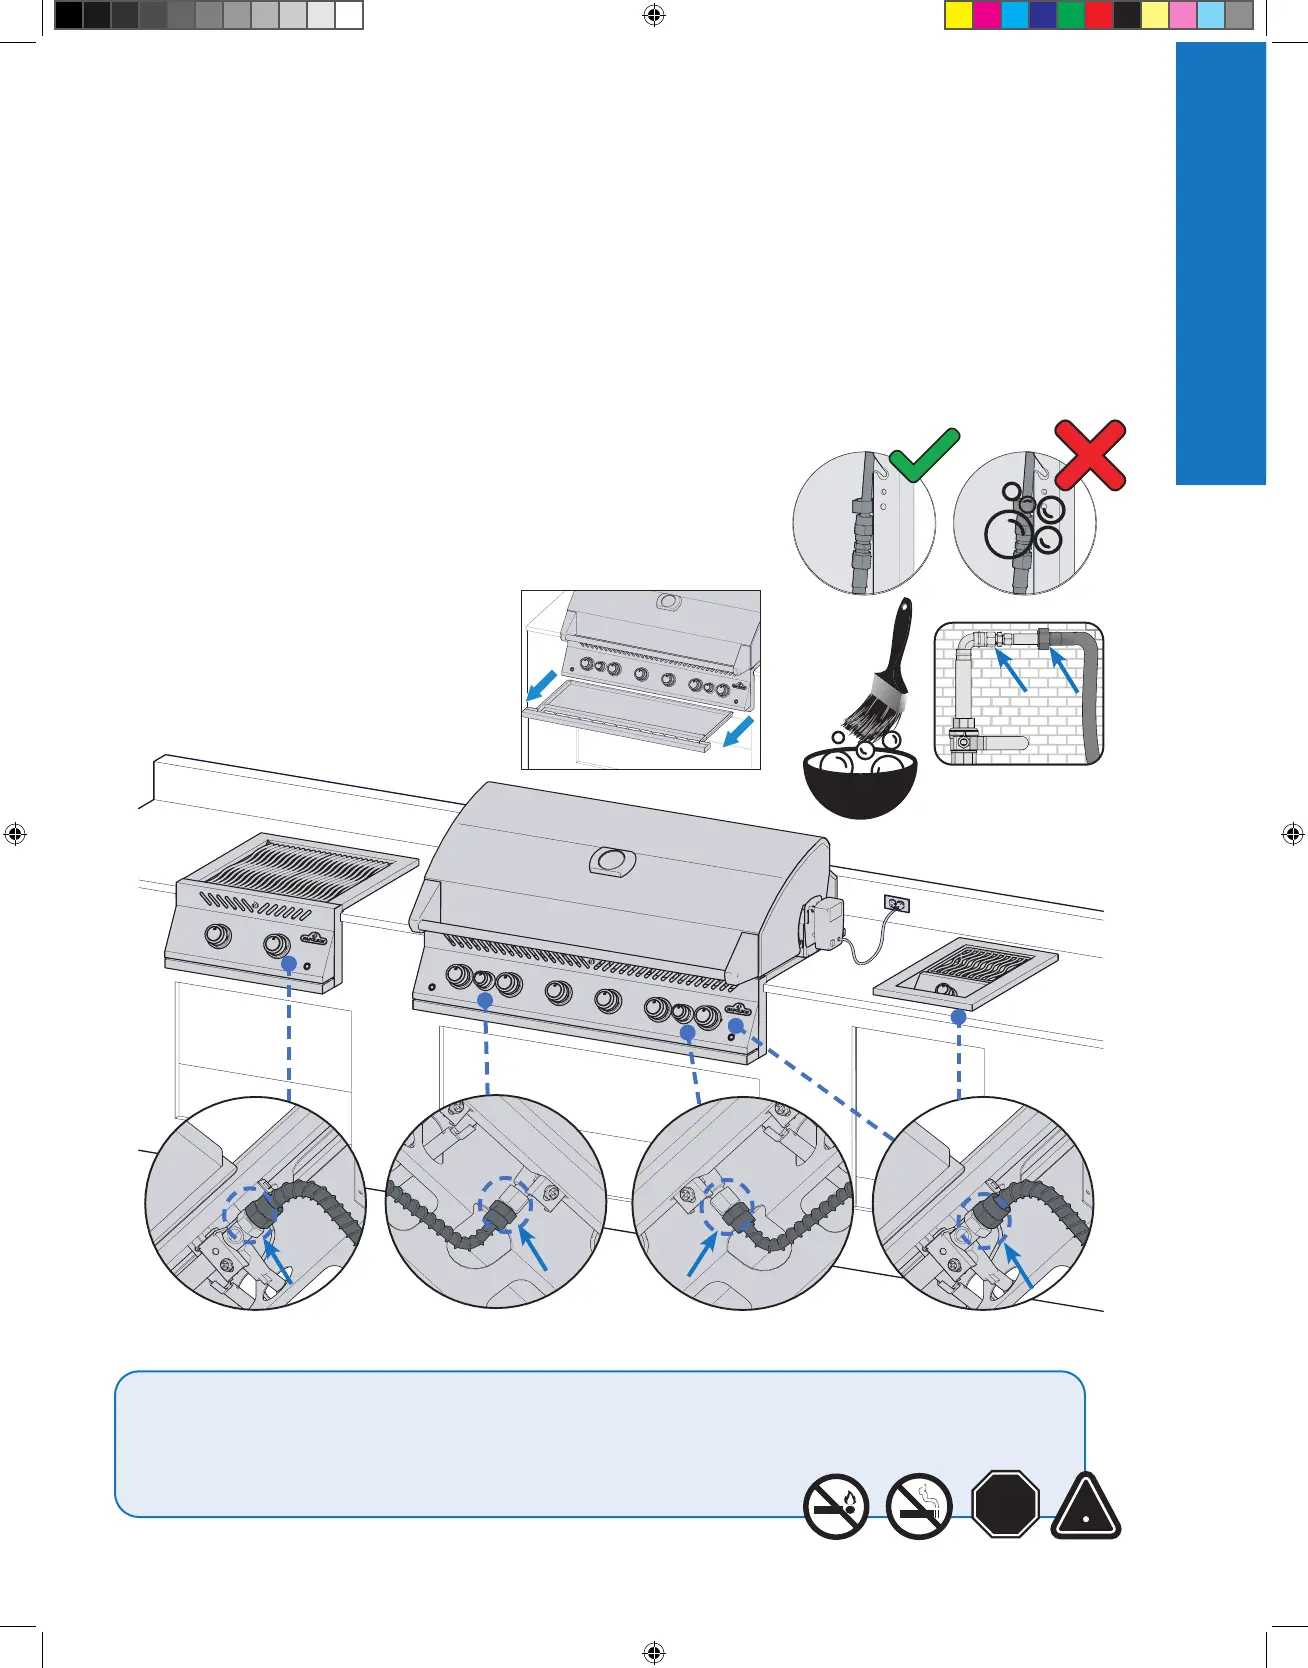
Why and When to Leak Test?
A leak test confirms no gas is escaping after you
connect the hose to the gas supply.
Each time the tank is refilled and reinstalled,
ensure that there are no leaks in the fitting where
the regulator connects to the tank.
Leak test this grill before use, annually, and when
any gas components are replaced.
Leak Test Steps
1. Do not smoke while performing the test.
2. Remove all sources of ignition.
3. Turn all burner controls to the off position.
4. Turn the gas supply valve on.
5. Brush a half-and-half solution liquid soap and
water onto all joints and connections of the
regulator, hose, manifolds, and valves.
6. Bubbles indicate a gas leak.
If you find a leak
1. Tighten any loose joints.
2. If the leak cannot be stopped, immediately shut off the gas
supply and disconnect the grill.
3. Have the grill inspected by a certified installer, or dealer.
4. Do not use the grill until the leak has been fixed.
WARNING! Never use an open flame to check for gas leaks. Sparks or flames will cause a fire, explosion, damage
to property, serious physical injury, or death.
WARNING! Only use the pressure regulator and hose assembly supplied with the grill, or one in conformity with
local codes.
STOP
Getting Started
N415-0601_Built In (Book).indb 9N415-0601_Built In (Book).indb 9 2/11/2021 3:38:42 PM2/11/2021 3:38:42 PM

 Loading...