W415-1146 / A / 02.16.13
36
EN
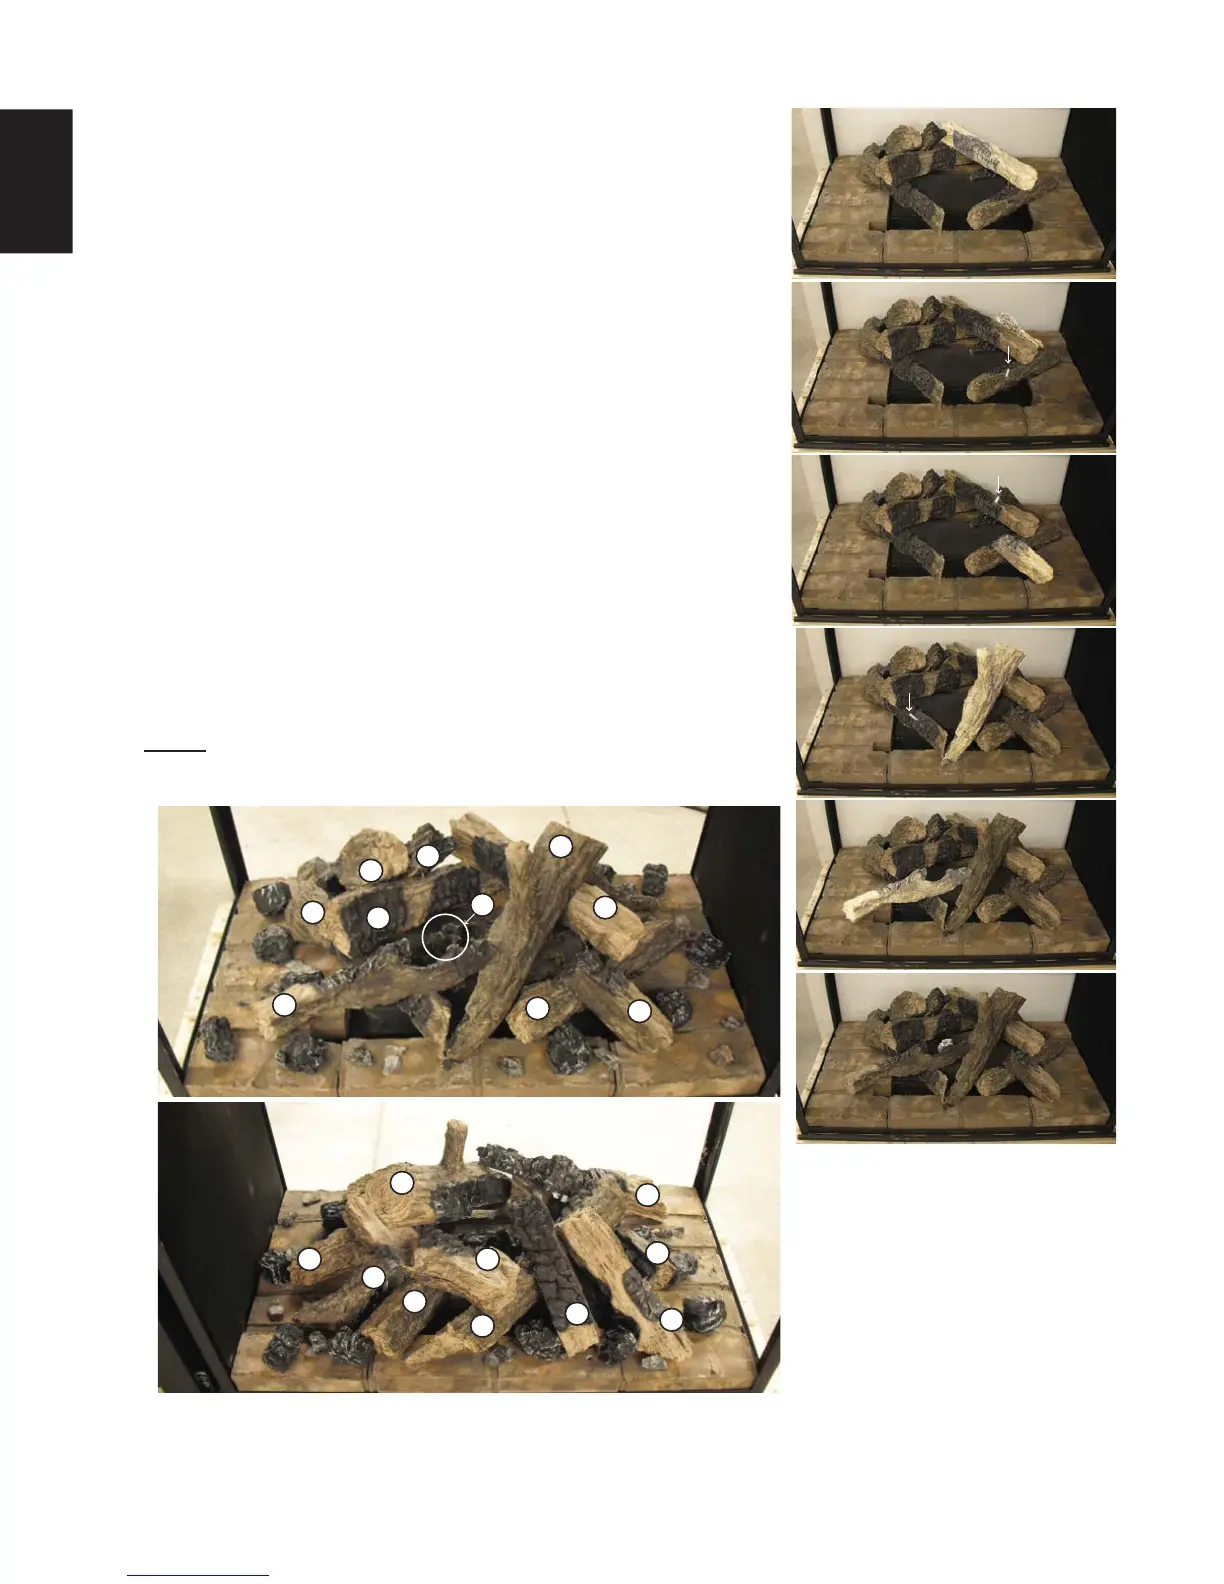
8. Place the #7 log onto the pin located in log #6 and onto the pin in the
#5 log, as shown in Figure 7.
9. Place the #8 log on the hearth pad and let it rest against the notch in
the side of the #7 log, as shown in Figure 8. HINT: The best view of
the #8 log is shown in the left side view below.
10. Place the #9 log onto the pin located in the #6 log and let it rest on
the right side, corner hearth pad and then place one pin into the #6
log, as shown in Figure 9.
11. Place the #10 log onto the pin located in the #7 log and let is rest in
the middle of the left side hearth pads, as shown in Figure 10. Place
one pin into the #1 log, as shown in Figure 10.
12. Place the #11 log onto the pin located in the #1 log and let is rest on
the left end hearth pads, as shown in Figure 11.
13. Place the #12 charcoal lump onto the two pins located in the center
of the burner, as shown in Figure 12.
14. Tear the ember material into small thin pieces and spread evenly on
top of the burner. Ember material will only glow when exposed to
direct fl ame.
15. Sprinkle the charcoal embers around the hearth then place the
charcoal lumps on top of the charcoal embers, as shown below.
NOTE: Do not cover the pilot or burner ports with media or embers.
Do not overfi ll.
RIGHT
SIDE
VIEW
1
11
2
3
10
6
9
7
4
12
Fig. 7
Fig. 11
Fig. 12
Fig. 8
PIN
Fig. 9
PIN
Fig. 10
PIN
LEFT
SIDE
VIEW
10
6
8
5
2
3
4
1
7
11
 Loading...