EasyManua.ls Logo

Napoleon UHM User Manual

Napoleon UHM
10 pages
To Next Page IconTo Next Page
Page #1 background imageLoading...
Page #1 background image
1
UHM
Universal Heat Management System
Wolf Steel Ltd., 24 Napoleon Rd., Barrie, ON L4M 0G8 Canada • 1(866)820-8686 • www.napoleon.com
W415-2948 / A / 03.19.21
!
WARNING
If the information in these instructions is not followed exactly, a fi re or explosion may result causing property damage,
personal injury or death.
Ensure the appliance, safety barrier and glass are completely cool before starting installation.
To avoid danger of suffocation keep the packaging bag away from babies and children. Do not use in cribs, bed,
carriages, or play pens. This bag is not a toy. Knot before throwing away.
Installer: Leave this leafl et with the appliance. Consumer: Retain this leafl et for future reference.
Caution: A barrier designed to reduce the risk of burns from the hot viewing glass is provided with this appliance and shall be
installed. This barrier is not designed for prolonged contact.
Included in this kit:
2 x fl exible duct
- 5 ft (alum.)
This kit moves the warm air from your fi replace enclosure to be expelled into the room. Where duct lengths are greater than
5 feet, it is recommended that the duct be insulated. We recommend installing the grills and vent boots in the same
room as the appliance.
We recommend installing the Universal Heat Management kit during the installation of the appliance BEFORE gas is
installed.
IMPORTANT
2 x collar assembly
2 x vent boot2 x grill
You will need:
Drill
Phillips Bit
Hex Bit
Gloves
Question and Answer IconNeed help?

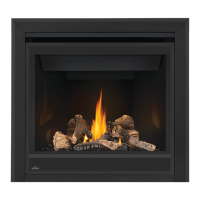
Do you have a question about the Napoleon UHM and is the answer not in the manual?

Napoleon UHM Specifications

General IconGeneral
BrandNapoleon
ModelUHM
CategoryFireplace Accessories
LanguageEnglish

Summary

Safety Information

General Safety Precautions

Essential safety guidelines to prevent fire, explosion, property damage, injury, or death.

Suffocation Hazard Warning

Warning about suffocation risk from packaging bags and safe disposal instructions.

Installation Preparation

Important Installation Notes

Key recommendations for installation, including duct insulation and timing.

Required Tools and Kit Components

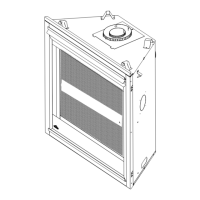
Lists necessary tools and details the components included in the heat management kit.

Installation Clearances and Requirements

Enclosure Top Clearance

Specifies the minimum clearance required to the enclosure top.

Vent Boot Mounting Clearance

Details top clearance for finishing material when vent boot is mounted horizontally.

Flexible Duct Clearance

Specifies the minimum clearance required around the flexible duct.

Mounting Options and Initial Steps

Mounting Options Overview

Illustrates vertical and horizontal mounting options and their minimum clearance requirements.

Initial Component Removal

Procedure for removing knockouts, insulation, and covers from the appliance top.

Vent Boot and Duct Installation

Collar Assembly Installation

Centering and attaching the collar assembly to the appliance using pre-punched holes.

Vent Boot Framing and Mounting

Framing space for vent boots and mounting them with required clearances.

Flexible Duct Connection

Running flexible duct between collar and vent boot, ensuring clearance to combustibles.

Final Assembly and Warnings

Standoff Shield Reinstallation

Instruction to reinstall the 2 standoff shields for appliance operation.

Grill Mounting Guidance

Note on mounting the grill with louvres facing downward.

Related product manuals