EasyManuals Logo

National Instruments PXI Series Installation Guide

National Instruments PXI Series
11 pages
To Next Page IconTo Next Page
To Previous Page IconTo Previous Page
Page #3 background imageLoading...
Page #3 background image
© National Instruments Corporation 3 Chassis Fan Replacement Guide
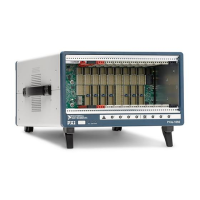
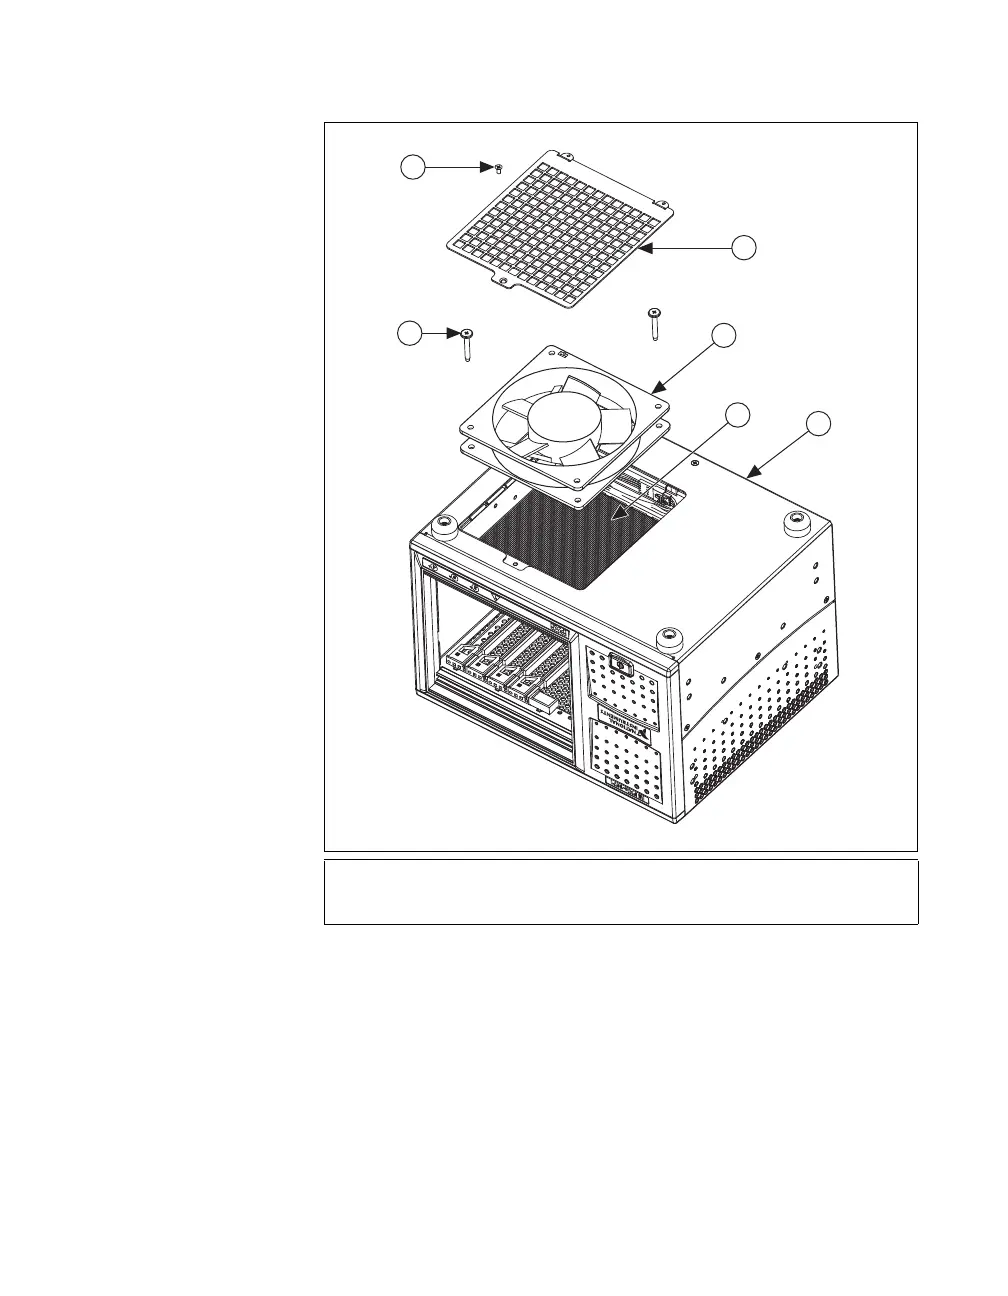
Figure 1 shows the parts you must remove to access the fan. Refer to the
following steps for installation and removal instructions.
Figure 1. PXI Express Chassis Part Locations (Chassis Shown Upside Down)
Complete the following steps to replace the fan (refer to the previous figure
for parts locations):
1. Locate the fan access panel on the bottom of the chassis. Remove the
access panel screw and the access panel.
2. Remove the two fan shoulder screws, shown in Figure 1, that fasten the
fan. Be careful not to lose the screws.
3. Remove the fan.
1 Fan Shoulder Screw (x2)
2 Fan Access Panel Screw (x1)
3 Fan Access Panel
4Fan
5 Screen (Visible Through Fan)
6 Chassis
1
2
3
6
4
5

Other manuals for National Instruments PXI Series

Questions and Answers:

Question and Answer IconNeed help?

Do you have a question about the National Instruments PXI Series and is the answer not in the manual?

National Instruments PXI Series Specifications

General IconGeneral
Form FactorPXI
Slot Count4, 8, 18 slots
CoolingForced air
CompatibilityPXI modules
Operating Temperature0 °C to 55 °C
Relative Humidity10% to 90%, non-condensing
DimensionsVaries depending on the specific chassis model
WeightVaries depending on the specific chassis model

Related product manuals