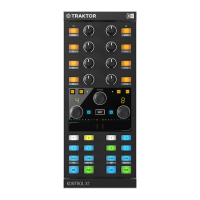
3 Key functions when using the X1 with TRAKTOR
This chapter
details the use of the X1 with TRAKTOR, whilst offering detailed explanations of
the device's key functions and suggested workflows. By the end of reading this, you'll be more
than ready to get creative with your TRAKTOR KONTROL device.
3.1 Accessing Primary and Secondary Functions
By
default,
the X1 will function in TRAKTOR with its primary functions. Alternatively, the X1's
secondary functions can be activated on certain buttons in combination with the SHIFT but-
ton.These functions are detailed throughout this manual.
3.2 Connecting the X1 device to TRAKTOR
Before proceeding, ensure that the X1's firmware is already installed as explained in the
Setup Guide.
The TRAKTOR X1 Setup Guide is available for download from the Native In-
struments.
The first thing that will happen when connecting the X1 with TARKTOR is verification of the
current
Deck
setup. By default, the left LED display flashes “A” to indicate that Deck A is con-
trolled by the left side of X1, while the right display flashes “B” to indicate that Deck B is con-
trolled by the right side of X1. If you’d like to change this setup, you can do so with the Browse
or Loop encoders:
►
Press either the BROWSE encoder, or one of the LOOP encoders to confirm the Deck set-
up.
→
The X1 will now be backlit, indicating it's ready for action.
At the point of selecting your chosen Deck assignment for the X1, the LED displays will
identify which side of the device will control the corresponding Deck.
Key functions when using the X1 with TRAKTOR
Accessing Primary and Secondary Functions
Traktor Kontrol X1 Mk2 - Manual - 12

 Loading...