© Pro Advantage by NDC. All rights reserved
PS-733 Rev 00-3/10 11/23
How to enter Date and Time:
The date and time are displayed on the Main Menu screen and are recorded with each test result.
The format of the date and time are displayed along with specific date and time values. If the date and time values
are incorrect follow the directions below:
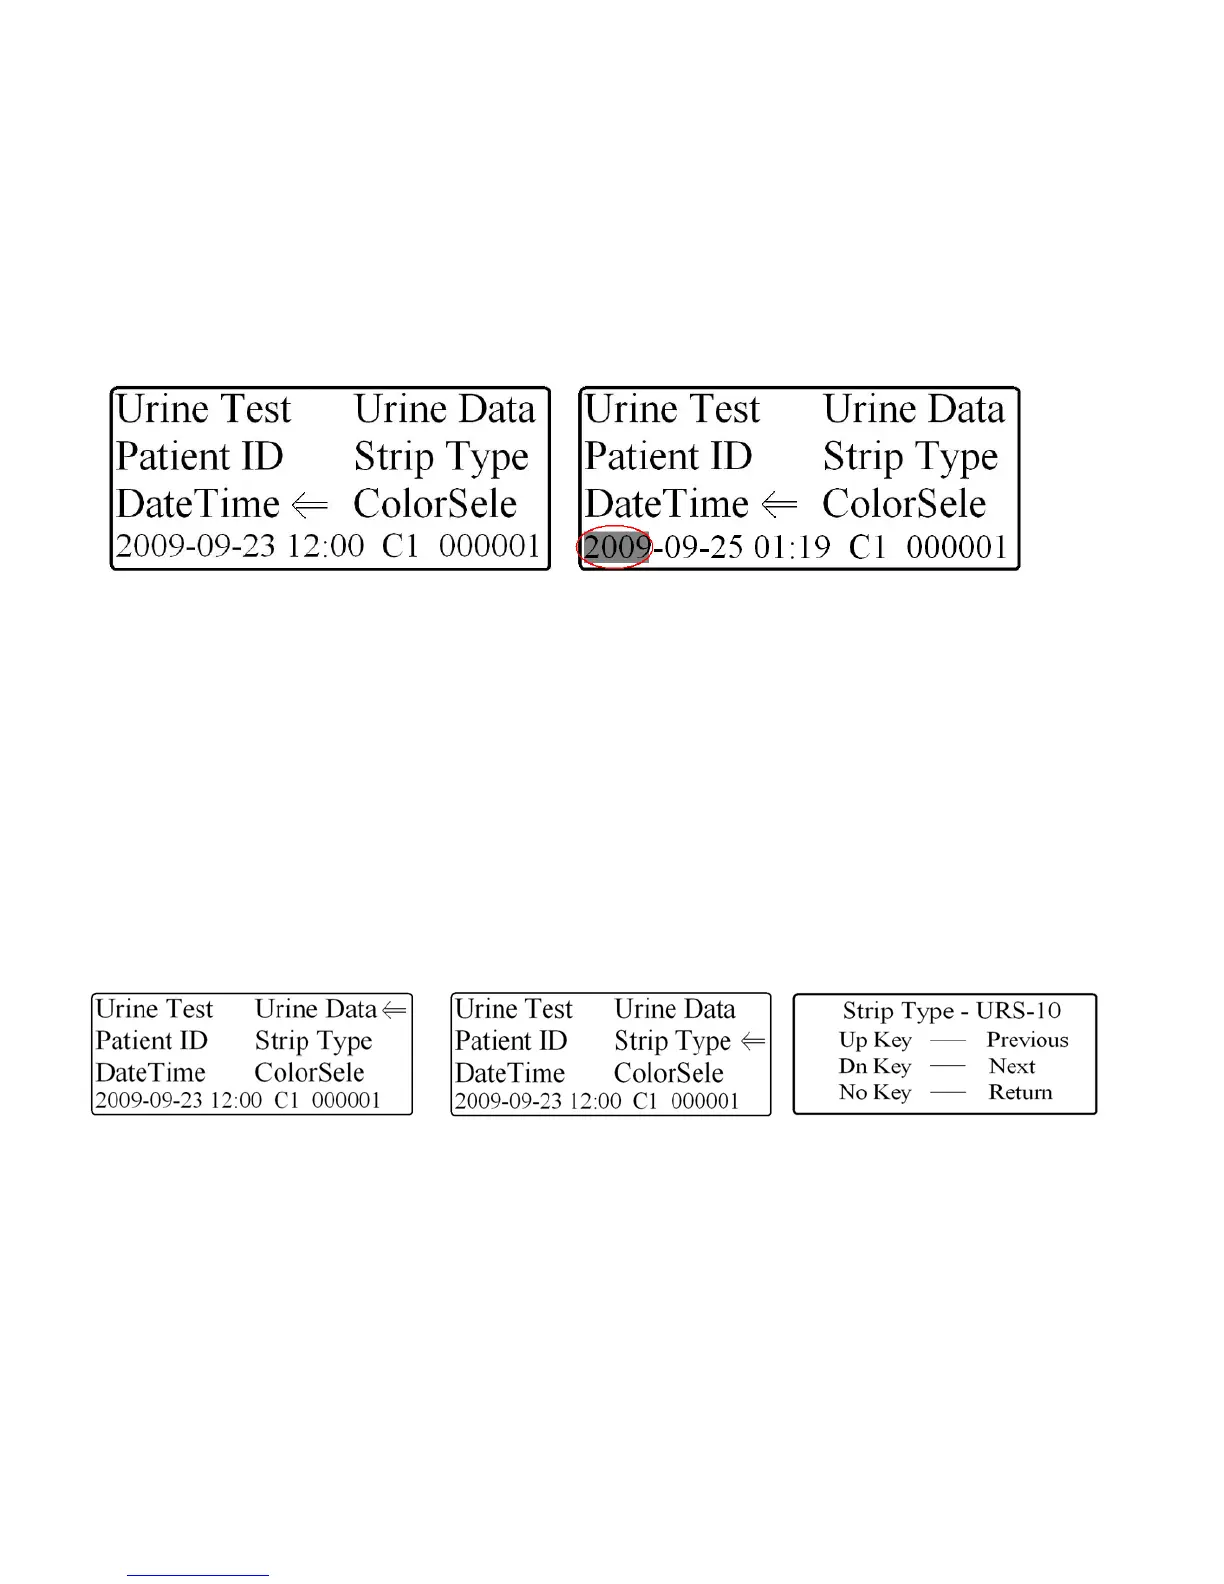
1. Highlight the DateTime option using the selection keys (see Fig. 12).
2. Press the “YES” key to change the date and time.
3. The year will become highlighted (see Fig. 13), use the selection keys to increase/decrease the year.
4. Press the “YES” key to highlight the month, use the selection keys to increase/decrease the month.
5. Press the “YES” key to highlight the day, use the selection keys to increase/decrease the day.
6. Press the “YES” key to highlight the hour, use the selection keys to increase/decrease the hour.
7. Press the “YES” key to highlight the minutes, use the selection keys to increase/decrease the minutes.
8. Press the “YES” key to return to the Main Menu.
Figure 12: Date and Time Function Figure 13: Changing the Date and Time
How to search past patient results:
The Pro Advantage Urine Analyzer stores 1000 Patient ID’s in its internal memory. The Pro Advantage Urine
Analyzer also allows the user access to these stored Patient ID’s. To access the past Patient ID results, the user
must start at the Main Menu.
1. Use the selection keys to highlight the Patient ID option (see Fig 8).
2. After highlighting the Patient ID, press the “YES” key to enter the patient ID which you need to recall (see
how to enter a Patient ID on page 10).
3. Once the Patient ID is entered, use the selection keys to highlight the Urine Data option (see Fig 14).
4. Press the “YES key to enter the Urine Data menu option.
To reprint past data press the “YES” key
To search other Patient ID’s press the “NO” key and return to the Main Menu, following steps 1-4 above.
To manually change the results showing on the LCD screen, use the selection keys to change the results that are
displayed (see Fig. 6, Pg. 9)
Figure 14: Urine Data Option Figure 15: Strip Type Option Figure 16: Strip Type Menu
How to change strip type:
The Pro Advantage Urine Analyzer allows for the user to use multiple strip types on the analyzer. To change the
strip type on the analyzer:
1. Highlight the Strip Type function using the selection keys (see Fig. 15).
2. Press the “YES” key to enter the strip type selection menu (see Fig. 16).
3. Use the selection keys to change the Strip Type.
4. Once changed, press the “NO” key to save the selection and return to the Main Menu