Synchronization Settings
The Other Settings Menu provides the settings to synchronize the time, date, and contact fields of PIM tools and phonebook with a
source over the air through a server on the Inter/Intranet (remote server) or locally (local server) with the use of PC applications. The
PIM applications that are synchronized are Scheduler with calendar, phonebook with contacts, and ToDo list. The phone can
synchronize the PIM applications all at the same time or separately, one at a time.
The Remote feature may not be offered by your service provider. If the service is offered, the service provider may charge a fee to
synchronize a wireless phone on their server. (See Flag.)
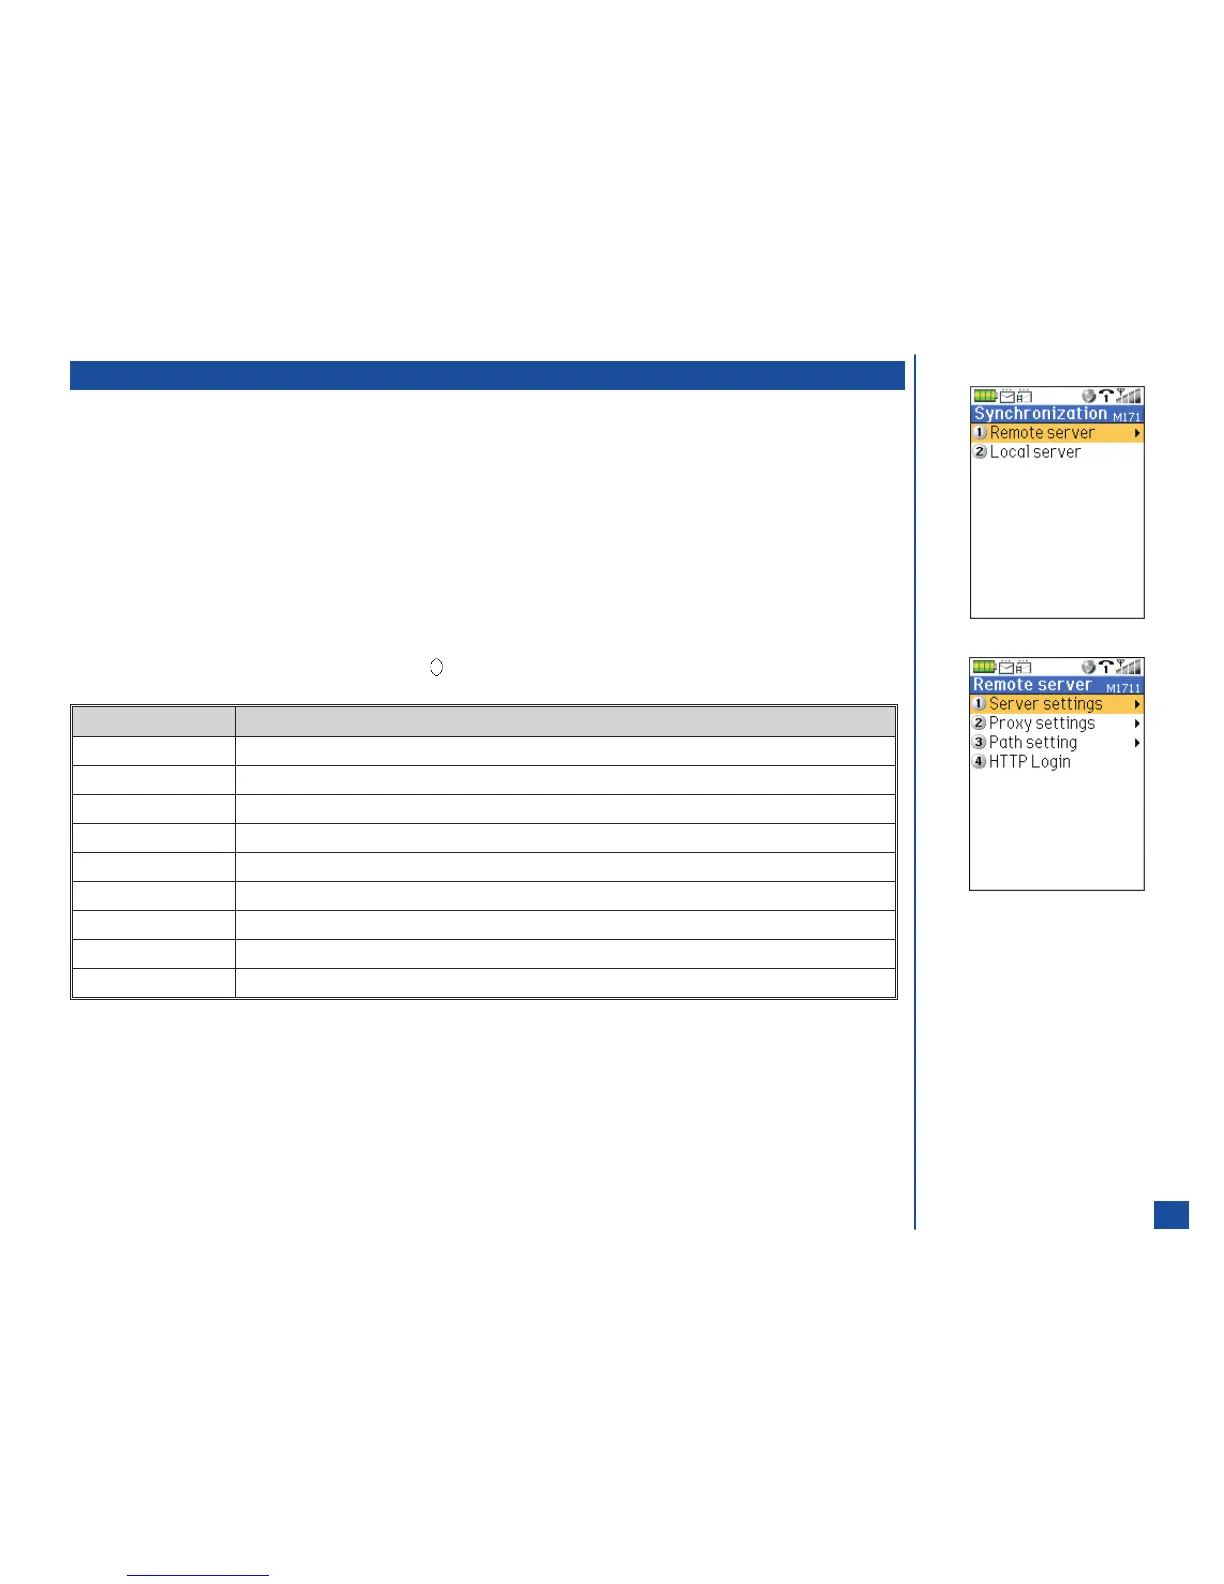
Remote Server
To establish synchronization settings for a remote server:
*
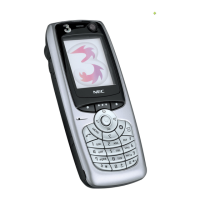
Press MENU (Main),1,7,1,and 1 to display the Remote Server menu.
Input the appropriate number to display the corresponding setting screen: 1 for Server settings, 2 for Proxy settings, 3 for Path
setting, or 4 for HTTP Login. Input the required information in the appropriate fields for server, proxy, path, and HTTP login
settings. (See table below for field settings.) Press (Select)) to select or Softkey 1 (OK) to save the setting changes and
return to the previous screen.
Setting Name Setting Entry
Server URL Enter the synchronization server’s URL.
Server Login Enter your user name and password provided by the server provider.*
IP address Enter the IP address of the server in numeric values only, e.g., “000.00.000.00”.
Proxy address** Enter the IP address of the Proxy server in numeric values only, e.g., “000.00.000.00”.
Proxy Login** Enter the user name and password provided for the proxy server address.*
Phonebook Path Enter the relative path of the phonebook in the server. Begin with “./”, e.g.,”./contact/personal”.
ToDo list Path Enter the relative path of the ToDo/tasks in the server. Begin with “./”, e.g., “./contact/tasks”.
Scheduler Path Enter the relative path of the Scheduler in the server. Begin with “./”, e.g., “./contact/scheduler”.
HTTP Login** Enter the user name and password for HTTP authentication.*
* The user id and password are case sensitive.
** The configuration is only mandatory if the server provides the feature. Only one authentication may be used, either proxy or
HTTP. The 525 wireless phone cannot operate with both authentications turned On.
Local Server
The local server synchronization requires an NEC approved USB cable and additional software. To establish synchronization settings for
a local server:
*
Press MENU (Main),1,7,1,and 2 to display the Login screen.
Input your user name or login identification and password. Press Softkey 1 (OK) to save the setting changes and return to the
Synchronization menu. (See Flag.)
L
Refer to page 160 for the remote
and local Synchronization
procedures.
O
The user name and password for
the local settings are the same that
you use on your PC for
synchronization authentication.
Refer to www.nechdm.com or the
IntellisyncÒ Lite for NEC Wireless
Phones Installation Guide and User
Guide instructions.
53