66
3. Convenient Features
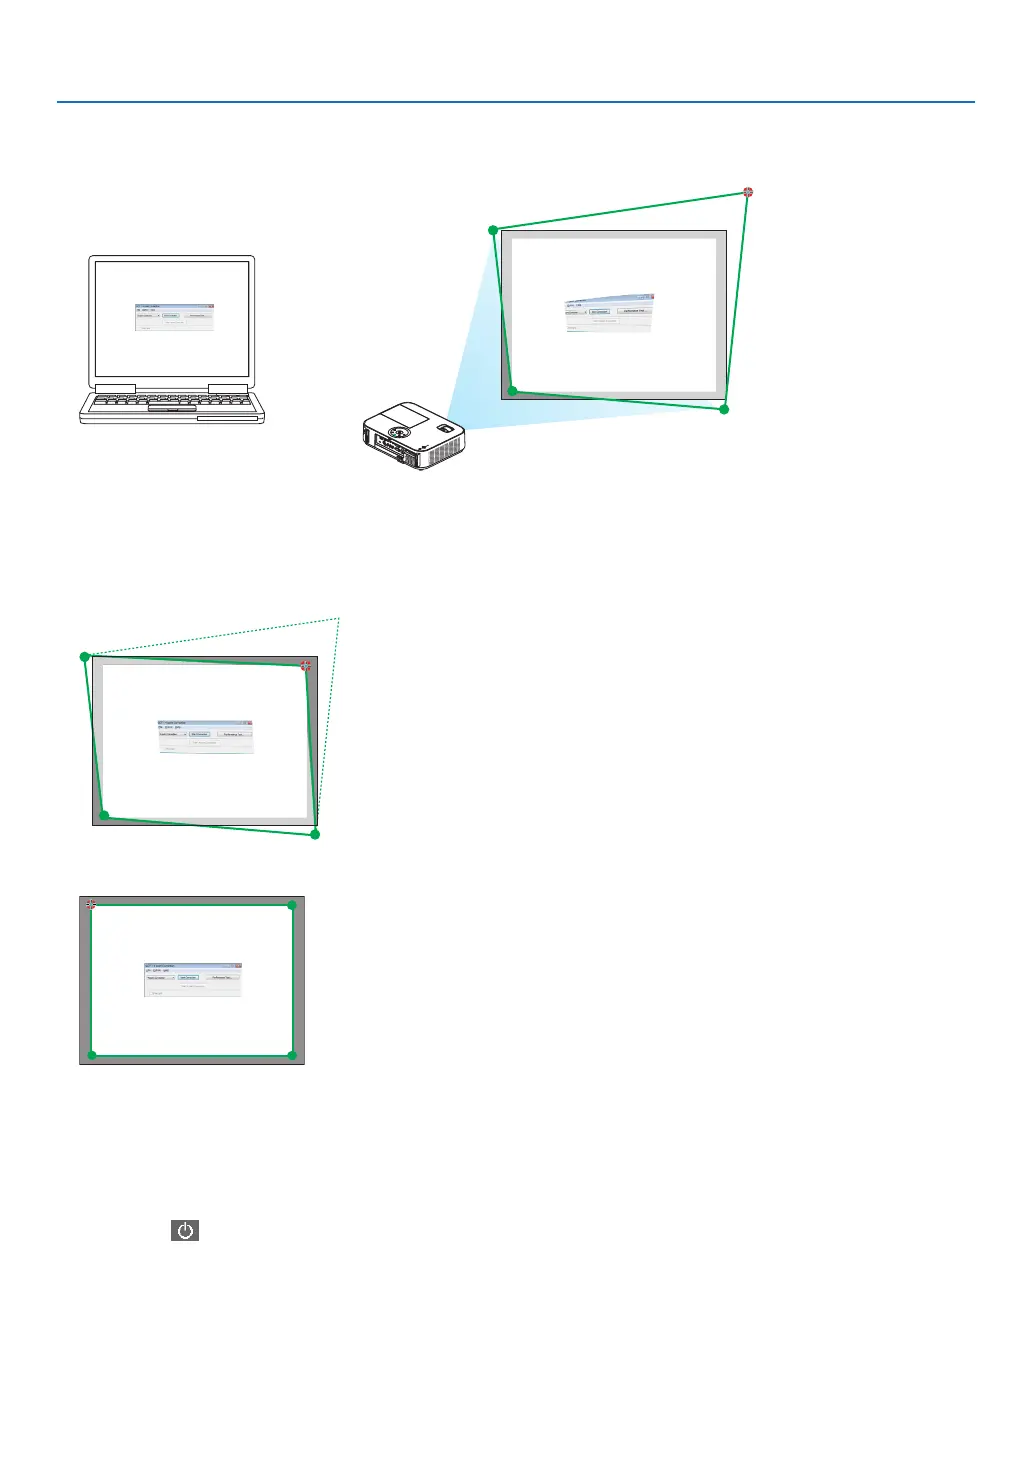
3. Usethemousetoclickthe[•]markofwhichcorneryouwishtomove.
The currently selected [ •]markwillturnred.
(Intheaboveexample,Windowsscreensareomittedforclarication.)
4. Dragtheselected[•]marktothepointyouwishtocorrectanddropit.
• Whenyouclicksomewherewithintheprojectimagearea,thenearest[•]markwillgotothepositionwhere
the mouse cursor is.
5. RepeatStep3and4tocorrectthedistortionoftheprojectedimage.
6. Aftercompleting,right-clickthemouse.
The green frame and the mouse pointer will disappear from the projected image area. This will complete the cor-
rection.
7. Clickthe“X”(close)buttononthe“4-pointCorrection”window.
The“4-pointCorrection”windowwilldisappearandthe4-pointcorrectionwilltakeeffect.
8. Clickthe“ ”buttononthecontrolwindowtoexittheGCT.
TIP:
• Afterperformingthe4-pointcorrection,youcansavethe4-pointcorrectiondatatotheprojectorbyclicking“File”→“Exportto
theprojector…”onthe“4-pointCorrection”window.
• SeetheHelpofImageExpressUtilityLiteforoperating“4-pointCorrection”windowandotherfunctionsthanGCT.(→page
60)