English−44
Creating a Power Schedule
The schedule function allows the monitor to automatically change between power on and standby modes at different times.
To program the schedule:
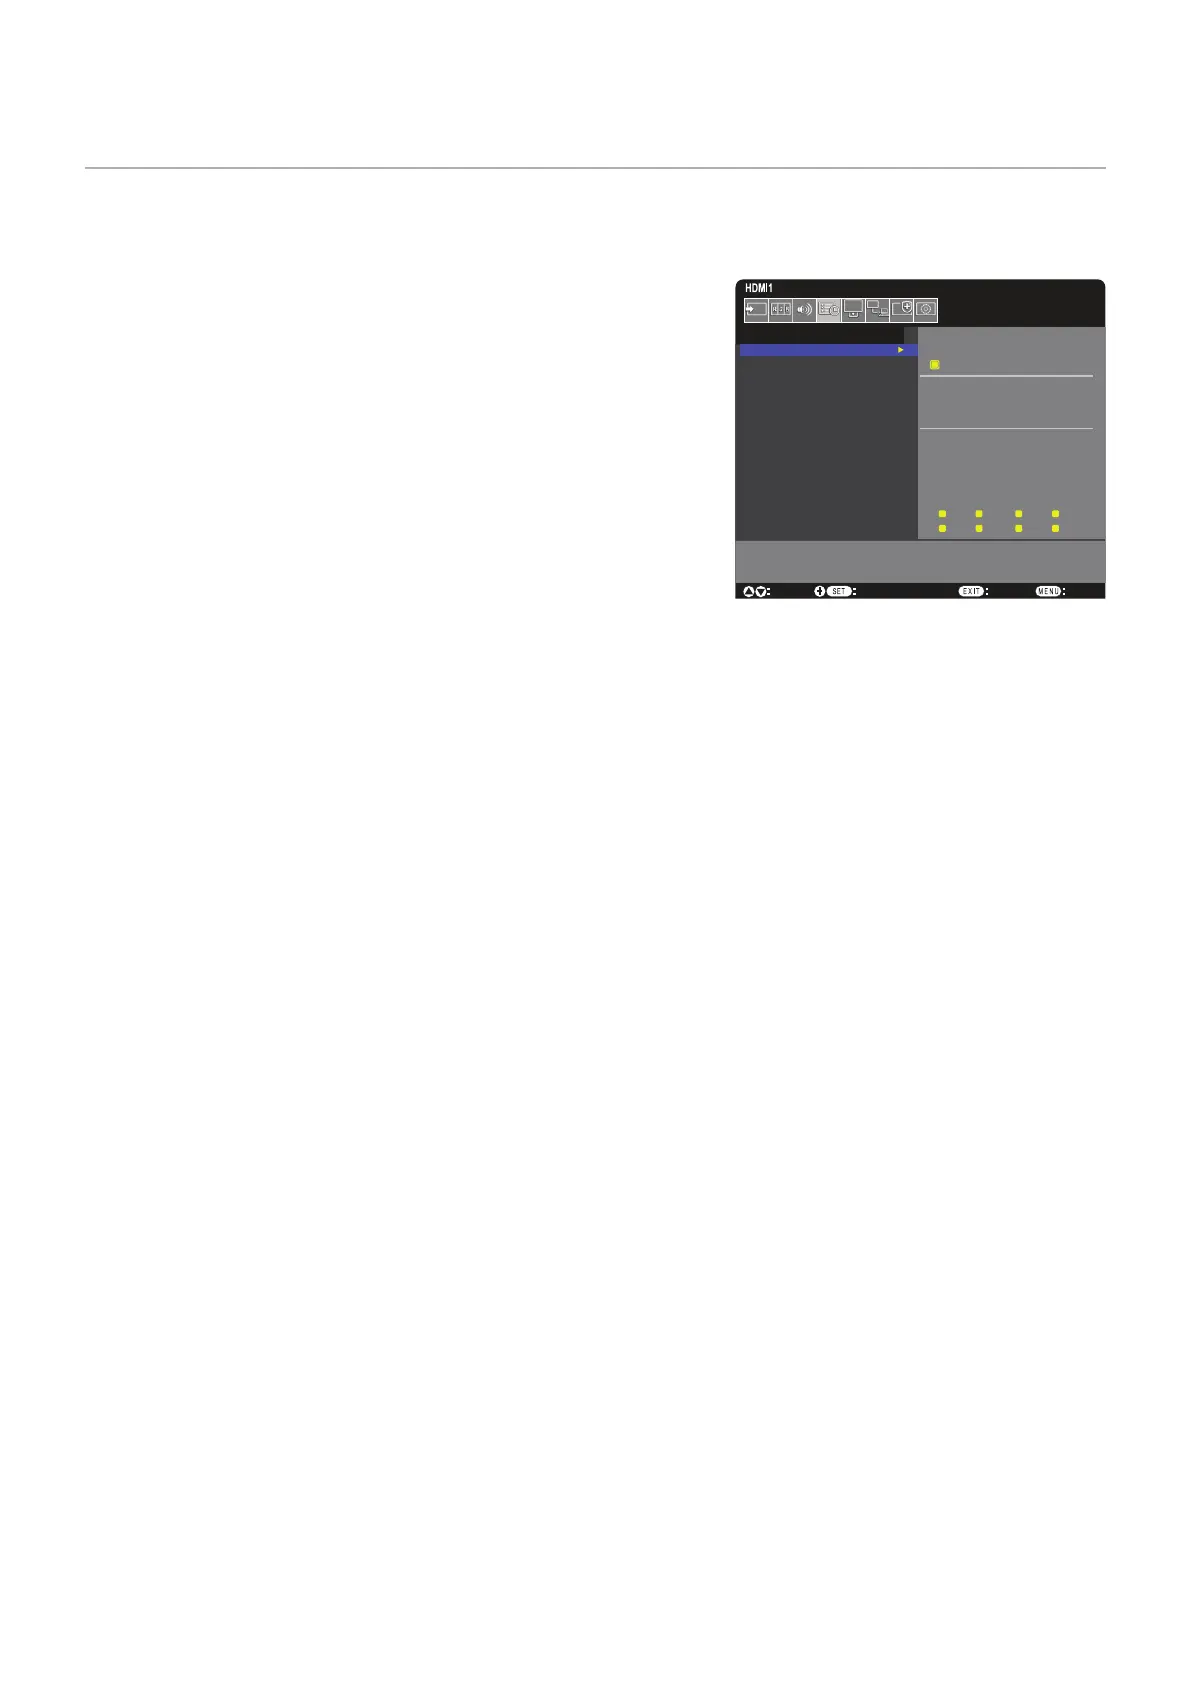
1. Enter the [SCHEDULE] menu.
a Using the remote control, highlight [SCHEDULE INFORMATION] using
the and buttons.
b Press the SET/POINT ZOOM or the + button to enter the Settings menu.
c Highlight the desired schedule number and press SET/POINT ZOOM
button.
d The box next to the number will turn yellow.
The schedule can now be programmed.
2. Use the button to highlight the [POWER]. Use the + and – buttons to
set [ON].
To set a power off schedule, set [OFF].
3. Use the button to highlight the [TIME]. Use the + and – buttons to set the time.
4. Use the and buttons to highlight [INPUT]. Use the + and – buttons to choose the input source.
5. Use the button to select [DATE] or [EVERY WEEK]. Press the SET/POINT ZOOM button on a menu which is suitable for
the schedule.
If the schedule is to be run on a specific day, choose [DATE] and press the SET/POINT ZOOM button.
If a weekly schedule is desired, choose the [EVERY WEEK] using the and buttons and pressing SET/POINT ZOOM
button to select. Then select the specific day and press SET/POINT ZOOM button.
6. After a schedule is programmed, the remaining schedules can then be set. Press MENU button to leave the OSD or press
EXIT button to go back to the previous menu.
NOTE: • If schedules are overlapping, the schedule with the highest number will have priority over the schedule with the
lowest number. For example, schedule #7 will have priority over schedule #1.
Goto Adjustment
Select
Return Close
SCHEDULE:
SCHEDULE INFORMATION
OFF TIMER
RESET
SETTINGS:
1
POWER: ON
TIME: 04 : 03
INPUT: HDMI
DATE
YEAR: 2020
MONTH: JAN
DAY: 01
EVERY WEEK
ALL MON TUE WED
THU FRI SAT SUN