E-23
Setting the allocation of the audio connectors
Setting the AUDIO 1, 2, and 3 connectors to the desired
input.
Example: Setting “AUDIO INPUT1” to “VIDEO 2”
Press the MENU/ENTER button on the remote control to
display the MAIN MENU on the screen, then...
1. Use the ▲ and ▼ buttons to select “AUDIO”, then press
the MENU/ENTER button.
The “AUDIO” screen appears.
2. Use the ▲ and ▼ buttons to select “AUDIO INPUT1”.
3. To set the AUDIO INPUT1 to “VIDEO2”...
Use the
and
buttons to select “VIDEO2”.
The mode switches each time the
or
button is
pressed, as shown in the table on page E-3.
The available sources depend on the settings of “BNC
INPUT” and “D-SUB INPUT”.
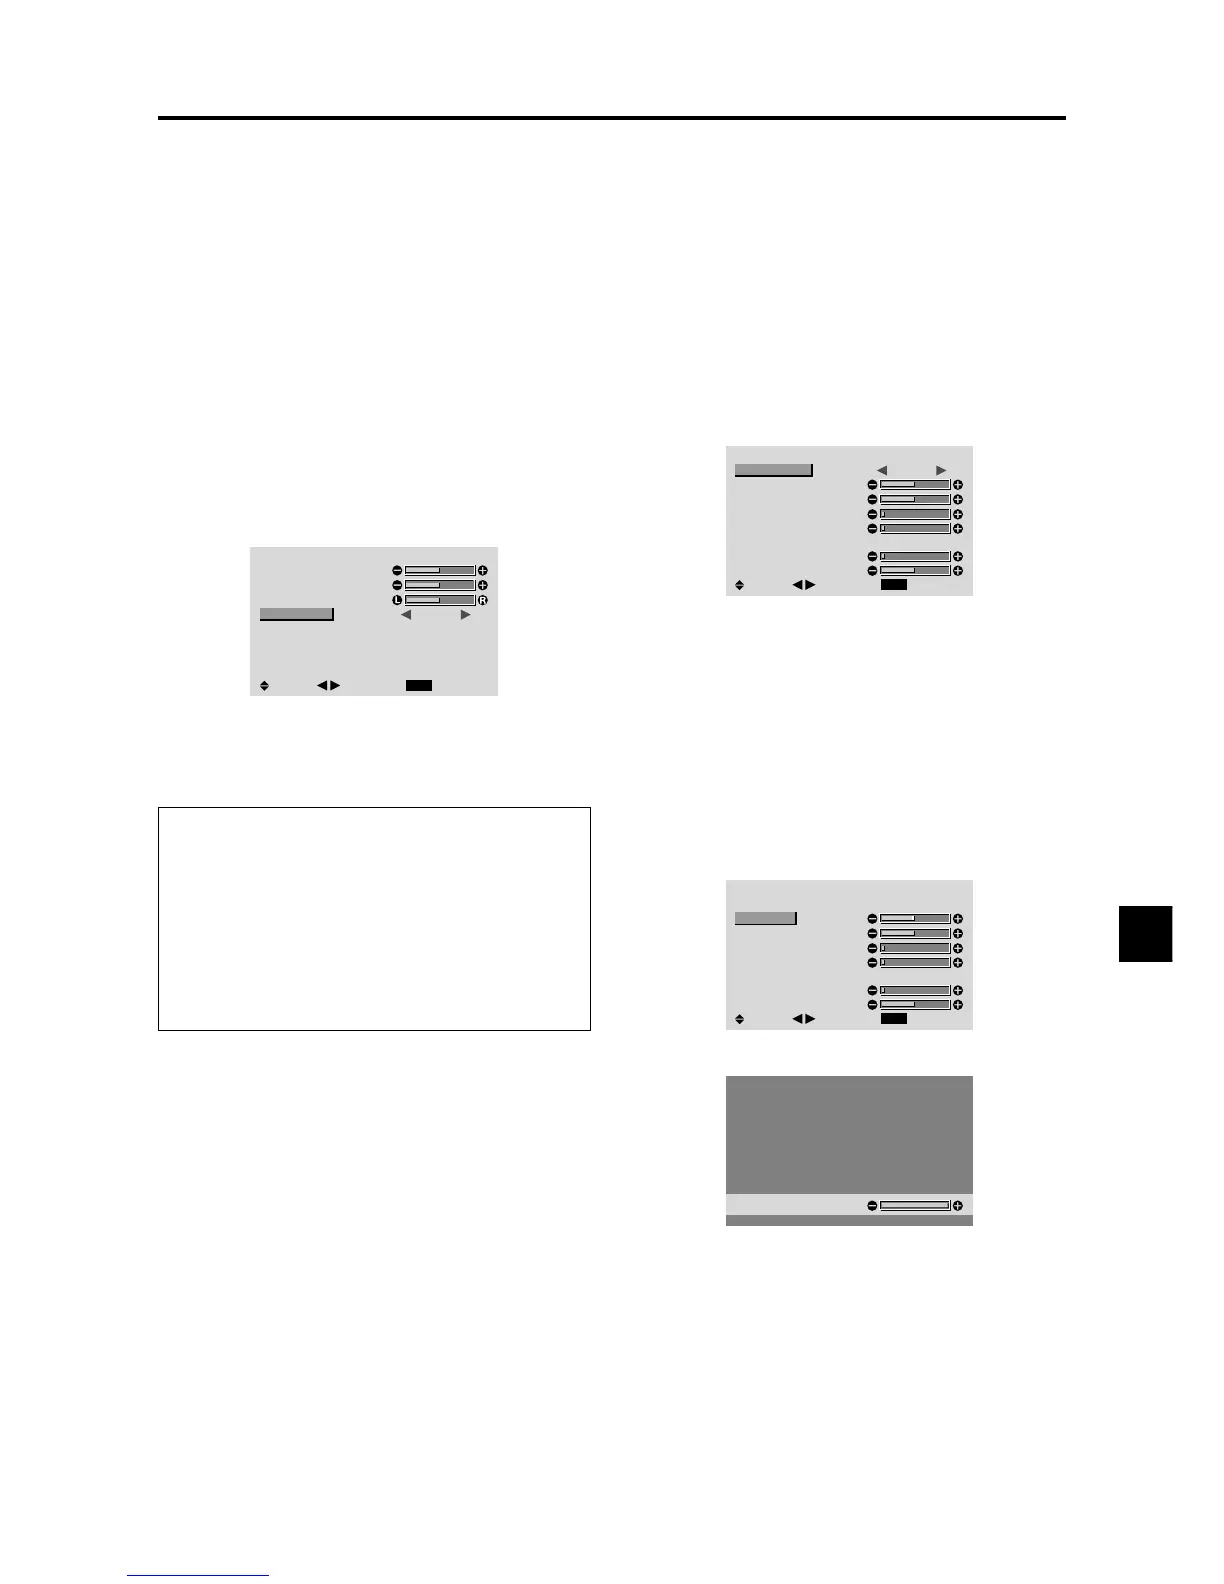
AUDIO
EXIT
BASS
TREBLE
BALANCE
AUDIO INPUT1
AUDIO INPUT2
AUDIO INPUT3
: VIDEO2
: HD/DVD1
: RGB1
SEL.
RETURN
ADJ.
4. Once the setting is completed...
Press the EXIT button to return to the main menu.
To delete the main menu, press the EXIT button once
more.
Information
AUDIO INPUT
A single audio input cannot be selected as the audio
channel for more than one input terminal.
Restoring the factory default settings
Select “ALL RESET” under the OPTION1 menu. Note
that this also restores other settings to the factory
defaults.
Image Adjust Settings Menu
Adjusting the Position, Size, Fine Picture, Picture Adj
The position of the image can be adjusted and flickering
of the image can be corrected.
Example: Adjusting the vertical position in the normal
mode
Press the MENU/ENTER button on the remote control to
display the MAIN MENU on the screen, then...
1. Use the ▲ and ▼ buttons to select “IMAGE ADJUST”,
then press the MENU/ENTER button. The “IMAGE
ADJUST” menu appears.
Default settings (when RGB/PC is selected)
IMAGE ADJUST
EXIT
ASPECT MODE
V-POSITION
H-POSITION
V-HEIGHT
H-WIDTH
AUTO PICTURE
FINE PICTURE
PICTURE ADJ.
: NORMAL
: OFF
SEL.
RETURN
ADJ.
* The settings on the IMAGE ADJUST menu are not
preset at the factory.
To select a mode ...
Use the
and
buttons to select a mode.
The mode switches as follows when the
and
buttons are pressed:
NORMAL ↔ FULL
* The mode can also be switched by pressing the “WIDE”
button on the remote control.
2. To adjust the vertical position ...
Use the ▲ and ▼ buttons to select “V-POSITION”.
IMAGE ADJUST
EXIT
ASPECT MODE
V-POSITION
H-POSITION
V-HEIGHT
H-WIDTH
AUTO PICTURE
FINE PICTURE
PICTURE ADJ.
: NORMAL
: OFF
SEL.
RETURN
ADJ.
3. Adjust using the
and
buttons.
V-POSITION
* If neither the
or
button is pressed within 5 seconds,
the current setting is set and the previous screen
reappears.
To continue making other computer image
adjustments ...
Repeat from step 2.
4. Once all adjustments are completed ...
Press the EXIT button to return to the main menu.
To delete the main menu, press the EXIT button once
more.
3-86
CONFIDENTIAL
 Loading...