4
1. Introduction
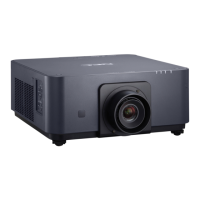
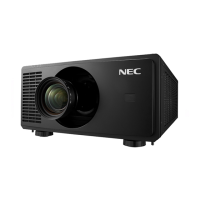
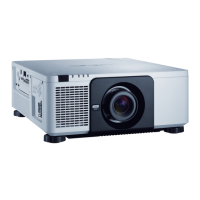
Part Names of the Projector
Front/Top
Thelensissoldseparately.ThedescriptionbelowisforwhentheNP18ZLlensismounted.
Control Panel
(→ page 6)
Lens
Ventilation (inlet)
Filter Cover
Remote Sensor (located on the
front and the rear)
(→ page 9)
Remote Sensor
(→ page 9)
Terminal Panel
(→ page 7)
IndicatorSection
(→ page 6)
Lens Release Button
(→ page 155)
ACInput
Connect the supplied power cord's
three-pin plug here, and plug the
other end into an active wall outlet.
(→ page 13)
Main Power Switch
USB (LAN) Port (for optional Wire-
less LAN Unit) (→ page 164)
Lens Cap
(The lens cap is attached to the
lens.)
Adjustable Tilt Foot
(→ page 25)
Adjustable Tilt Foot
(→ page 25)
Built-in Security Slot ( )*
Slot for Power Cord Stopper (→
page 14)
* ThissecurityslotsupportstheMicroSaver
®
SecuritySystem.

 Loading...