EasyManua.ls Logo

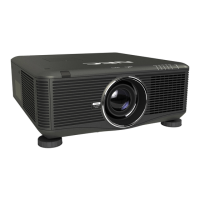
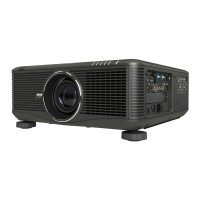
NEC NP-PX700W User Manual

NEC NP-PX700W
251 pages
To Next Page IconTo Next Page
Page #1 background imageLoading...
Page #1 background image
Projector
PX750U/PX700W/PX800X
User’s Manual
Model No.
NP-PX750U, NP-PX750UG, NP-PX700W, NP-PX700WG, NP-
PX800X, NP-PX800XG
• Theprojector’sModelNo.indicatedontheprojector’slabelisNP-
PX750U, NP-PX750UG, NP-PX700W, NP-PX700WG, NP-PX800X,
andNP-PX800XGrespectively.
EachmodelisreferredtoasPX750U,PX700W,andPX800Xre-
spectivelyunlessotherwisespecied.

Table of Contents

Other manuals for NEC NP-PX700W

Questions and Answers:

NEC NP-PX700W Specifications

General IconGeneral
Matrix size0.65 \
Native aspect ratio-
Projection distance0.8 - 54.8 m
Vertical scan range48 - 120 Hz
Horizontal scan range15 - 108 kHz
Projection technologyDLP
Contrast ratio (typical)2100:1
Screen size compatibility50 - 300 \
Projector native resolutionWXGA (1280x800)
Keystone correction, vertical- 30 - 30 °
Keystone correction, horizontal- 40 - 40 °
Focal length range26 - 117.4 mm
Aperture range (F-F)1.7 - 3.1
Vertical lens shift range-50 - 50 %
Horizontal lens shift range-10 - 10 %
Lamp power400 W
Lamps quantity1 lamp(s)
Light source typeLamp
Lamp power (economic mode)320 W
Service life of light source2000 h
Service life of light source (economic mode)2500 h
Full HDNo
Supported video modes1080i, 1080p, 480i, 480p, 576i, 576p, 720p
Analog signal format systemNTSC, NTSC 4.43, PAL, PAL 60, PAL M, PAL N, SECAM
Supported graphics resolutions1024 x 768 (XGA), 1280 x 1024 (SXGA), 1400 x 1050 (SXGA+), 1600 x 1200 (UXGA), 1920 x 1200 (WUXGA), 640 x 480 (VGA), 800 x 600 (SVGA)
Audio (L/R) in0
BNC input ports5
USB connector typeUSB Type-A
Serial interface typeRS-232
USB 2.0 ports quantityUSB 2.0 ports have a data transmission speed of 480 Mbps, and are backwards compatible with USB 1.1 ports. You can connect all kinds of peripheral devices to them.
Progressive scan outputYes
VGA (D-Sub) ports quantity3
Optical disc player typeNot included
Noise level43 dB
CertificationUSA: UL60950-1, FCC Part15 Class B, Canada: CSA60950-1, ICES-003 Class B
Noise level (economic mode)39 dB
PlacementDesktop
Product typeLarge venue projector
Product colorBlack
Power sourceAC
AC input voltage100 - 240 V
AC input frequency50 - 60 Hz
Power consumption (standby)33 W
Power consumption (typical)1006 W
Storage temperature (T-T)-10 - 50 °C
Operating temperature (T-T)0 - 40 °C
Operating relative humidity (H-H)20 - 80 %
Remote control typeIR
Weight and Dimensions IconWeight and Dimensions
Depth516 mm
Width504 mm
Height192 mm
Weight19700 g

Summary

1. Introduction

1 What’s in the Box?

Lists all items included in the projector packaging for verification.

2 Introduction to the Projector

Provides an overview of the projector, its capabilities, and features.

3 Part Names of the Projector

Identifies and labels the physical components of the projector's front/top and rear.

4 Part Names of the Remote Control

Labels and describes all buttons and functions on the projector's remote control.

5 Operating Environment for Software Included on CD-ROM

Details the system requirements for bundled software like Image Express Utility.

2. Projecting an Image (Basic Operation)

1 Flow of Projecting an Image

Outlines the step-by-step process for setting up and projecting an image.

2 Connecting Your Computer/Connecting the supplied Power Cord

Explains how to connect the computer and power cord to the projector for basic operation.

3 Turning on the Projector

Details the procedure for powering on the projector, including standby mode.

4 Selecting a Source

Describes how to choose the input source (computer, video, etc.) for projection.

5 Adjusting the Picture Size and Position

Explains how to adjust image size and position using lens shift, zoom, focus, and tilt feet.

6 Correcting Keystone Distortion

Guides on using the Keystone function to fix trapezoidal image distortion digitally.

7 Optimizing Computer Signal Automatically

Explains how to use the Auto Adjust button for automatic image optimization.

8 Turning off the Projector

Provides the steps for safely powering down the projector.

9 After Use

Covers post-operation steps like unplugging and securing the projector.

3. Convenient Features

1 Blocking the lamp light (LENS SHUTTER)

Explains how to use the shutter button to block the projector's light output.

2 Turning off the Image

Details using the AV-MUTE button to temporarily turn off the projected image.

3 Freezing a Picture

Describes how to use the FREEZE button to pause and resume the projected image.

4 Enlarging a Picture

Explains how to use the D-ZOOM function to magnify the projected image up to four times.

5 Changing Eco Mode/Checking Energy-Saving Effect Using Eco Mode [ECO MODE]

Covers selecting lamp brightness modes for power saving and checking CO2 emission reduction.

6 Using the Optional Remote Mouse Receiver (NP01MR)

Explains how to operate the computer's mouse functions using the projector's remote control.

7 Correcting Horizontal and Vertical Keystone Distortion [CORNERSTONE]

Details the Cornerstone feature for correcting trapezoidal distortion using edge alignment.

8 Displaying Two Pictures at the Same Time

Covers using PIP and PICTURE BY PICTURE modes to display two simultaneous input signals.

9 Preventing the Unauthorized Use of the Projector [SECURITY]

Explains how to set up a keyword to prevent unauthorized operation of the projector.

10 Storing Changes for Lens Shift, Zoom, and Focus [LENS MEMORY]

Guides on saving and recalling lens shift, zoom, and focus adjustments for different signals.

11 Displaying a Picture Using [EDGE BLENDING]

Explains how to create a large, uniform image from multiple projectors by blending edges.

12 Controlling the Projector by Using an HTTP Browser

Details how to control projector settings and operations via a web browser through the network.

13 Projecting Your Computer’s Screen Image from the Projector via a Network [NETWORK PROJECTOR]

Guides on projecting the PC screen image over a network without a direct cable connection.

14 Using the Projector to Operate Your Computer via a Network [REMOTE DESKTOP]

Explains how to remotely control a computer from the projector via a network connection.

4. Using the Viewer

1 What you can do with the Viewer

Describes the Viewer's capabilities for displaying files from USB or shared network folders.

2 Preparing presentation materials

Guides on creating and saving presentation files (PowerPoint, PDF) for use with the Viewer.

3 Projecting images stored in a USB memory device

Explains how to start the Viewer and display files from a USB memory device.

4 Projecting data from shared folder

Details how to connect to and display files from a shared network folder.

5 Projecting data from media server

Guides on setting up and connecting to a media server for file playback.

6 Restrictions on displaying files

Lists limitations and restrictions when displaying PowerPoint and PDF files via the Viewer.

5. Using On-Screen Menu

1 Using the Menus

Explains the basic navigation and operation of the projector's on-screen menu system.

2 Menu Elements

Identifies and explains the common elements found in the projector's menu windows.

3 List of Menu Items

Provides a comprehensive list of menu items and their available options based on input source.

4 Menu Descriptions & Functions [SOURCE]

Details the functions and options available for selecting the input source.

5 Menu Descriptions & Functions [ADJUST]

Explains the picture adjustment settings like Mode, Preset, Gamma Correction, and Color Temperature.

6 Menu Descriptions & Functions [SETUP]

Covers setup options including Keystone, Cornerstone, PIP, Wall Color, and Lamp Mode settings.

7 Menu Descriptions & Functions [INFO.]

Describes how to view projector status, lamp usage, and total carbon savings information.

8 Menu Descriptions & Functions [RESET]

Explains how to reset projector settings to factory defaults for various categories.

9 Application Menu

Details the application menu for accessing User Supportware, Network Settings, and Tools.

6. Connecting to Other Equipment

1 Mounting a lens (sold separately)

Provides instructions on how to attach and detach optional lenses for the projector.

2 Making Connections

Guides on connecting the projector to various external devices using different cable types.

7. Maintenance

1 Cleaning the Filters

Explains the procedure for cleaning the projector's air filters to maintain performance.

2 Cleaning the Lens

Provides instructions on how to safely clean the projector's lens.

3 Cleaning the Cabinet

Details the process for cleaning the projector's exterior cabinet.

4 Replacing the Lamp and the Filters

Guides on replacing the projector lamp and filters when they reach end of life.

5 Replacing the Filters

Provides specific instructions for replacing the projector's air filters.

8. User Supportware

1 Installing Software Program

Guides on installing software like Image Express Utility and PC Control Utility Pro.

2 Projecting Images or Videos from the Projector over a LAN (Image Express Utility 2.0)

Explains how to send computer screens to the projector over a network using Image Express Utility 2.0.

3 Controlling the Projector over a LAN (PC Control Utility Pro 4)

Guides on controlling the projector remotely via LAN using PC Control Utility Pro 4 software.

4 Projecting Your Mac’s Screen Image from the Projector over a LAN (Image Express Utility 2 for Mac)

Guides on using Image Express Utility 2 for Mac to project Mac screen images over a network.

5 Operating the Projector Via the LAN (Virtual Remote Tool)

Details using Virtual Remote Tool to control the projector and transfer images via LAN.

6 Converting PowerPoint files to Slides (Viewer PPT Converter 3.0)

Explains how to convert PowerPoint files to JPEG for viewing on the projector via USB.

9. Appendix

1 Throw distance and screen size

Provides tables for screen sizes and throw distances for different lenses.

2 Replacing the Color Wheel (included)

Guides on how to remove and replace the projector's color wheel.

3 Mounting the Optional Board (sold separately)

Explains the procedure for installing optional interface boards into the projector.

4 Compatible Input Signal List

Lists all compatible analog, HDMI, DisplayPort, and component input signals.

5 Specifications

Details the projector's technical specifications including optical, electrical, and mechanical.

6 Cabinet Dimensions

Provides the physical dimensions and mounting hole information for the projector.

7 Pin Assignments of D-Sub COMPUTER Input Connector

Shows the pin assignments for the D-Sub computer input connector.

8 Troubleshooting

Lists common problems and their corresponding indicator messages and solutions.

10 Troubleshooting Check List

A checklist to help users diagnose and solve problems before contacting support.

11 TravelCare Guide

Information about NEC's international warranty and repair service for travelers.

12 REGISTER YOUR PROJECTOR! (for residents in the United States, Canada, and Mexico)

Instructions on how to register the projector online to activate warranty and service programs.

Related product manuals