WIM | INSTALLATION GUIDE
Connections
5/20
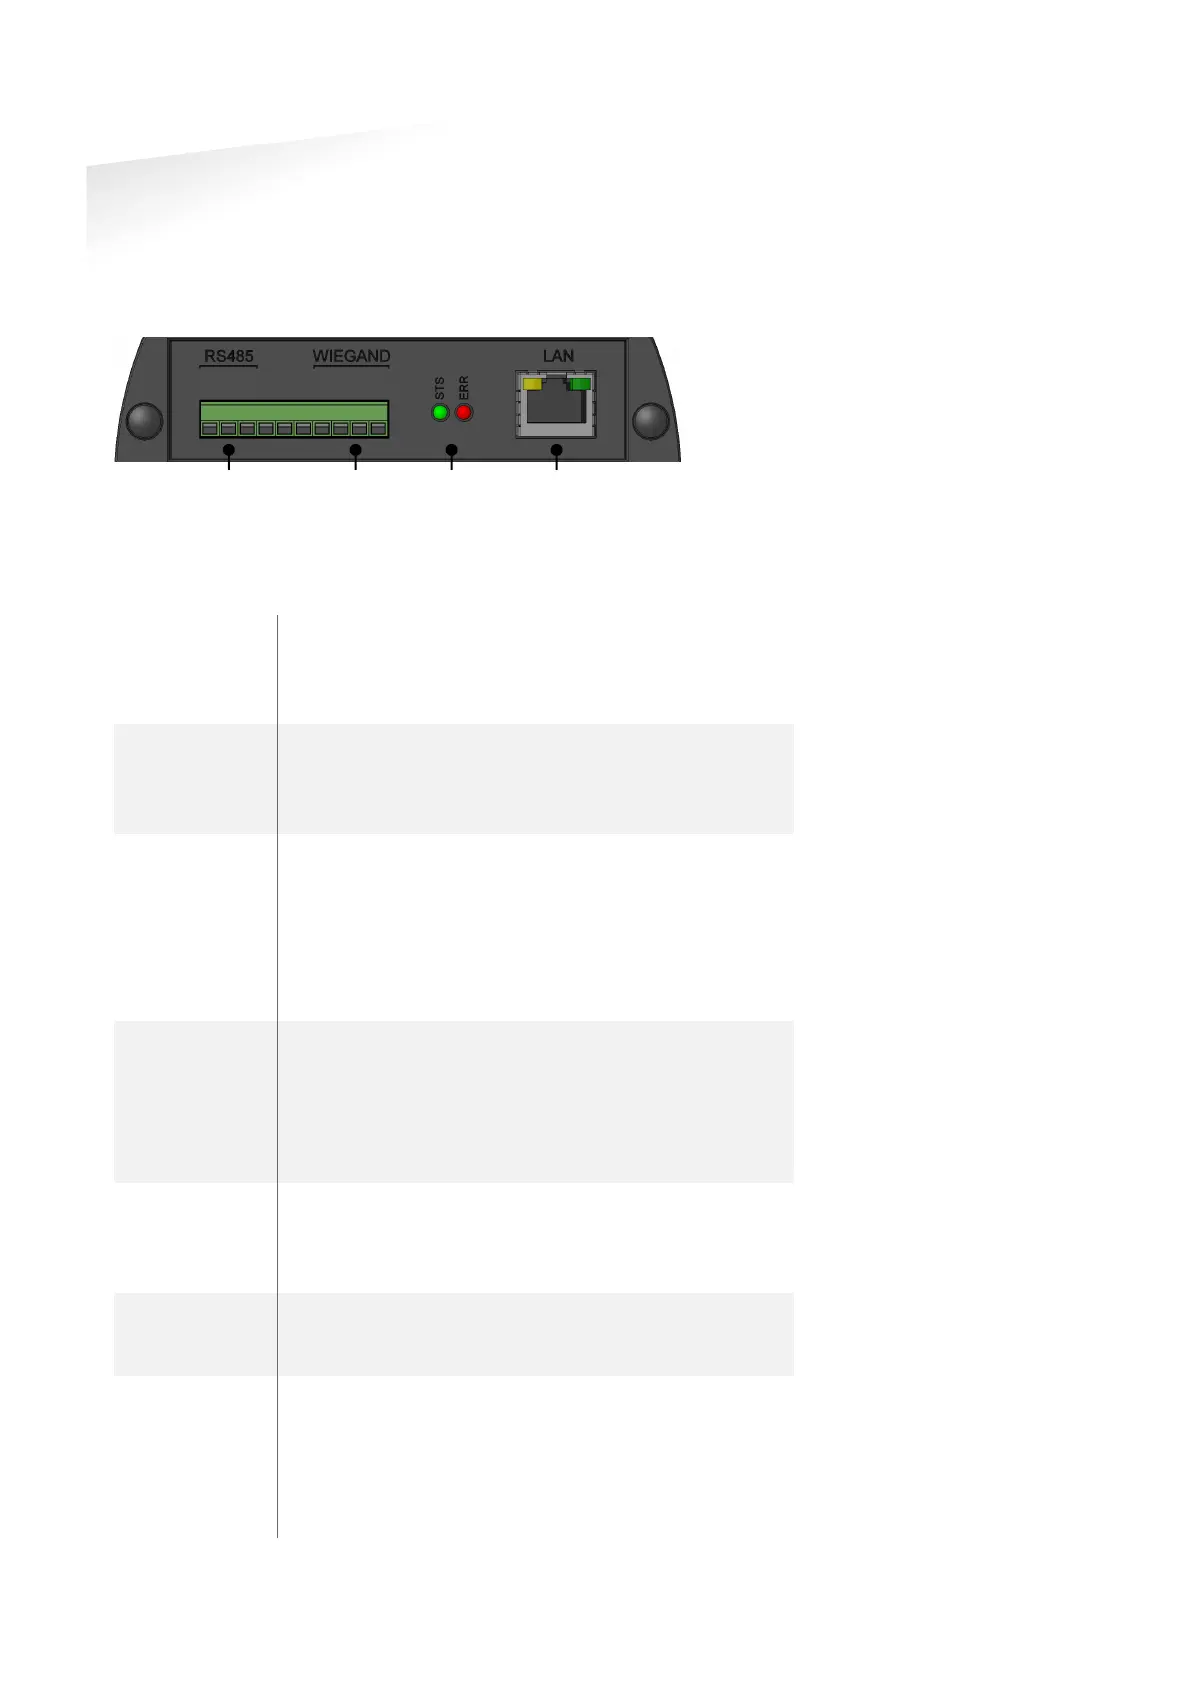
3 CONNECTIONS
Below the connections are shown which are available on front panel of the device.
Shielded cable shall be used for all connections except power supply.
Figure 2: Front view
RS485 Connect the RS485 to the License Plate Reader (9600, 8N1).
A: RS485-A (yellow)
B: RS485-B (green)
WIEGAND Connect the Wiegand output to your access control system.
D1: Wiegand data-1 (white)
D0: Wiegand data-0 (green)
MAGSTRIPE Magstripe Clock and Data output.
Select with the plate conversion mode switches. See for more
details chapter 5.
D1: Data
D0: Clock
CLS: Card Loaded
BARCODE Barcode wand emulation data output in code39 format.
Select with the plate conversion mode switches. See for more
details chapter 5.
D1: Wand emulation data output (black=high)
D0: Wand emulation data output (black=low)
STS LED Status LED (green)
Blinks regularly to indicate standby.
Blinks fast to indicate that a RS485 message (license plate) is
ERR LED Error LED (red)
Normally off.
On if match-list used and license plate not found.
LAN The LAN connection (RJ45 socket) is used to configure the
device and manage the match-list.
Link LED (left): Off=No link, Amber=10Mbps,
Green=100Mbps.
Activity LED (right): Off=No activity, Amber=HDX
Activity, Green=FDX Activity.
RS485
connection
WIEGAND
output
LED
indications
LAN
connection