Installing the Inside Version
12 E-Coder)R900i Installation and Maintenance Guide
3 Before installing the meter, remove the thread protectors and spud
caps. Be sure that no debris enters the meter during installation.
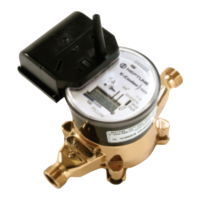
4 Place the coupling gaskets inside the coupling nuts and set the
meter in the line. The meter should be in the horizontal position
with the register dial facing upward. The direction of flow marked
on the meter must agree with the direction of water flow.
5 Start the coupling nuts by hand then use a wrench and tighten suffi-
ciently to prevent leakage. Be careful not to cross-thread the con-
nections.
6 Open the meter outlet valve slowly. Open a down stream faucet and
run enough water to dissipate entrained air and flush the line. While
the faucet is open, check to see if the meter is operating correctly.
7 Turn off the faucet and check the meter installation for leaks.
8 To activate the LCD and begin the MIU transmissions, use a small
flashlight to activate the light sensor. The light sensor is recessed
under a small hole near the center of the faceplate.
9 Test the installation as described in “Testing the E-Coder)R900i
Inside Installation” on page 13.
Retrofit Meter Installation
1 Use a punch/screwdriver and hammer to punch out the tamper
proof seal pin on the existing register head.
2 Remove the existing register by twisting counter-clockwise.
3 Install the new E-Coder)R900i register head onto the meter body in
the desired orientation by twisting clockwise.
4 Test the installation as described in “Testing the E-Coder)R900i
Inside Installation” on page 13.
5 Snap the new tamper-proof seal pin to secure the register to the
meter body.
Use caution; the meter threads are sharp.
The small hole is denoted on the faceplate by a flashlight
symbol.