Labelflash
2. If you want to print a DiskT@2 on the data side, insert a blank Labelflash disc with the data
side facing down in the recorder.
The Burn Label window is opened with the DiskT@2 logo.
3. Create a label according to your requirements or open a label that you have already created
with Nero CoverDesigner.
The interface in the Burn Label window and creation of a label work on the
same principle as Nero CoverDesigner. See the separate Nero CoverDesigner
manual for full instructions on how to create professional looking covers and la-
bels.
4. If you want to change the area in which the label is printed, change the print area accordingly
using the input fields Inner Radius and Width.
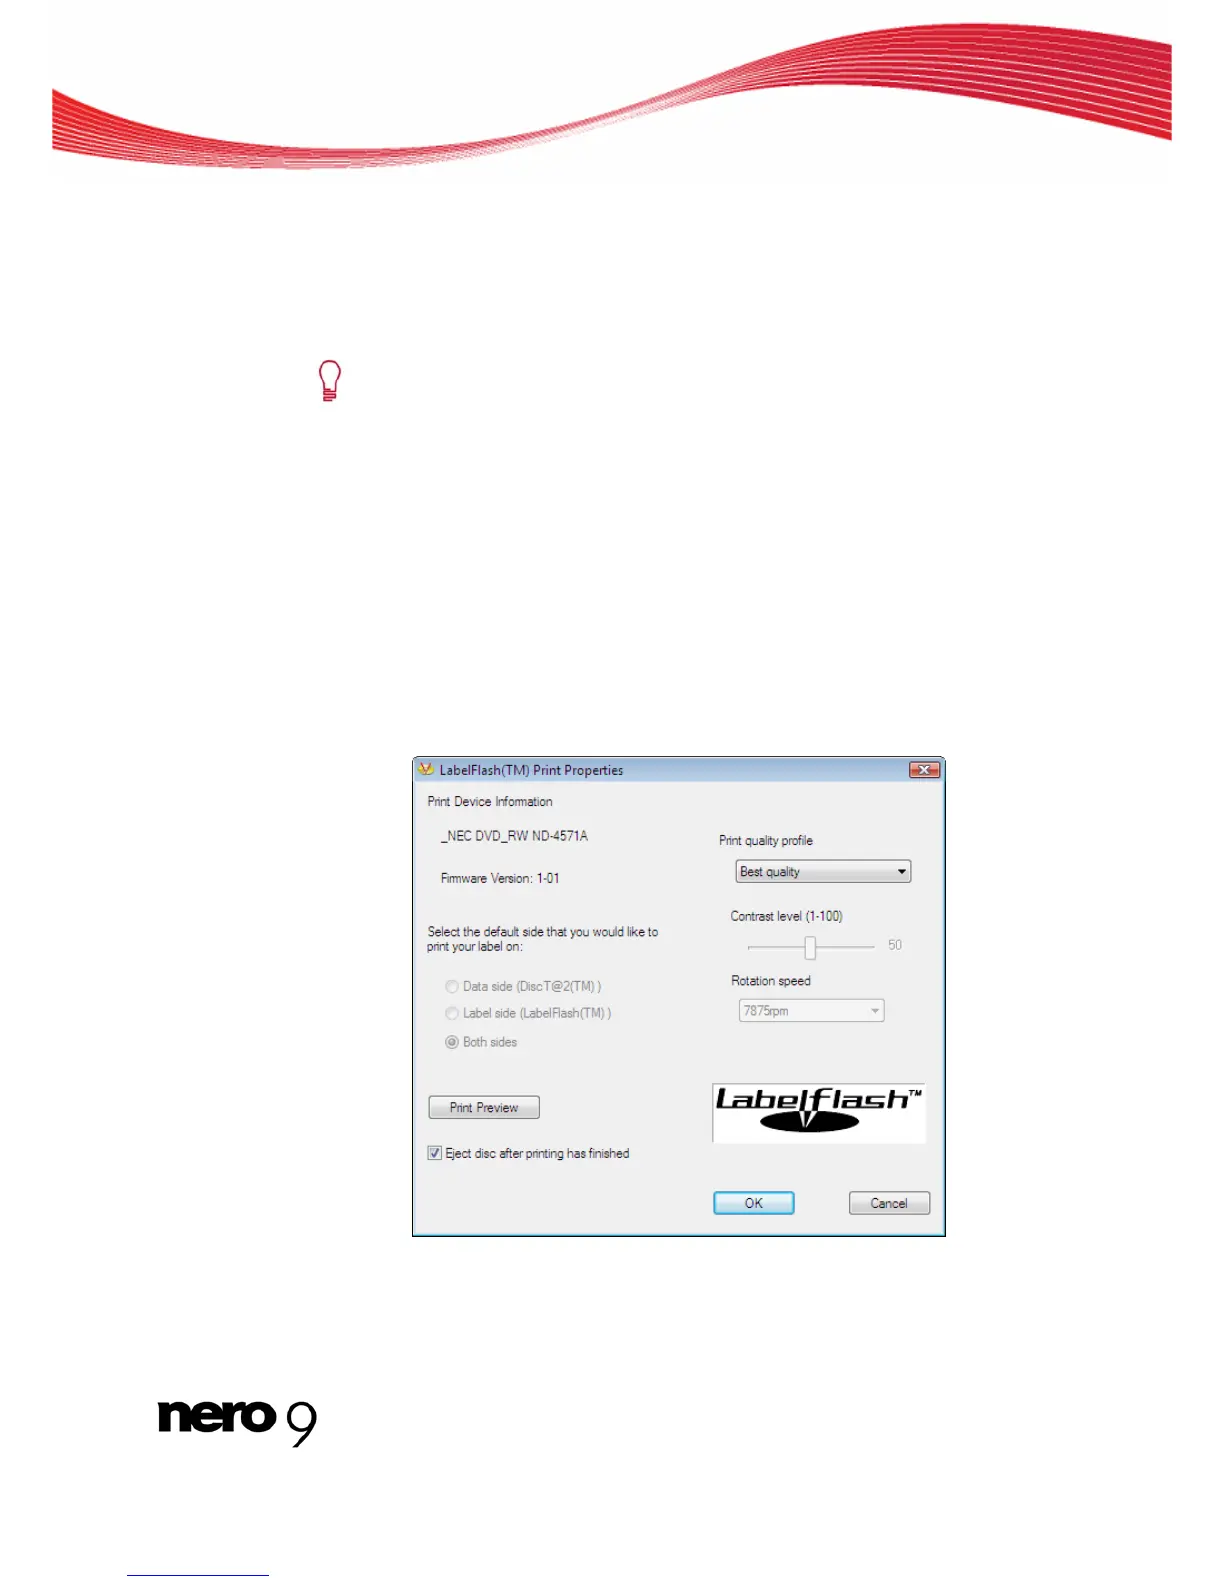
5. If you want to view or change the print properties:
1. Click the Change button.
The Labelflash Print Properties window is opened.
2. If you want to change the printing quality, select a quality level from the Print quality pro-
file drop-down menu.
3. If you select the User defined entry from the Print quality profile drop-down menu, you
can change the contrast level and the rotation speed.
4. Click the OK button.
Labelflash Print Properties
The Labelflash Print Properties window is closed and the changes are accepted.
Nero Burning ROM 66