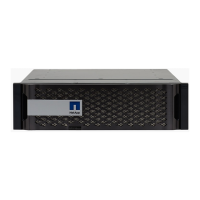
controller power modules into it.
1. If you are not already grounded, properly ground yourself.
2. Align the end of the DCPM module with the chassis opening, and then gently slide it into the chassis until it
clicks into place.
The module and slot are keyed. Do not force the module into the opening. If the module
does not go in easily, realign the module and slide it into the chassis.
3. Repeat this step for the remaining DCPM module.
Step 9: Install fans into the chassis
To install the fan modules when replacing the chassis, you must perform a specific sequence of tasks.
1. If you are not already grounded, properly ground yourself.
2. Align the edges of the replacement fan module with the opening in the chassis, and then slide it into the
chassis until it snaps into place.
When inserted into a live system, the amber Attention LED flashes four times when the fan module is
successfully inserted into the chassis.
3. Repeat these steps for the remaining fan modules.
4. Align the bezel with the ball studs, and then gently push the bezel onto the ball studs.
Step 10: Install I/O modules
To install I/O modules, including the NVRAM/FlashCache modules from the old chassis, follow the specific
sequence of steps.
You must have the chassis installed so that you can install the I/O modules into the corresponding slots in the
new chassis.
1. If you are not already grounded, properly ground yourself.
2. After the replacement chassis is installed in the rack or cabinet, install the I/O modules into their
corresponding slots in the replacement chassis by gently sliding the I/O module into the slot until the
lettered and numbered I/O cam latch begins to engage, and then push the I/O cam latch all the way up to
lock the module in place.
3. Recable the I/O module, as needed.
4. Repeat the preceding step for the remaining I/O modules that you set aside.
If the old chassis has blank I/O panels, move them to the replacement chassis at this time.
Step 11: Install the power supplies
Installing the power supplies when replacing a chassis involves installing the power supplies into the
replacement chassis, and connecting to the power source.
1. If you are not already grounded, properly ground yourself.
2. Using both hands, support and align the edges of the power supply with the opening in the system chassis,
731


 To Next Page