2. Press the blue button on the boot media housing to release the boot media from its housing, and then
gently pull it straight out of the boot media socket.
Do not twist or pull the boot media straight up, because this could damage the socket or the
boot media.
3. Move the boot media to the new controller module, align the edges of the boot media with the socket
housing, and then gently push it into the socket.
4. Check the boot media to make sure that it is seated squarely and completely in the socket.
If necessary, remove the boot media and reseat it into the socket.
5. Push the boot media down to engage the locking button on the boot media housing.
Step 3: Move the system DIMMs
To move the DIMMs, locate and move them from the old controller into the replacement controller and follow
the specific sequence of steps.
1. If you are not already grounded, properly ground yourself.
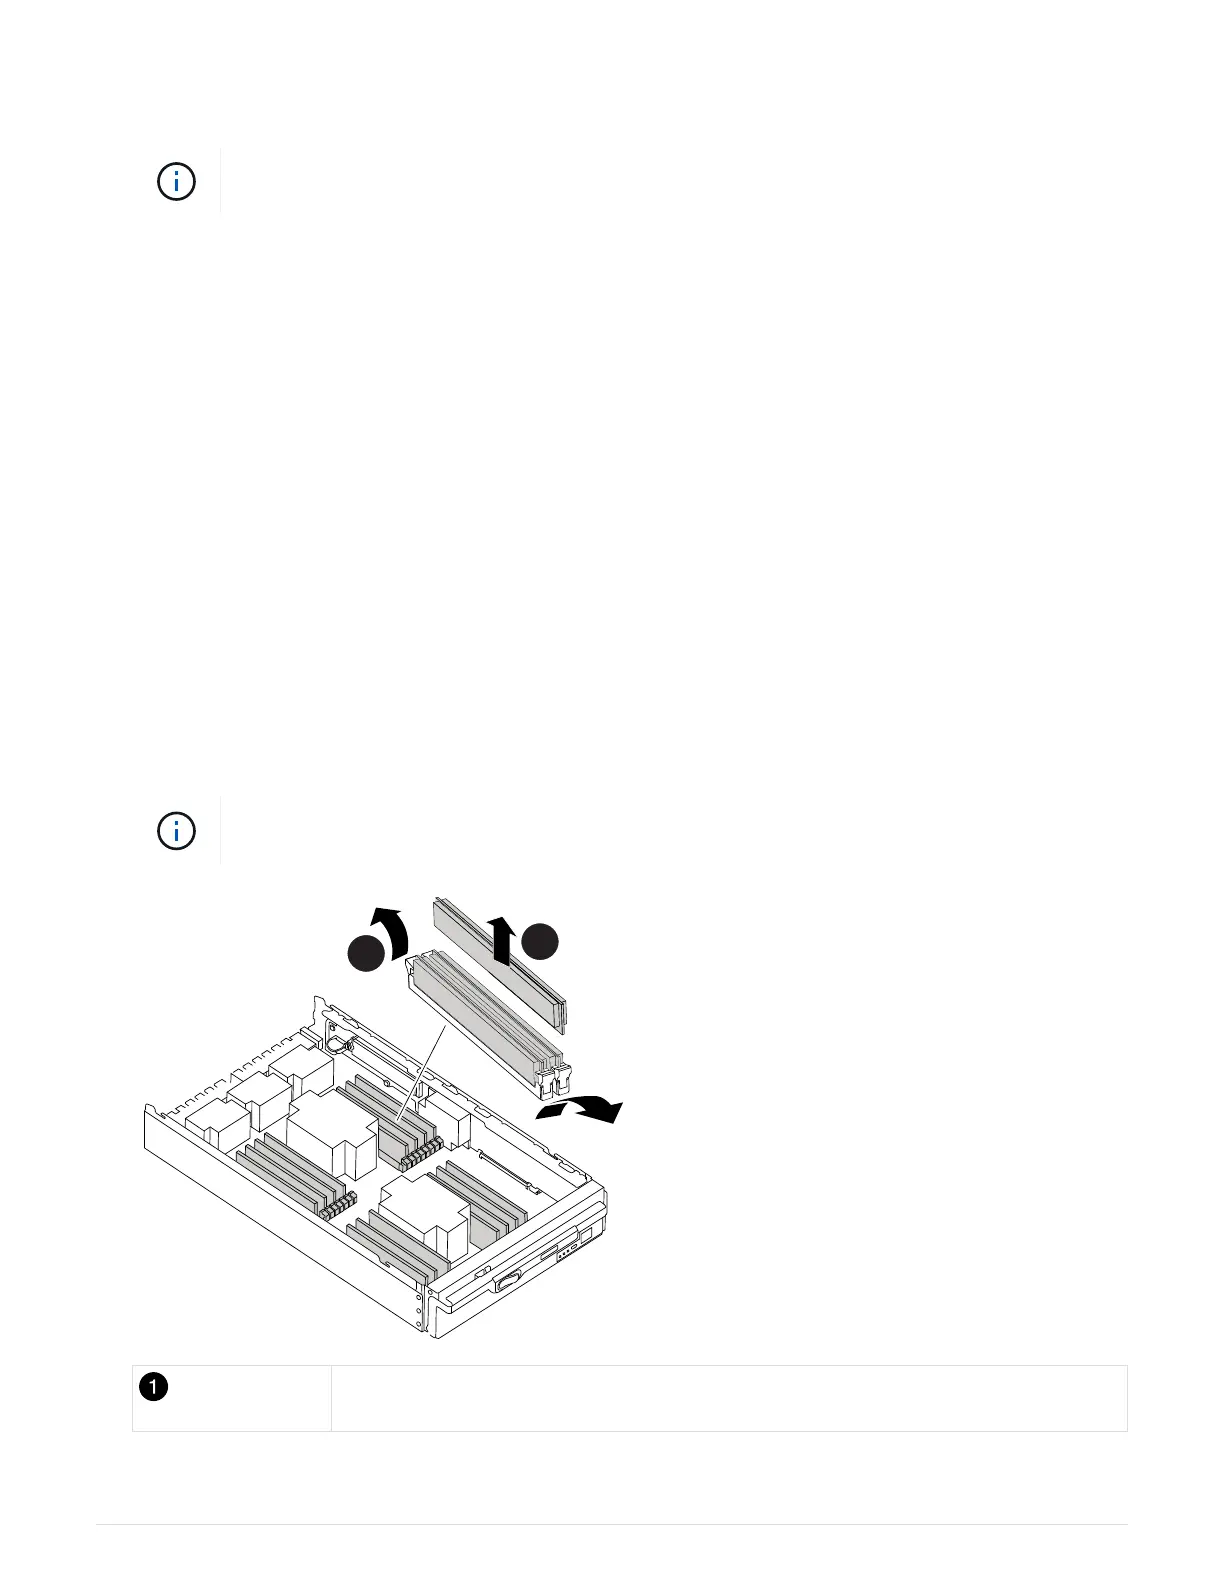
2. Locate the DIMMs on your controller module.
3. Note the orientation of the DIMM in the socket so that you can insert the DIMM in the replacement
controller module in the proper orientation.
4. Eject the DIMM from its slot by slowly pushing apart the two DIMM ejector tabs on either side of the DIMM,
and then slide the DIMM out of the slot.
Carefully hold the DIMM by the edges to avoid pressure on the components on the DIMM
circuit board.
DIMM ejector tabs
740


 To Next Page